¶ gpio programming
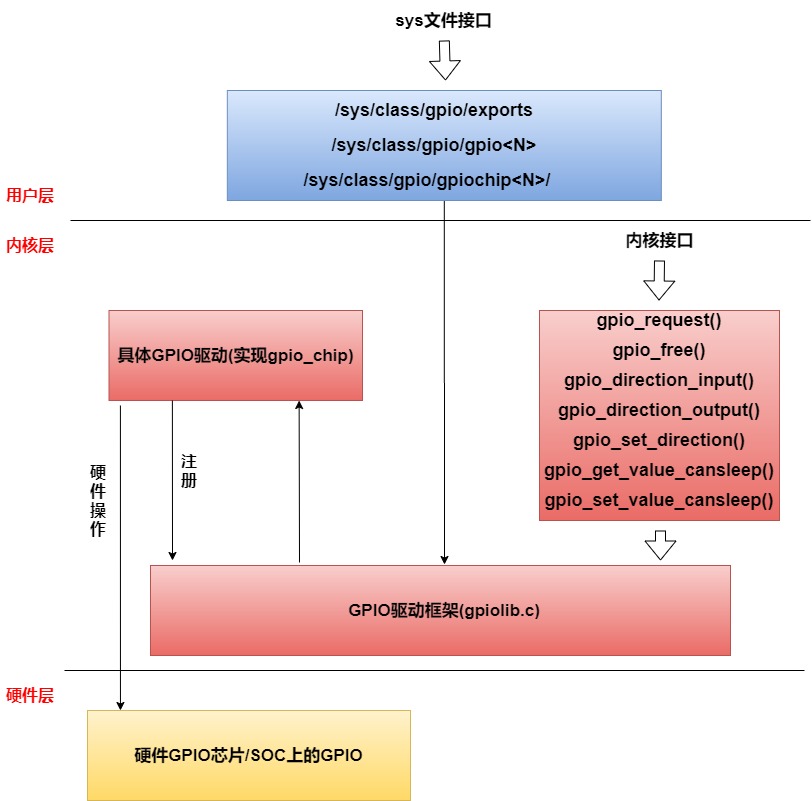
GPIO: General-Purpose Input/Output is a general-purpose pin that can be dynamically configured and controlled during software operation. On the RK platform, except for some specialized pins (e.g. DDR, MIPI, etc.), all other pins, if not configured for multiplexing, are GPIO by default, and RK's GPIO driver provides a standard GPIO interface to Linux, which has a set of sysfs nodes that operate GPIOs in user mode. The application layer of GPIO programming is mainly through the operation of these nodes to realize.
The following is an example of operating GPIO2_C0 and GPIO4_C3. These two GPIOs are located as follows
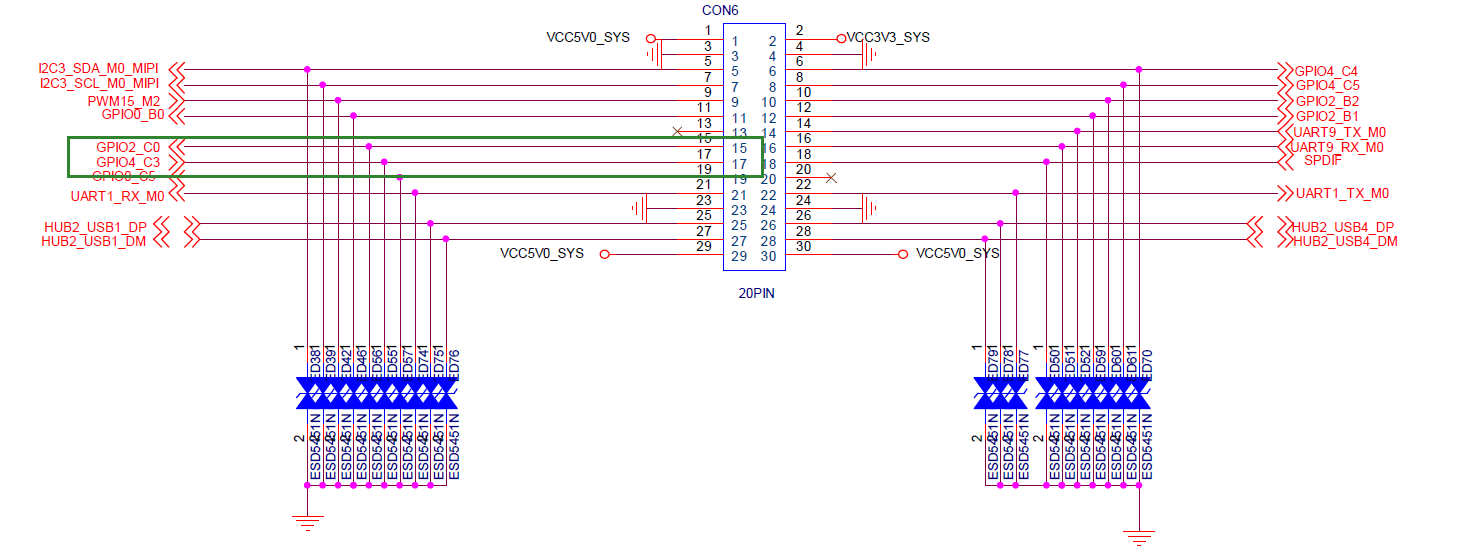
Short these two pins during the test
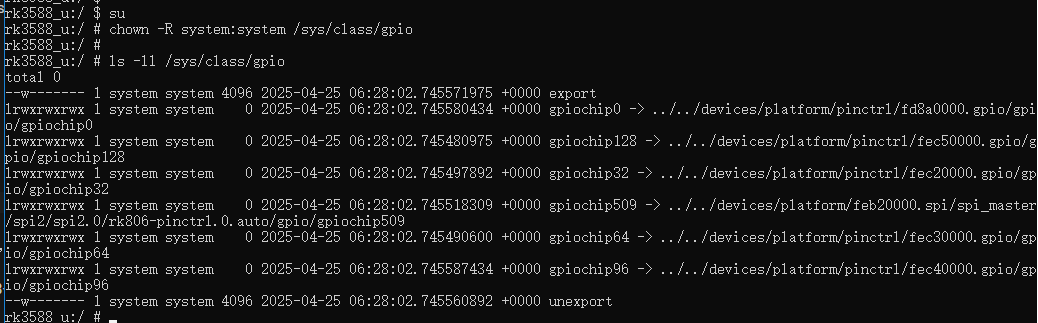
The nodes under “/sys/class/gpio” are root by default. You need to execute the following command in adb or serial terminal to get root privileges.
su
The modified effect is as follows
Under the generic Linux framework, all GPIOs are numbered numerically. For RK platform chips, the numbering is calculated as follows
(gpio controller number - 0)*32+(port number - ‘A’)*8+index
GPIO2_C0 has controller number 2, port number C, and index sequence number 0, so the numbering is
(2-0) * 32 + 2 * 8 + 0 = 80
Similarly GPIO4_C3 is numbered 147
¶ Command Line Operation of GPIOs
Setting GPIO80 GPIO147 to user-state operation
echo 80 > /sys/class/gpio/export
echo 147 > /sys/class/gpio/export
Set GPIO80 to output Set GPIO147 to input
echo out > /sys/class/gpio/gpio80/direction
echo in > /sys/class/gpio/gpio147/direction
In the case where GPIO80 is an output, set the level
In the case where GPIO147 is an input, read its level, 1 is high, 0 is low
GPIO80 outputs a high level, read GPIO147 level
echo 1 > /sys/class/gpio/gpio80/value
cat /sys/class/gpio/gpio147/value
GPIO80 outputs low, reads GPIO147 level
echo 0 > /sys/class/gpio/gpio80/value
cat /sys/class/gpio/gpio147/value
Cancel GPIO80 GPIO147 User State Operation
echo 80 > /sys/class/gpio/unexport
echo 147 > /sys/class/gpio/unexport
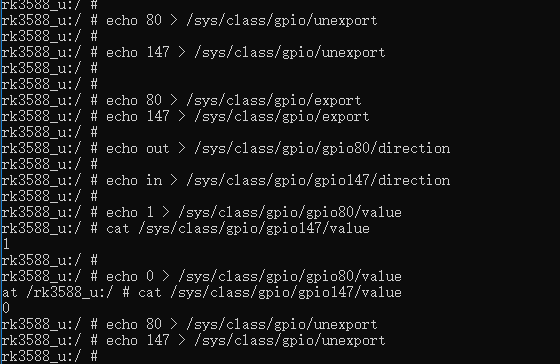
The result of the above operation flow is shown below
¶ Android app operation GPIO
Under android, you can use JAVA native read/write functions to operate GPIOs directly, but the app doesn't have root privileges, so you need to change the group to which these exported gpio belong to to system on the command line.
echo 80 > /sys/class/gpio/export
echo 147 > /sys/class/gpio/export
chown -R system:system /sys/class/gpio/gpio80/
chown -R system:system /sys/class/gpio/gpio147/
JAVA interface code is as follows, here only need to use a simple read and write functions can be
    public static void writeToFile(String fileName, String content) throws IOException {
        try (BufferedWriter writer = new BufferedWriter(new FileWriter(fileName))) {
            writer.write(content);
        }
    }

    public static String readFileToString(String fileName) throws IOException {
        if (Build.VERSION.SDK_INT >= Build.VERSION_CODES.O) {
            return new String(Files.readAllBytes(Paths.get(fileName)), StandardCharsets.UTF_8);
        }
        return null;
    }

    public static boolean isFileExists(String filePath) {
        if (filePath == null || filePath.isEmpty()) {
            return false;
        }
        File file = new File(filePath);
        return file.exists();
    }
On the basis of the app created in the previous section, add a button and a text box, press the button to execute the test program, first determine the existence of gpio80 and gpio147, such as the existence of the first to write 1 to gpio80 to read gpio147, and then write 0 to gpio80 to read gpio147
        button2.setText("gpio test");
        button2.setOnClickListener(new View.OnClickListener() {
            @Override
            public void onClick(View v) {
                textDisplay.setText("start gpio test... \n");

                if(!isFileExists("/sys/class/gpio/gpio147") || !isFileExists("/sys/class/gpio/gpio80")) {
                    textDisplay.append("gpio not export... \n");
                } else {
                    try {
                        writeToFile("/sys/class/gpio/gpio80/direction","out");
                        writeToFile("/sys/class/gpio/gpio147/direction","in");

                        writeToFile("/sys/class/gpio/gpio80/value","1");
                        textDisplay.append("write gpio80 1,read gpio147: "+readFileToString("/sys/class/gpio/gpio147/value")+"\n");

                        writeToFile("/sys/class/gpio/gpio80/value","0");
                        textDisplay.append("write gpio80 0,read gpio147: "+readFileToString("/sys/class/gpio/gpio147/value")+"\n");

                    } catch (IOException e) {
                        throw new RuntimeException(e);
                    }

                }
            }
        });
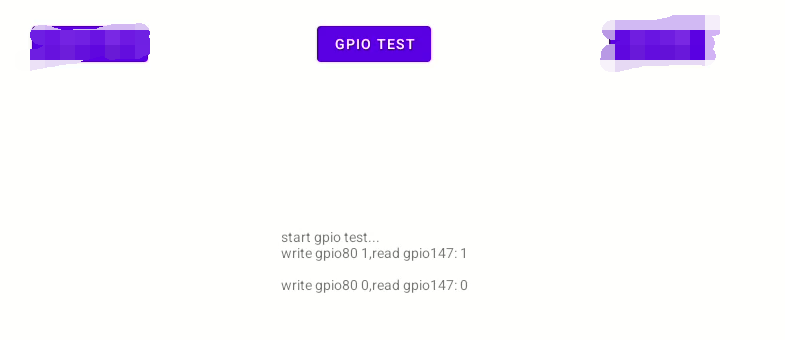
Pressing the GPIO TEST button during the test shows the following effect