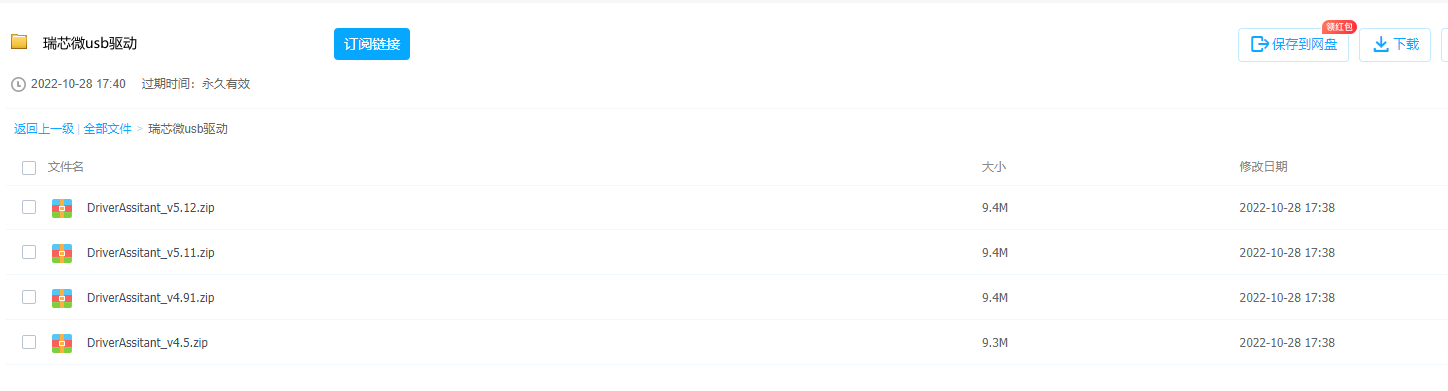
¶ 1.Download
- RK USB Driver:
Official Download
http://dd.youyeetoo.cn:5000/sharing/Zc5GRkc1c
Google Download
https://drive.google.com/drive/folders/1MsxDXozDOjmlSvIWEluMBkQvXatZcccx?usp=drive_link - ADB under windows:
Official Download
http://dd.youyeetoo.cn:5000/sharing/P96cQQ7gZ
Google Download
https://drive.google.com/file/d/1T88RCqrPFE3k-mnfvYO7fG0XmGW3J-8H/view?usp=drive_link - Tools for burn images:
Official Download
http://dd.youyeetoo.cn:5000/sharing/3W7nooilt
Google Download
https://drive.google.com/drive/folders/10_rxI8xGCn28YKdaMJHJSaGGuFp2f0Mw?usp=drive_link - Android Images Download:
Official Download
http://dd.youyeetoo.cn:5000/sharing/MCNHhsMEI
Google Download
https://drive.google.com/drive/folders/1odVfWpC0djzkLsTNafvrtwgveWWi6aPY?usp=drive_link - Debian11 Images Download:
Official Download
http://dd.youyeetoo.cn:5000/sharing/lQOgYESZp
Google Download
https://drive.google.com/drive/folders/1ASXnNhkZNfRv7eKatuWzC39Zy0v8aGbD?usp=drive_link - Ubuntu Images Download:
Official Download
http://dd.youyeetoo.cn:5000/sharing/ymaoRMfUe
Google Download
https://drive.google.com/drive/folders/1oMxSIKruAI8y7Q3Q0jcJB95kET6XZF0-?usp=drive_link - OHOS Images Download:
Official Download
http://dd.youyeetoo.cn:5000/sharing/BlNC25DnH
Google Download
https://drive.google.com/drive/folders/1PPQL8ABzM4VhtLhbfTxNlAhC3E8zrusz?usp=drive_link
¶ 2. Prepare tools
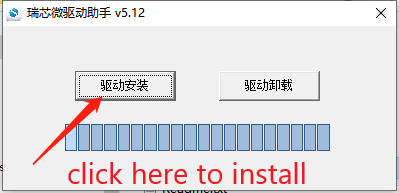
¶ 2.1 Install Rockchip Micro USB driver
a. Go to the data download section to download any version of Rockchip’s USB driver compressed package.
b. Click driver installation
¶ 2.2 Install the RKDevTool tool
Just select the corresponding software to download in the data download.
¶ 3. Burn the system to EMMC
¶ 3.1.debian system
Use Rockchip microtool
RKDevToolto burn
Proceed as follows
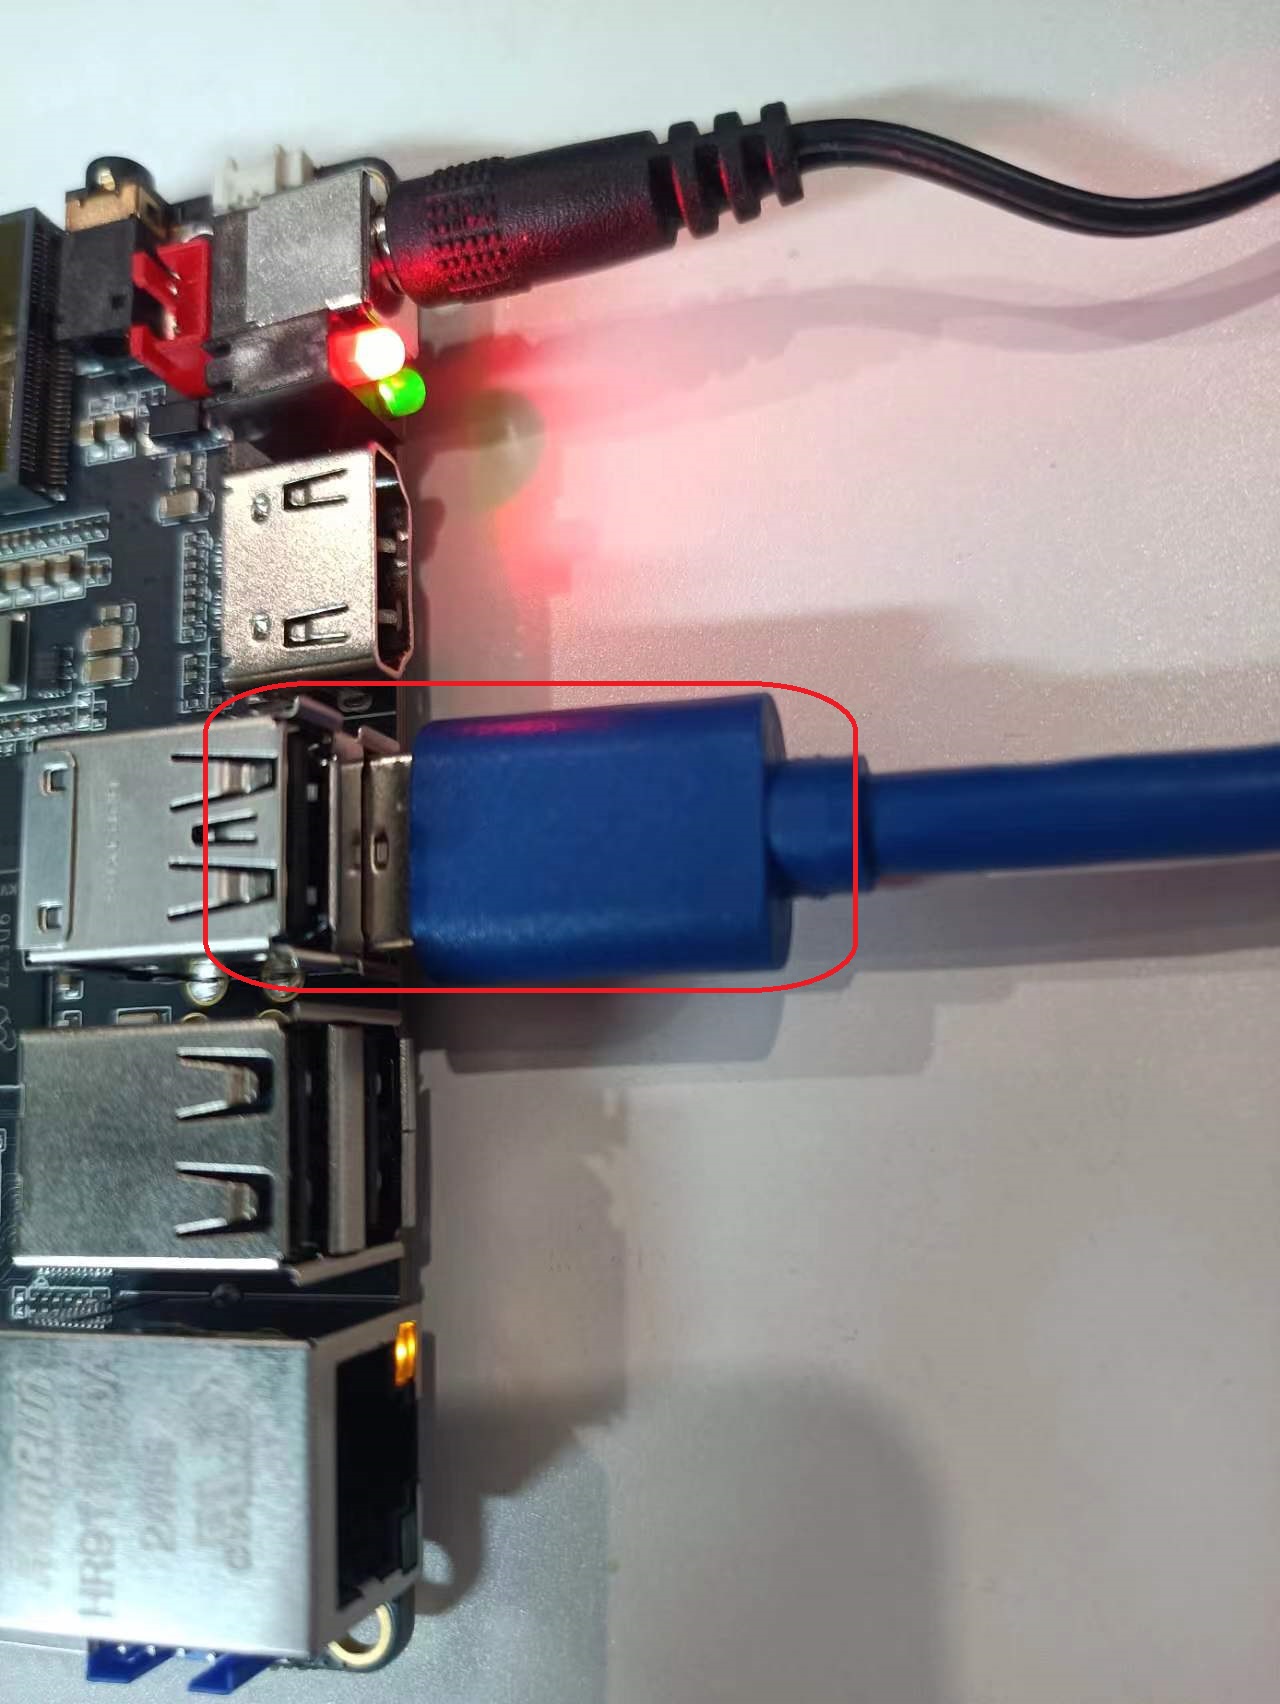
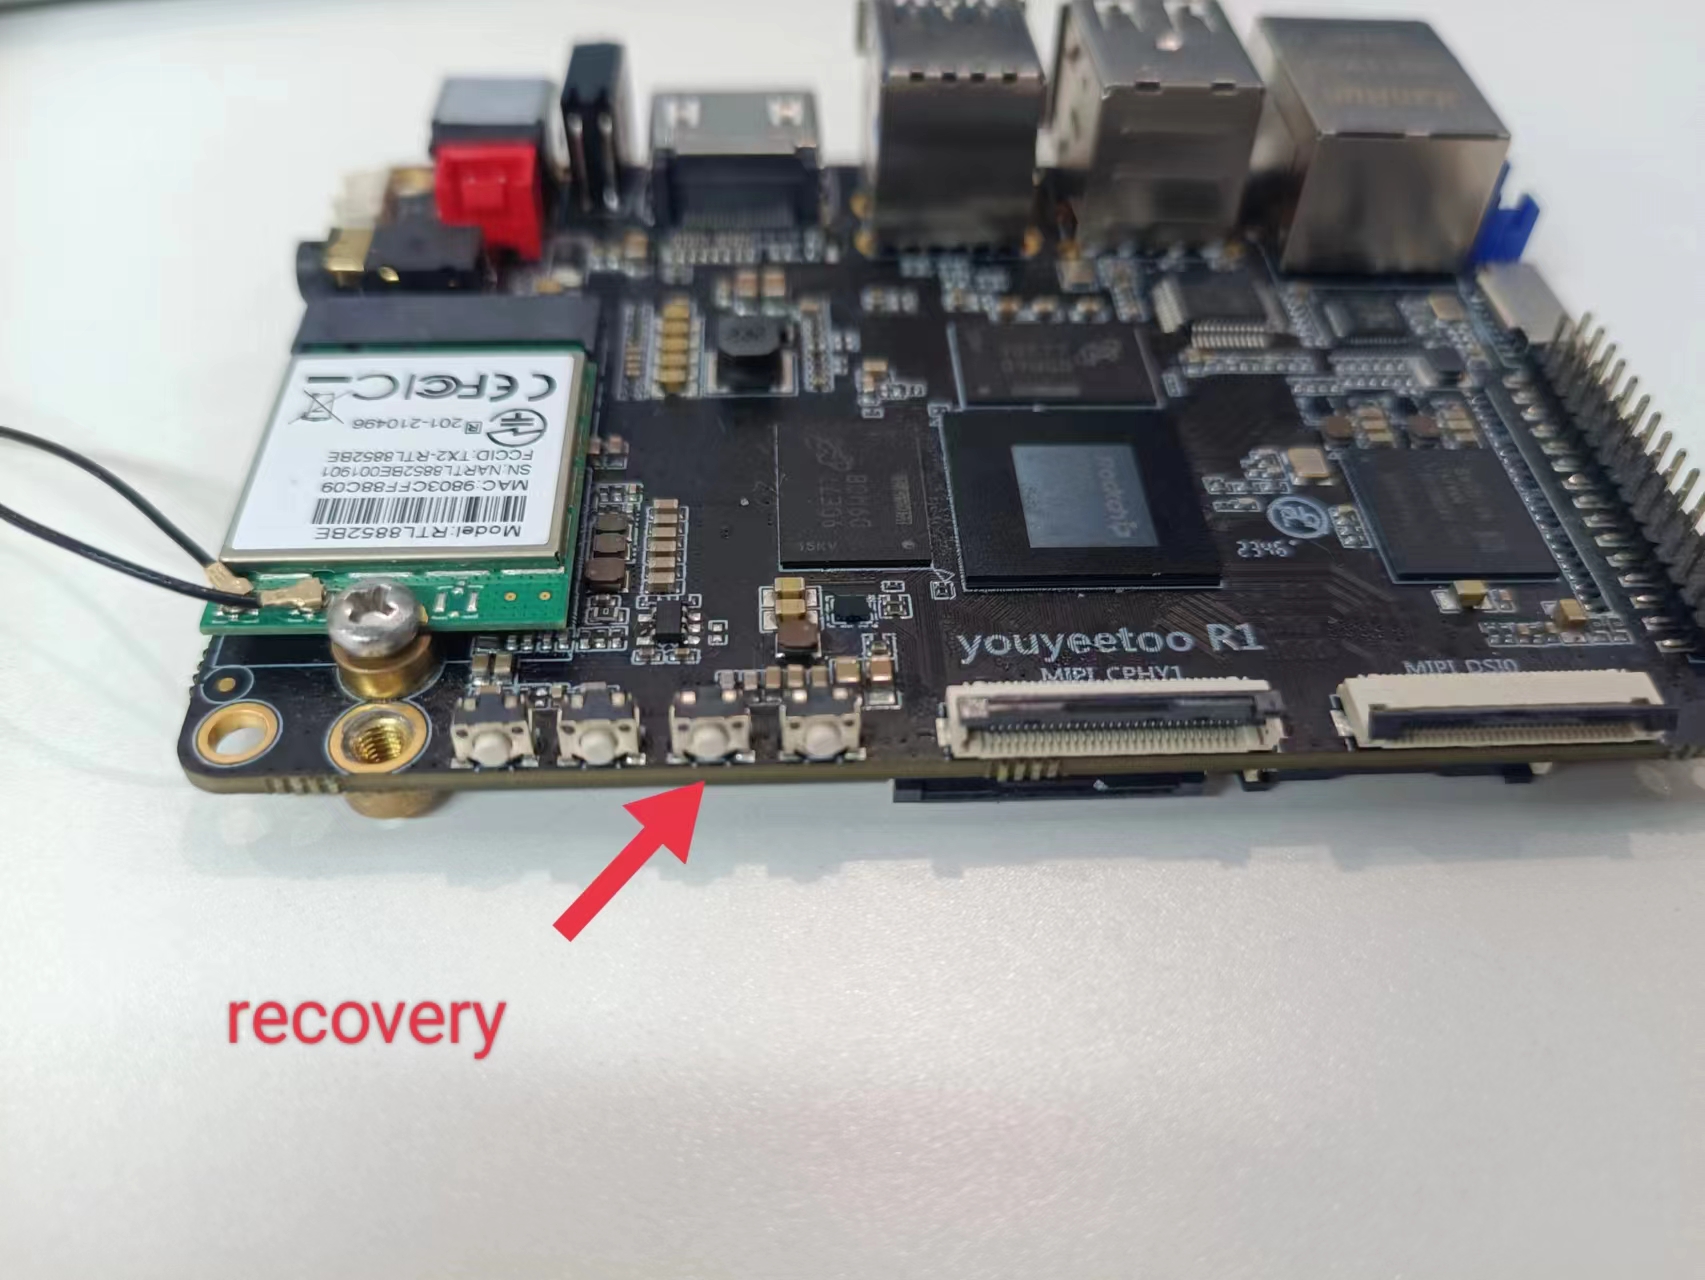
¶ a. Connect the development board to the computer, then press and hold the recovery button, and release it after 2 to 3 seconds after powering on to enter the loader mode.
¶ v2:Use type-c interface
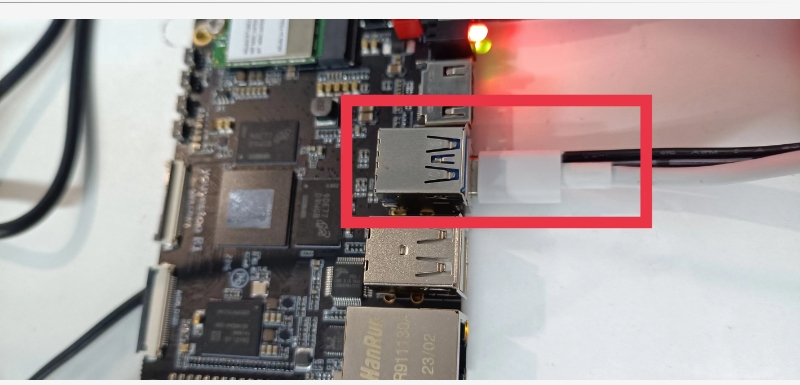
¶ v3:Use usb interface
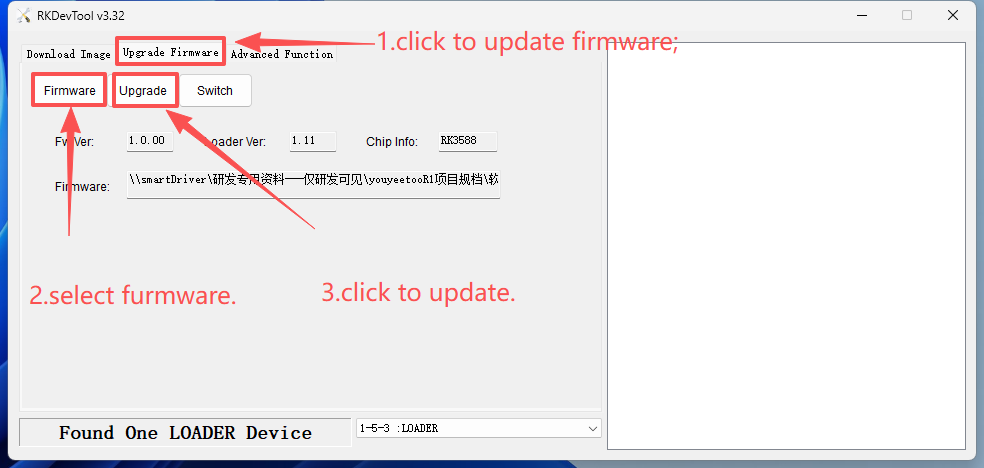
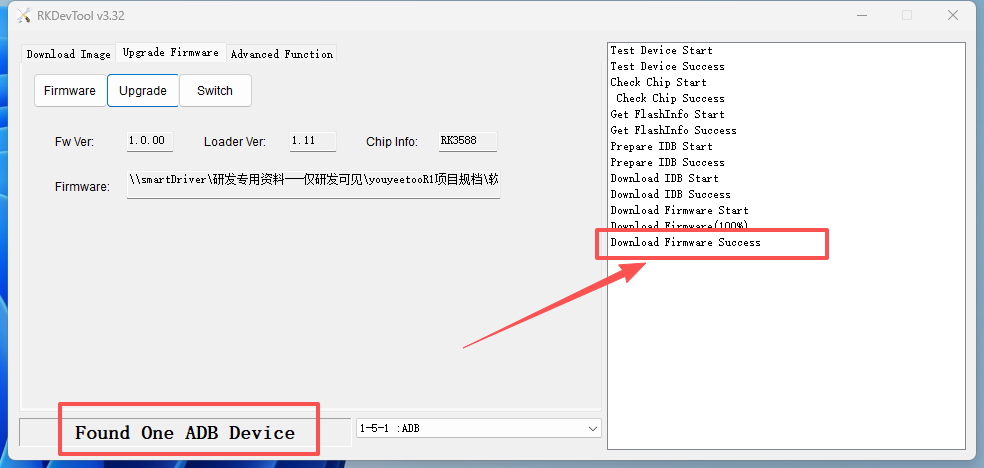
¶ b. Open the software and click Upgrade Firmware->Firmware->Upgrade.
¶ 3.2.android system
Use Rockchip microtool
RKDevToolto burn
Proceed as follows
a. Connect the development board to the computer, then press and hold the recovery button and release it after 2 to 3 seconds after powering on to enter the loader mode.
¶ v2:Use type-c interface
¶ v3:Use usb interface
b. Open the software and click Upgrade Firmware->Firmware->Upgrade.
¶ 3.3.ubuntu system
Use Rockchip microtool
RKDevToolto burn
Proceed as follows
a. Connect the development board to the computer, then press and hold the recovery button and release it after 2 to 3 seconds after powering on to enter the loader mode.
¶ v2:Use type-c interface
¶ v3:Use usb interface
b. Open the software and click Upgrade Firmware->Firmware->Upgrade.
¶ Firmware boot sequence description
When the user chooses to boot from a TF card or emmc method, the content of another storage medium needs to be erased; otherwise, the system boot may be affected.
¶ Steps to flash firmware (including Armbian) on a macOS system
Clone rkdeveloptool from GitHub and patch it according to the following instructions to fix compatibility issues with clang (the code is written for gcc compilation; if you don't mind adding 500MB of installation space and linking the binary to additional libraries, you can also compile directly using gcc).
Install the required packages using brew, then build and "install":
brew install automake autoconf libusb pkg-config git wget

cd rkdeveloptool

autoreconf -i

./configure

make -j $(sysctl -n hw.ncpu)

cp rkdeveloptool /opt/homebrew/bin/
Switch the OTG switch on the bottom of the R1 to position "1".
Before powering on the R1, prepare a USB-A male to USB-A male cable, and connect one end to your MacBook using a USB-A to USB-C adapter. Plug the other end of the USB-A male cable into the blue USB-A port on the R1. Such USB-A male to USB-C cables may exist, but I couldn't find one.
Make sure to plug in this cable before powering on the R1.
Press and hold the "Recovery" button on the side of the R1 for a few seconds, then release it and boot the R1. The red and green indicator lights on the side should be constantly lit during boot.
Run the command rkdeveloptool ld in the terminal. You should see output similar to this:
DevNo=1 Vid=0x2207,Pid=0x350b,LocationID=1 Loader
First, erase the flash memory: rkdeveloptool ef
Then flash any compatible operating system. For example, Armbian Community Edition:
rkdeveloptool wl 0 Armbian_community_26.2.0-trunk.332_Youyeetoo-r1-v3_forky_current_6.18.7_minimal.img
After flashing, unplug the USB cable and reboot the R1 or reset the CPU using the "Reset" mini button on the side.
Congratulations! You have successfully flashed the firmware for your R1 using macOS.
Important Notes:
rkdeveloptool will not be able to compile with clang unless you follow the patching instructions.
You must use the dedicated data cable. A regular USB-A to C cable will not work.
The dedicated data cable must be plugged in before booting the R1; otherwise, the R1 will not be able to enter Maskrom mode.