¶ Introduction
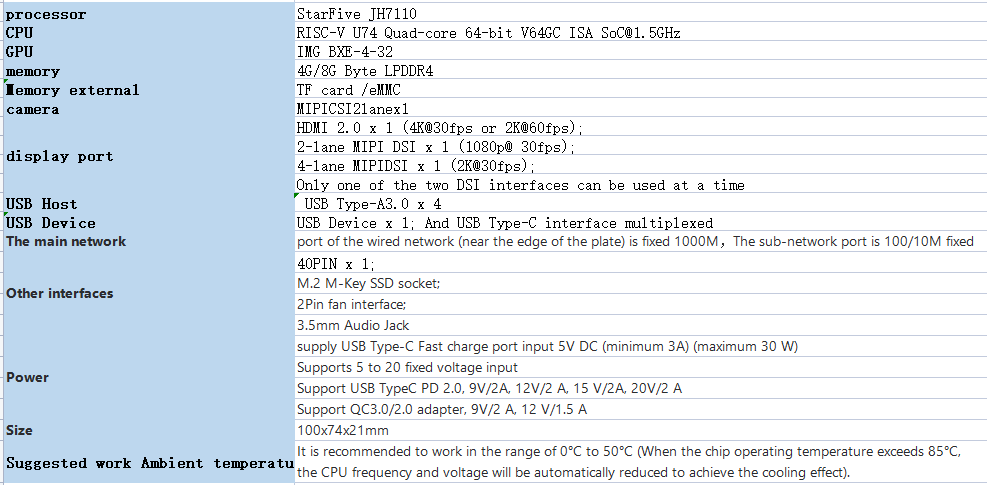
The VisionFive 2 features a quad-core 64-bit SoC with RV64GC ISA running at speeds up to 1.5GHz and integrated with IMG BXE-4-32. OpenCL 3.0, OpenGL ES 3.2, and Vulkan 1.2 are supported. VisionFive 2 offers a 4/8 GB LPDDR4 memory option with rich I/O peripherals such as M.2 connector, eMMC socket, USB 3.0 port, 40-pin GPIO head, Gigabit Ethernet port, TF card slot. And more. It has onboard audio and video processing capabilities and has MIPI-CSI and MIPI-DSI connectors as multimedia peripherals. The open source SBC also offers extensive software compatibility, including support for Debian.
中文资料:VisionFive2
¶ Product parameters
¶ Basic Tutorial
¶ Debian system installation
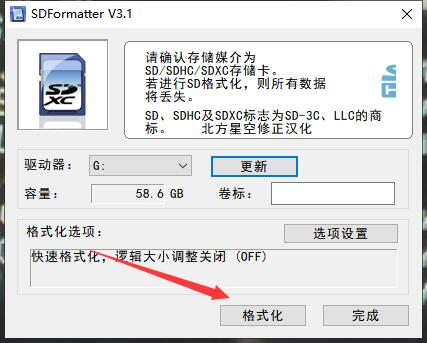
Download and openSDFormattersoftware,Format the corresponding TF card
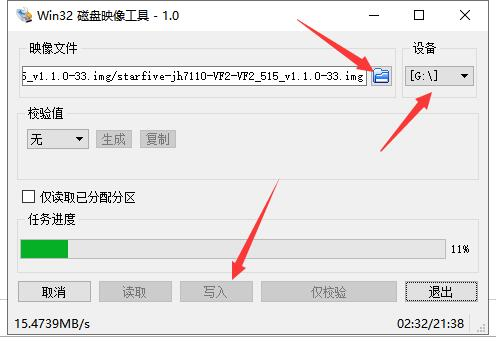
Download and openWin32DiskImagersoftware,Select the corresponding image file and disk and click Write
¶ Start
Turn the two dip switches ON the board to the right (ON) position
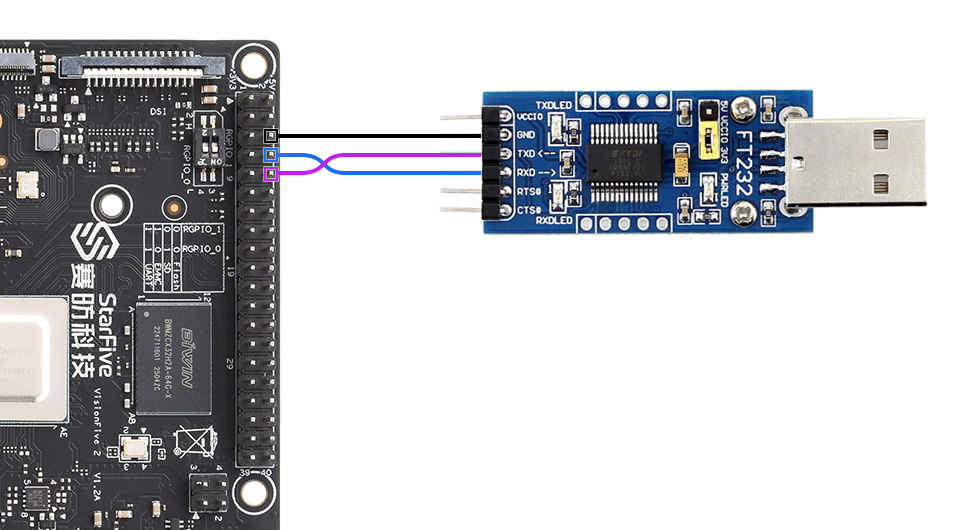
Insert the TF card with burned image, connect the USB to TTL module according to the figure, connect the USB to TTL module to the PC, and determine the port
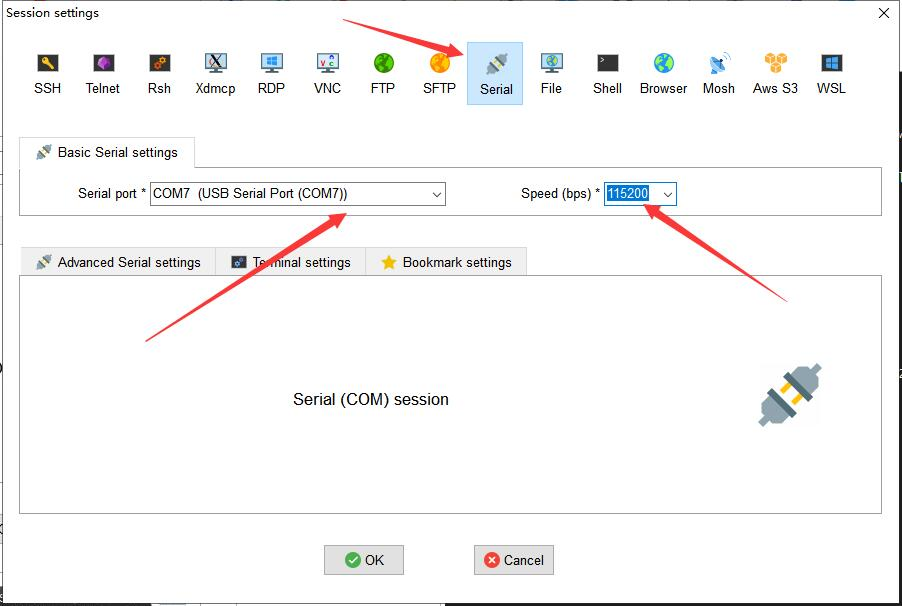
Open MobaXterm and follow the illustrated steps

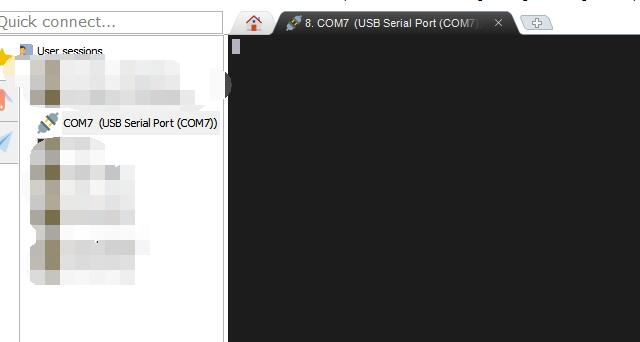
Access network cable and power supply, in U-boot print to the illustrated position to try, press any key to enter the device tree switch
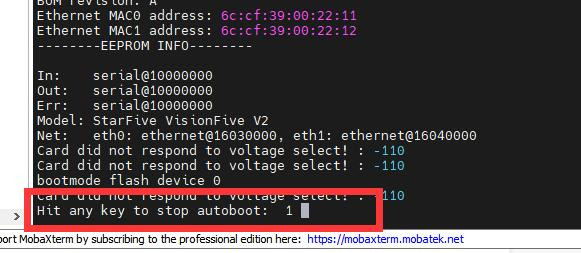
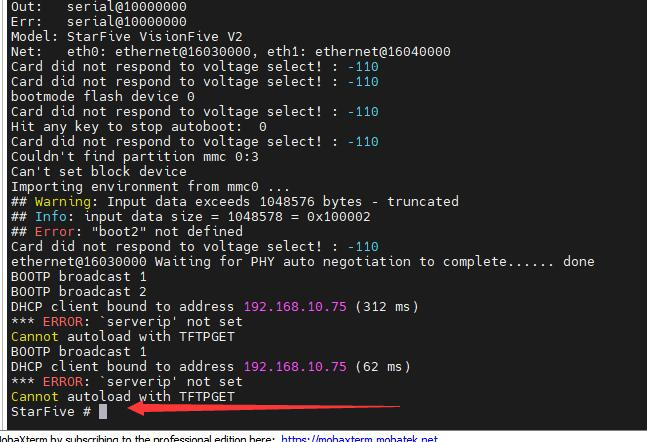
Enter the following command (line by line) :
ext4load mmc 1:3 a0000000 /boot/uEnv.txt
env import a0000000 17c
setenv fdtfile starfive/jh7110-visionfive-v2.dtb
sysboot mmc 1:3 ext2 b0000000 /boot/extlinux/extlinux.conf
Waiting a few seconds will automatically enter the system (if you have selected it before, you must select it before entering the system).
Username: root
Password: starfive

¶ Extended file system ensures that all storage on the memory card is available
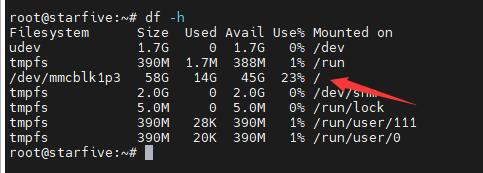
To query the memory space, run df -h
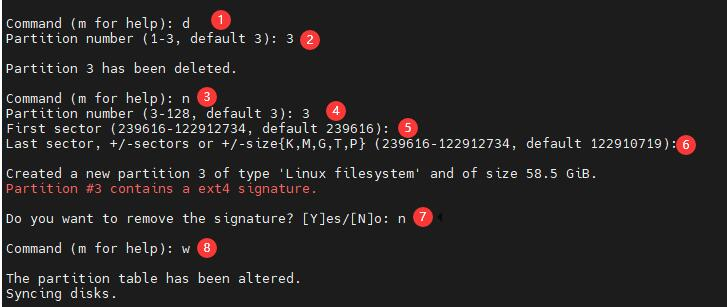
Enter the fdisk /dev/mmcblk1 command
Enter as shown in the figure. Press enter for position 5 and 6
Enter the command resize2fs /dev/mmcblk1p3

Run df -h to check the space size

¶ View the IP address
The net-tools toolkit is not installed on Debian, so you need to install it manually
Use command
apt-get install net-tools
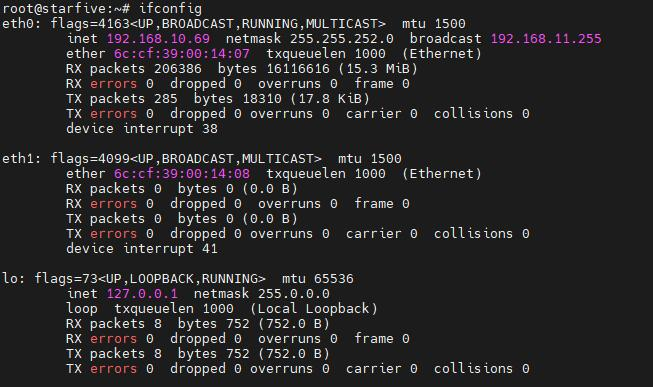
After the installation is complete, run the ifconfig command to view the IP address of the corresponding network port
¶ Connect SSH
VisionFive2's Debian system does not support ssh connections as root, so you need to set this up as follows
Edit the ssh configuration file
nano /etc/ssh/sshd_config
Add the following two sentences at the end of the document:
PasswordAuthentication yes
PermitRootLogin yes
Save the Settings, exit, and restart the ssh service
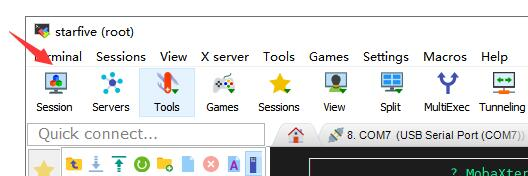
service sshd restart or systemctl restart sshd.service Use MobaXterm to connect to VisionFive2 over ssh. If the connection fails, restart VisionFive2
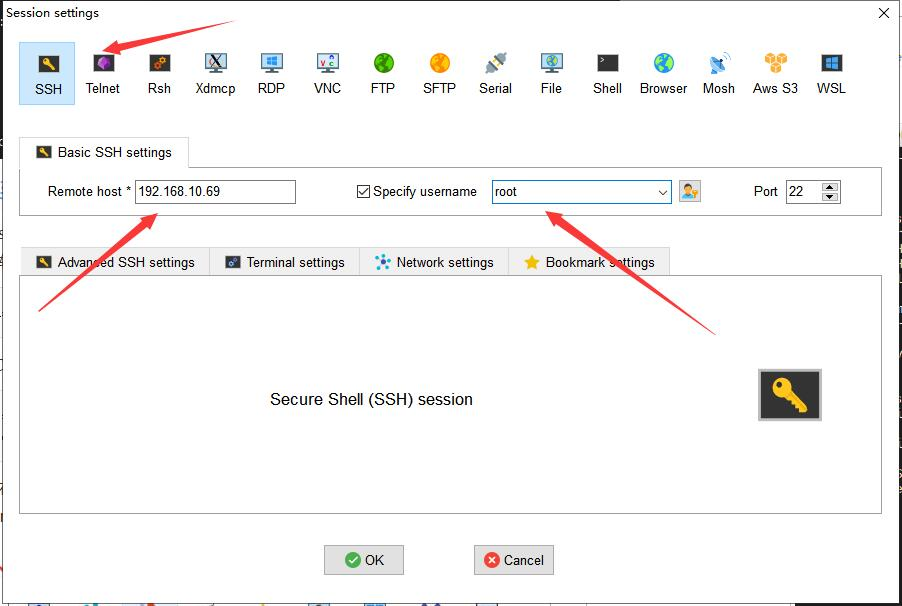
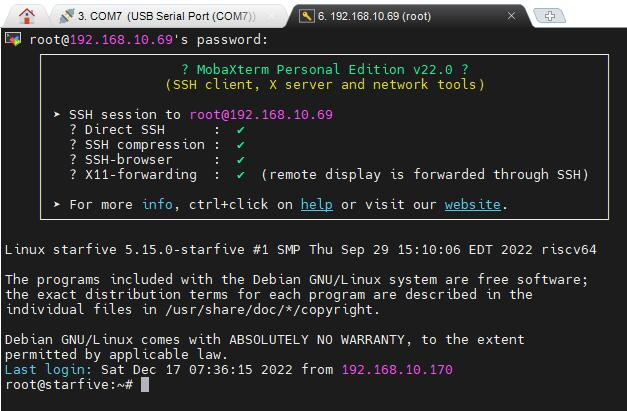
¶ Adaption product must be used
¶ WM8960
In U-boot print to the position shown, press any key to enter the device tree switch
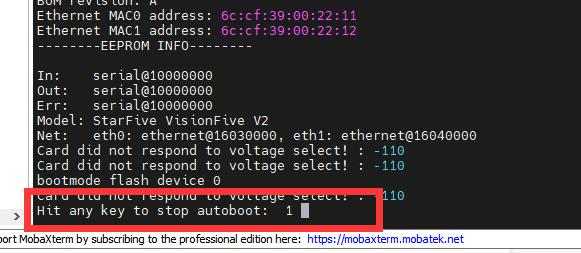
Replace the power-on command with the following
ext4load mmc 1:3 a0000000 /boot/uEnv.txt
env import a0000000 17c
setenv fdtfile starfive/jh7110-visionfive-v2-wm8960.dtb
sysboot mmc 1:3 ext2 b0000000 /boot/extlinux/extlinux.conf
Install alsa-utils
apt install alsa-utils

Enter arecord -l to list sound cards and recording devices
Note the position marked on the figure, which represents the device number of the sound card and recording device. card0, device1 is the two patch microphones onboard module WM8960

Enter the command:
arecord -Dhw:0,1 -f S32_LE-r16000-c2-d 10 -t wav sound_32b_16k.wav
Start recording 10 seconds of 32 bit, 16kHz audio and save it in the current directory as sound_32b_16k.wav
Enter the command:
aplay-Dhw :0,2 -f S32_LE-r16000 -t wav sound_32b_16k.wav
Audio is played using the onboard headphone jack of the WM8960 module
Note that the VisionFive2 motherboard onboard headphone jack only supports output audio in 16-bit audio format
¶ Sense HAT (B)
Install the corresponding library file
apt-get install pip
pip install VisionFive.gpio
apt-get install python3-numpy
apt-get install python3-pil
apt-get python3-smbus
Download program
apt-get install p7zip-full
wget http://www.waveshare.net/w/upload/6/6c/Sense-HAT-B-Demo.7z
7z x Sense-HAT-B-Demo.7z -O./Sense-HAT-B-Demo
cd Sense-HAT-B-Demo
LPS22HBTR sample program - Barometric sensor demonstration
cd LPS22HB/VisionFive2
python3 LPS22HB.py
SHTC3 example program - Temperature and humidity sensor demonstration
cd SHTC3/VisionFive2
python3 SHTC3.py
ADS1015 sample program -AD conversion demonstration
cd ADS1015/VisionFive2
python3 AD.py
ICM20948 Example program -9 axis sensor demonstration
cd ICM-20948/VisionFive2
python3 ICM20948.py
TCS34725 Example program - Color Recognition Sensor demonstration
Install the pygame library
apt-get install pygame
Run program
cd TCS34725/VisionFive2
python3 main.py
¶ data
English data address
English forum address
¶ Debian mirror image
Unreleased version of Debian V1.1
Debian V2.3
Official latest image
¶ develop software
SDFormatter
Win32DiskImager
MobaXterm
¶ FAQ
-
Problem: The image 69 system cannot be started
There is a problem with the system boot directory
The solution:
Go to the following document and follow Section 4.4 to restore the Bootloader operation
https://doc.rvspace.org/VisionFive2/PDF/VisionFive2_QSG.pdf -
Problem: It is clear that you have purchased 8GB memory, but you only have 4G memory by running the command

Debian system version is too old, Flash firmware version is too old
The solution:
Download the latest Debian image
Update the onboard Flash firmware
