¶ Settings
¶ Language settings
- Click "Settings" on the application interface.

- Enter the setting interface, as shown in the figure below:

- Click "System" to enter the system setting interface, and then click "Language & input", as shown in the figure below:

- Click "Languages" to enter the language setting interface, as shown in the figure below:

- Click "Add a language" to add a new language

- Swipe to the back and click Add Chinese (China), as shown in the figure below:


- Drag the language bar and set it to 1 to set the default language

- set up complete

¶ Adjust brightness
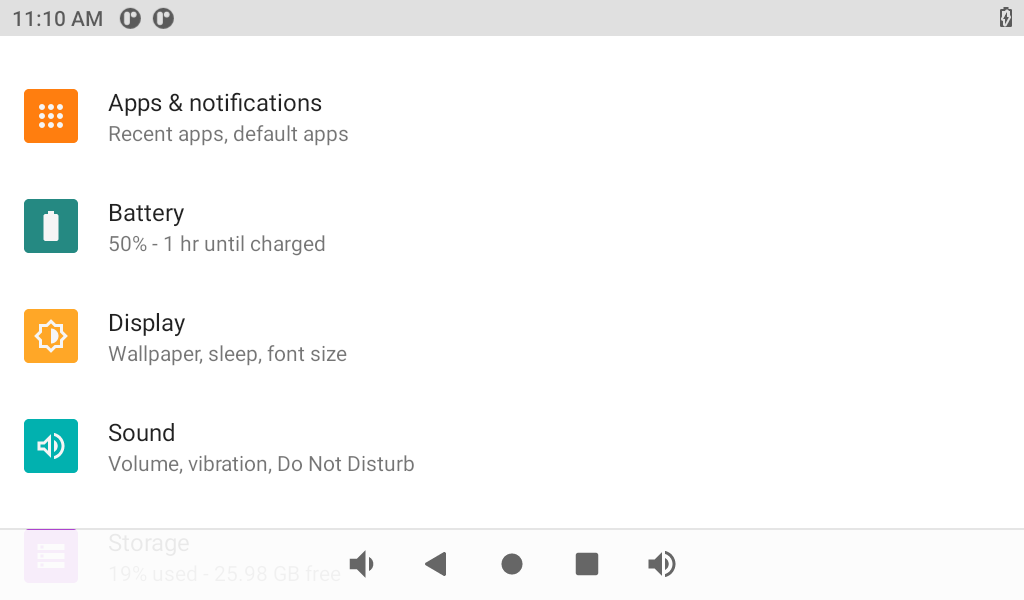
- Enter the setting interface, click "Display", as shown in the figure below:
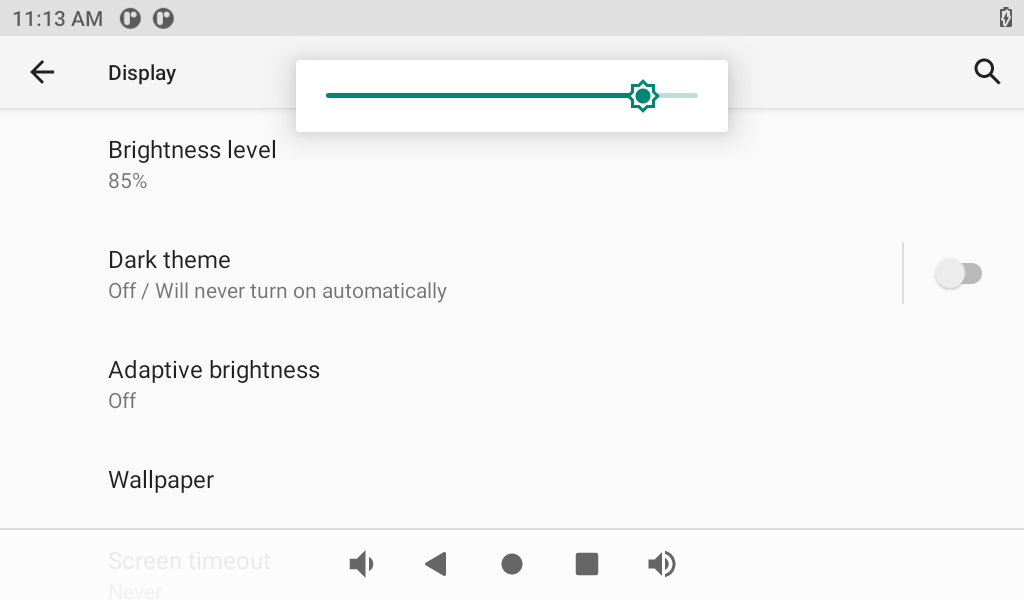
- After entering the display, click "Brightness level“, the brightness adjustment slider appears, you can adjust the brightness, as shown in the figure below:
¶ Adjust time
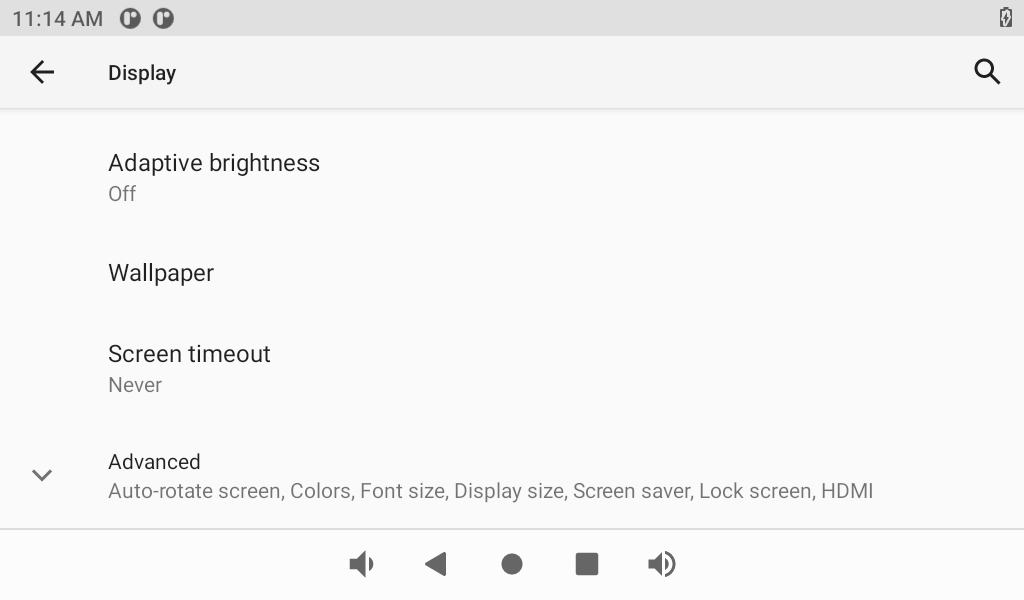
- In the display, click "Screen timeout" to set the sleep time, as shown in the figure below:
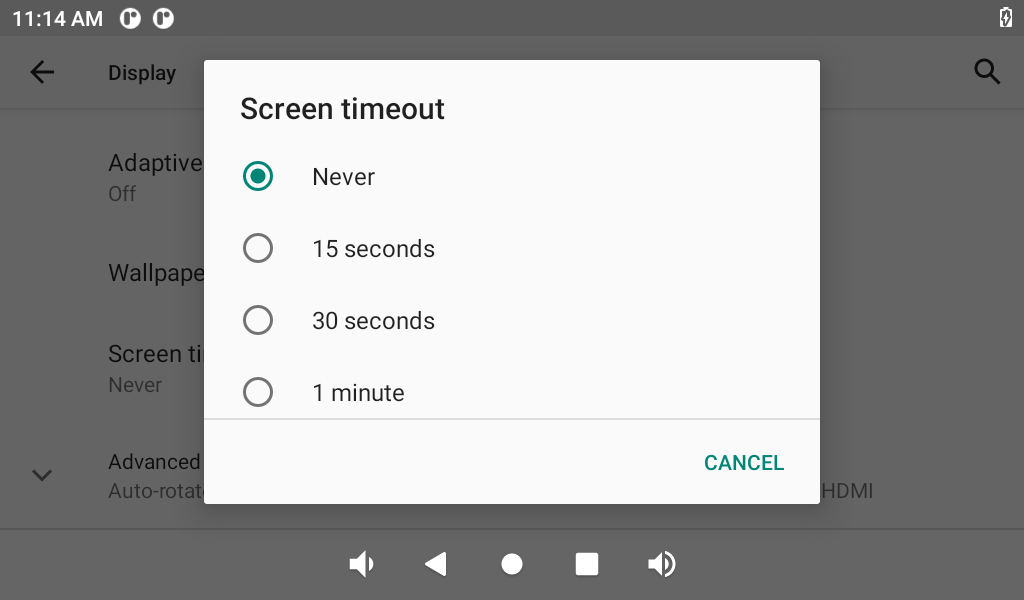
2.Select the sleep time, as shown in the figure below:
¶ Adjust volume
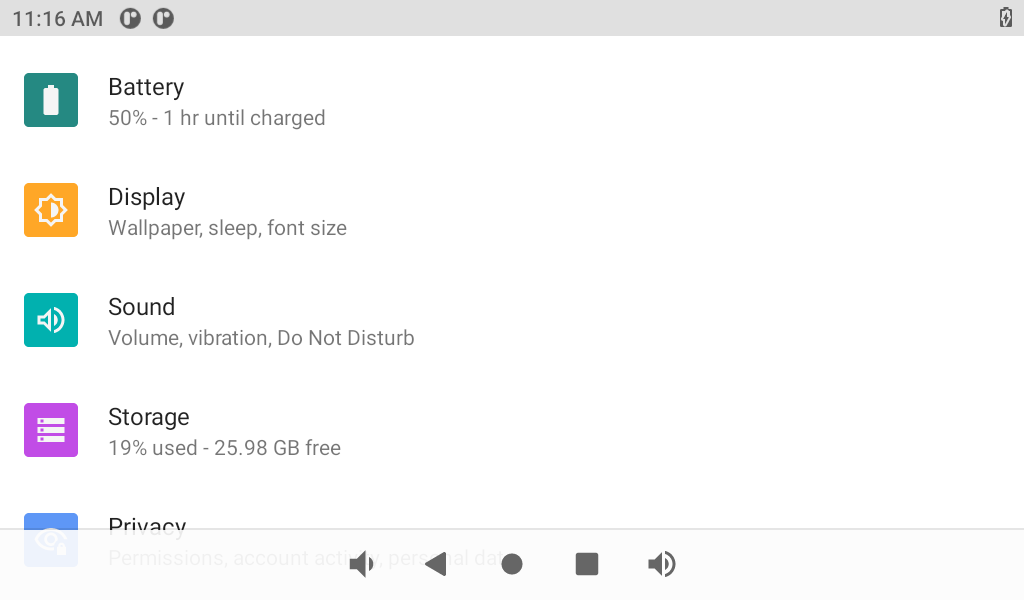
- Click ”Settings“ on the application interface to enter the setting interface,then,Click 'Sound', as shown in the figure below:
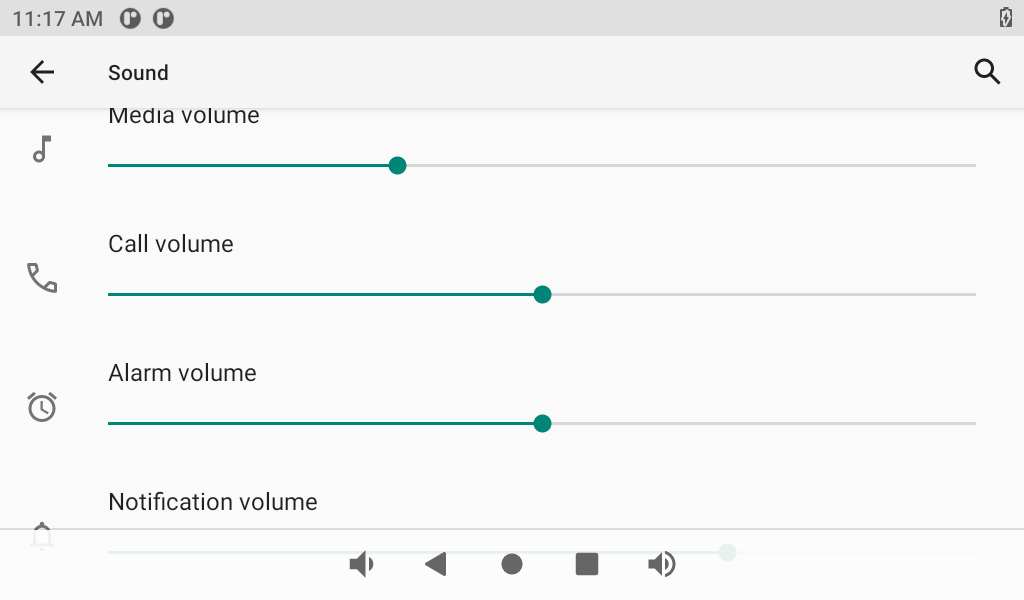
- Click "Sound" to enter the sound setting interface, drag the slider to set the volume, as shown in the figure below:
¶ Adjust time
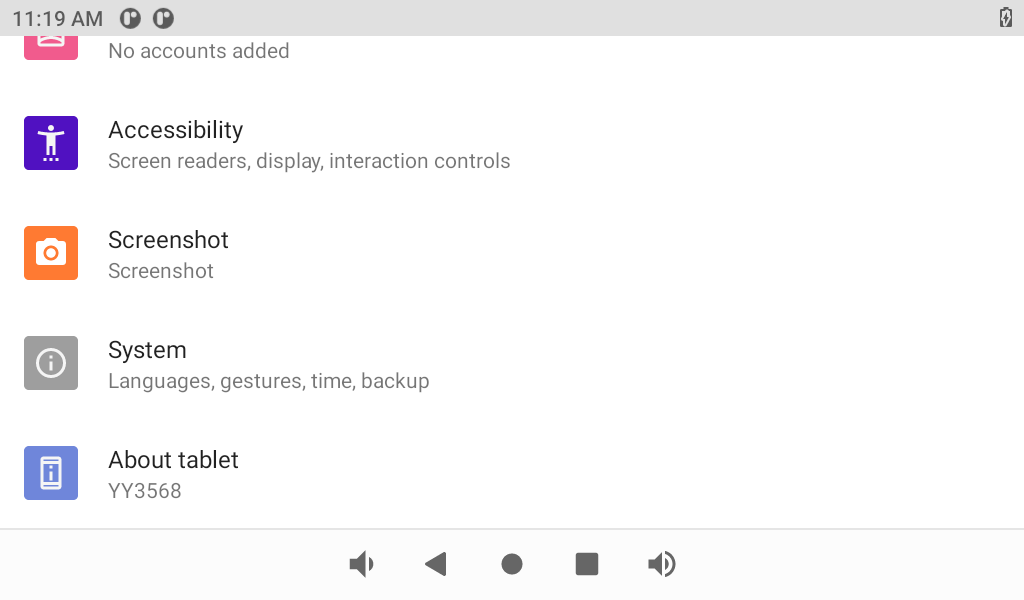
- Click Settings on the application interface to enter the setting interface, as shown in the figure below:
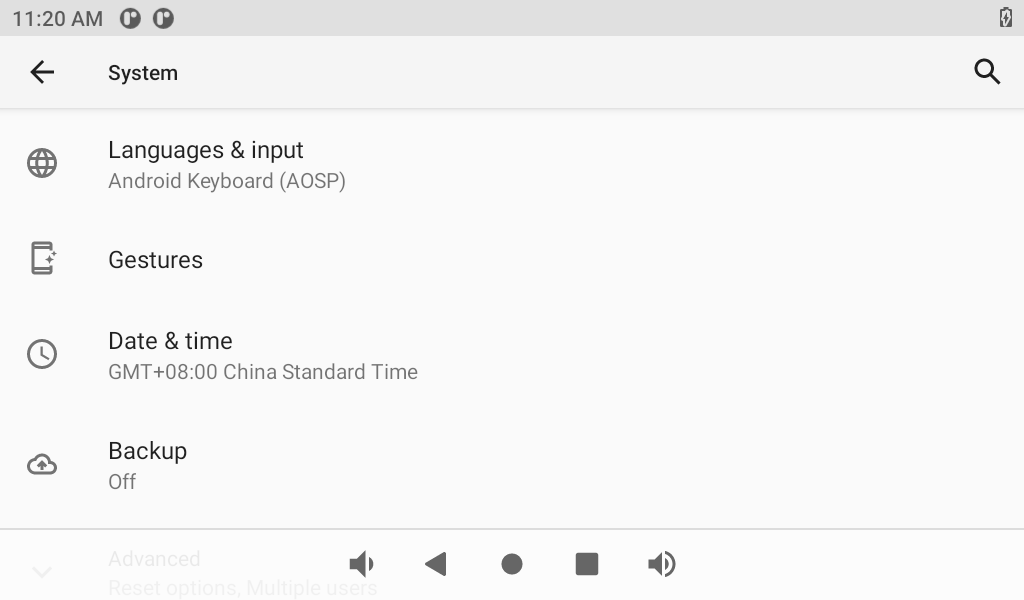
- Click "System" -> "Date & time" to enter the date and time setting interface, where you can modify the date and time, as shown in the figure below:
- Select to close "Use network-provided time", and set the date and time respectively, as shown in the figure below:
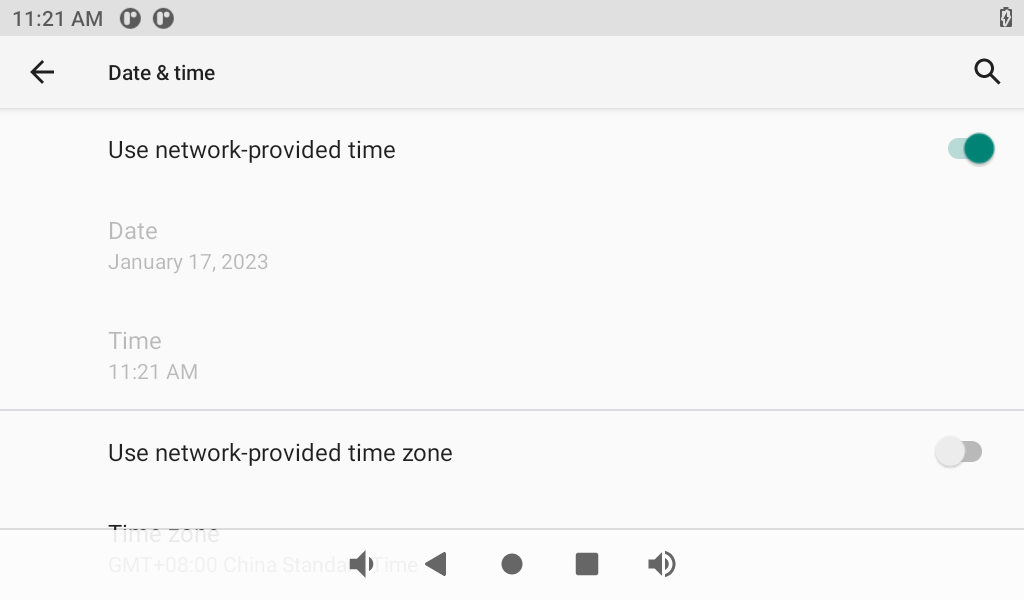
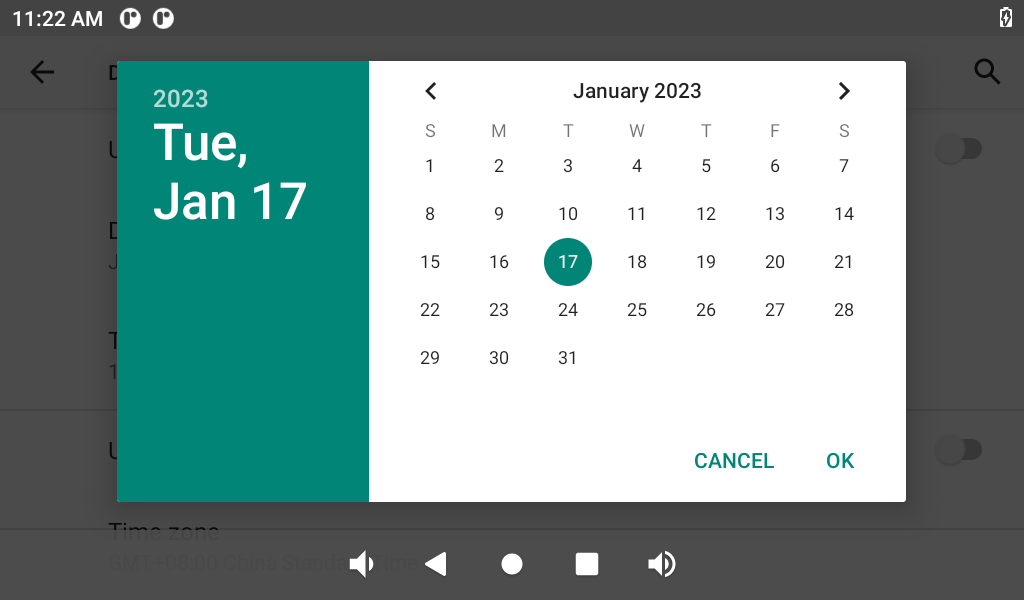
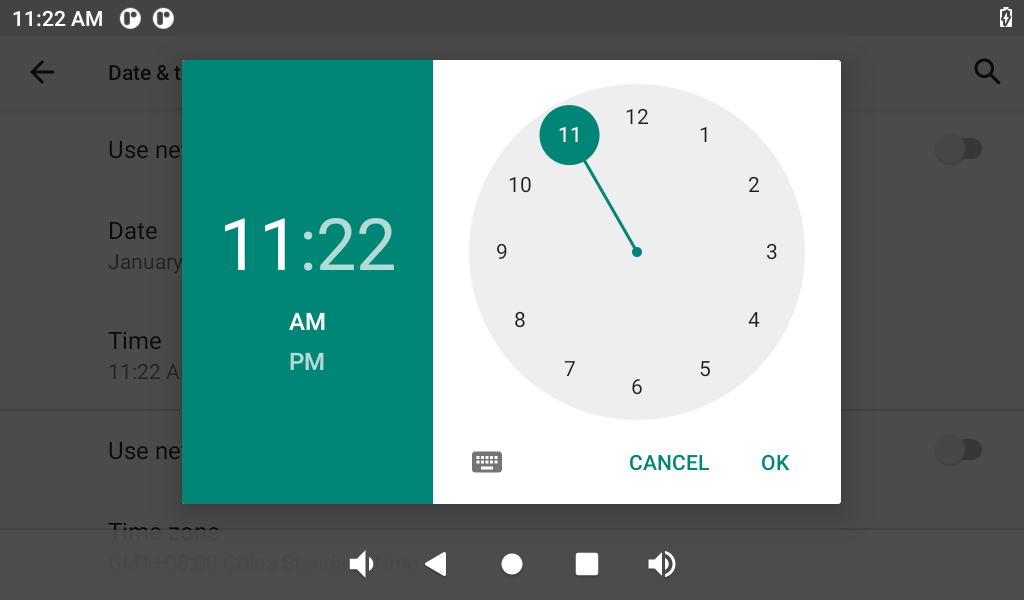
- Click "Set date" and "Set time" to set, click "OK" to power off and then power on the board, and enter the time setting interface again, you will see that the time has been updated synchronously.
¶ set static ip
- Click Settings on the application interface to enter the setting interface, as shown in the figure below:

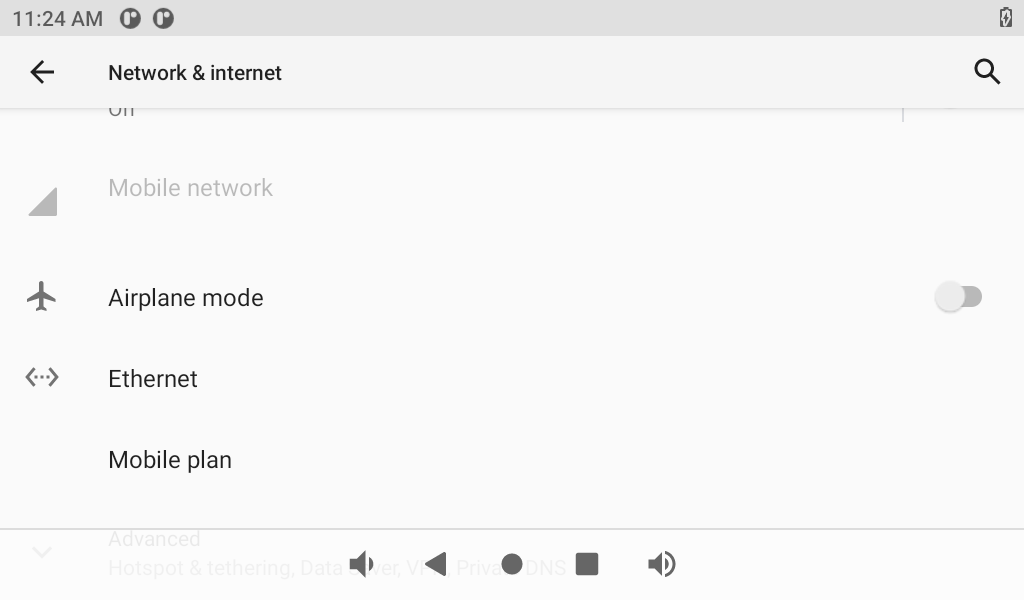
- Click "Network & internet", as shown in the following figure:
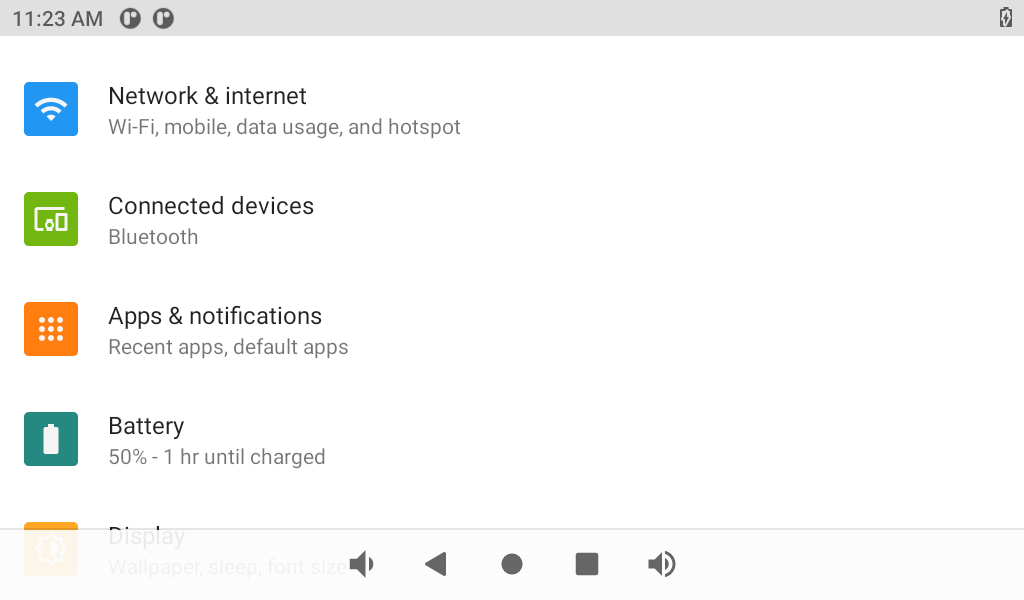
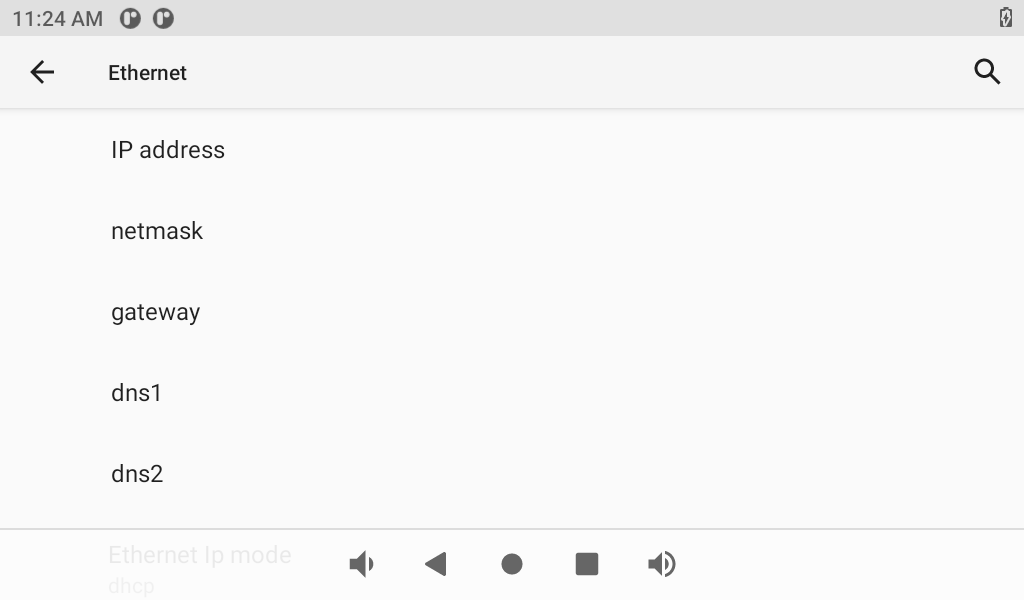
- Click "Ethemet", "ip address" is the static ip
- Click ”IP address“ to set static IP
¶ Storage device
¶ Check U disk
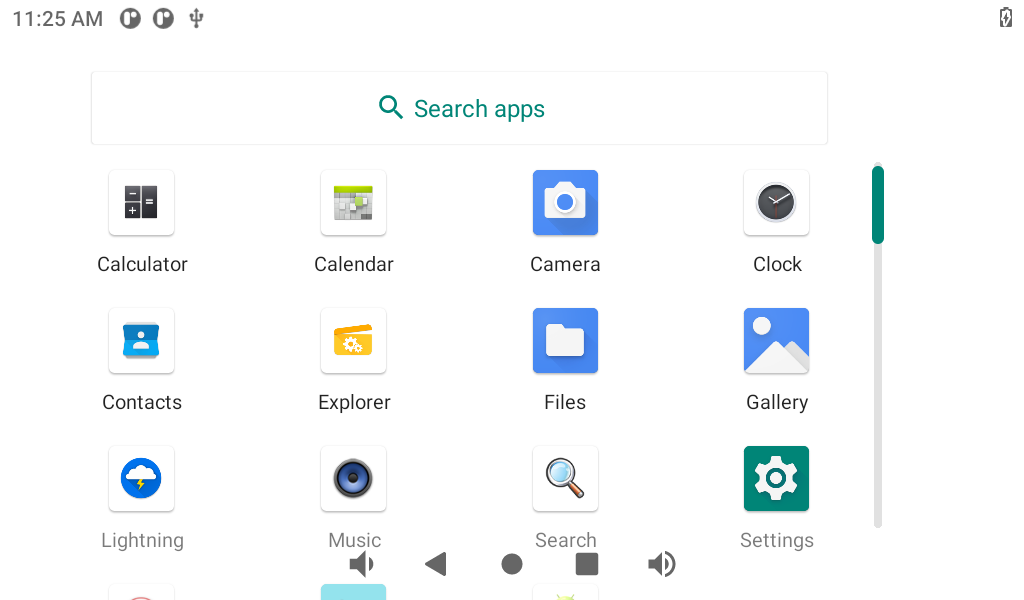
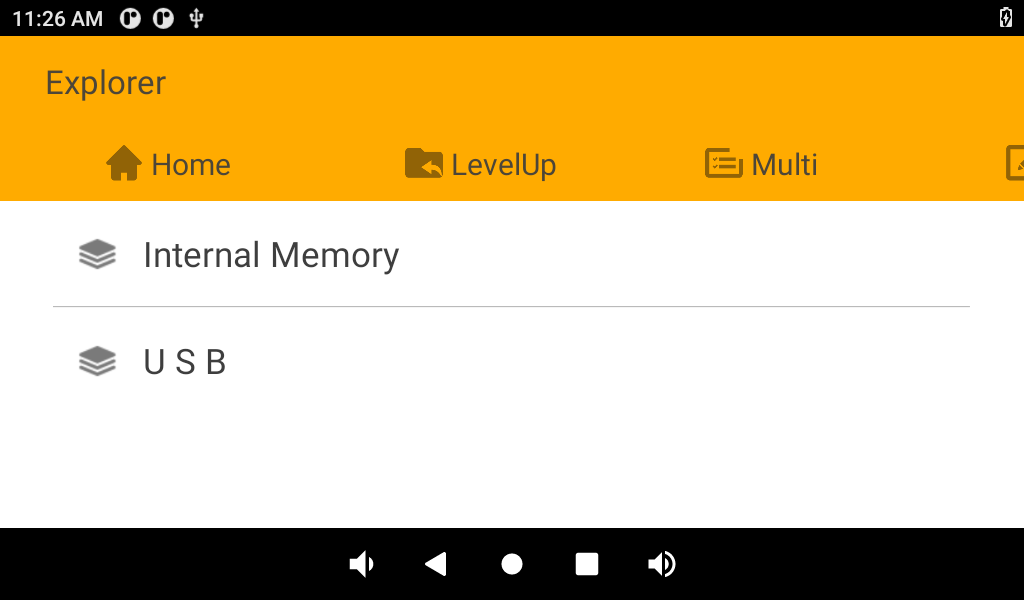
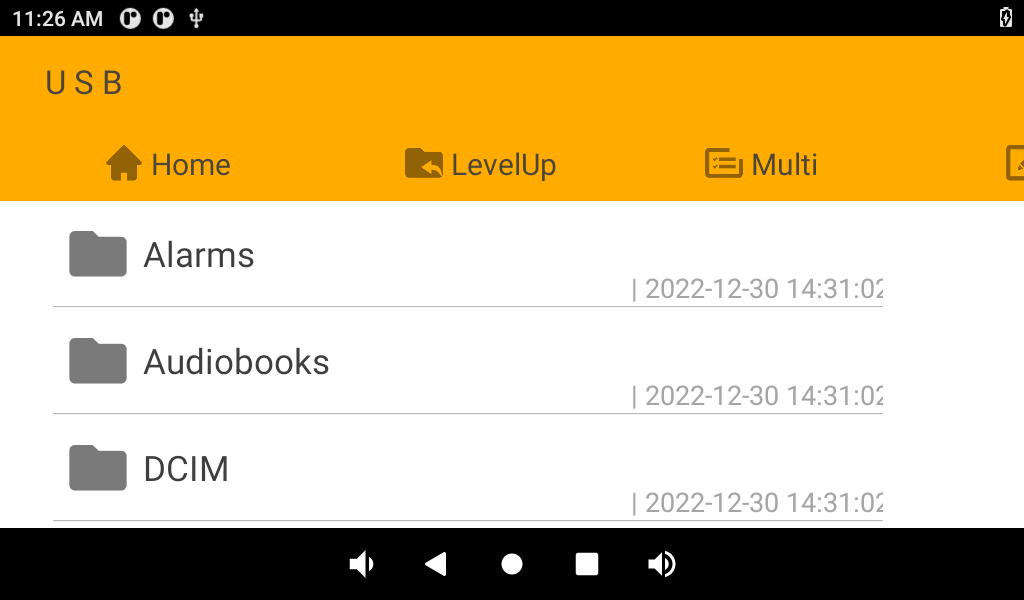
- When the U disk is inserted, the "Explorer" on the desktop can find the corresponding U disk. As shown below:
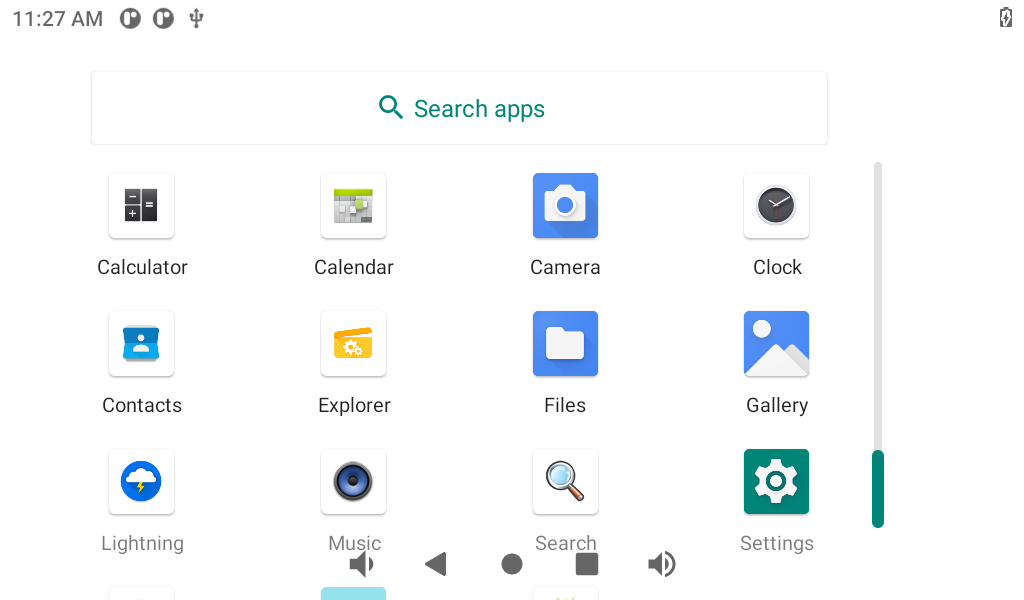
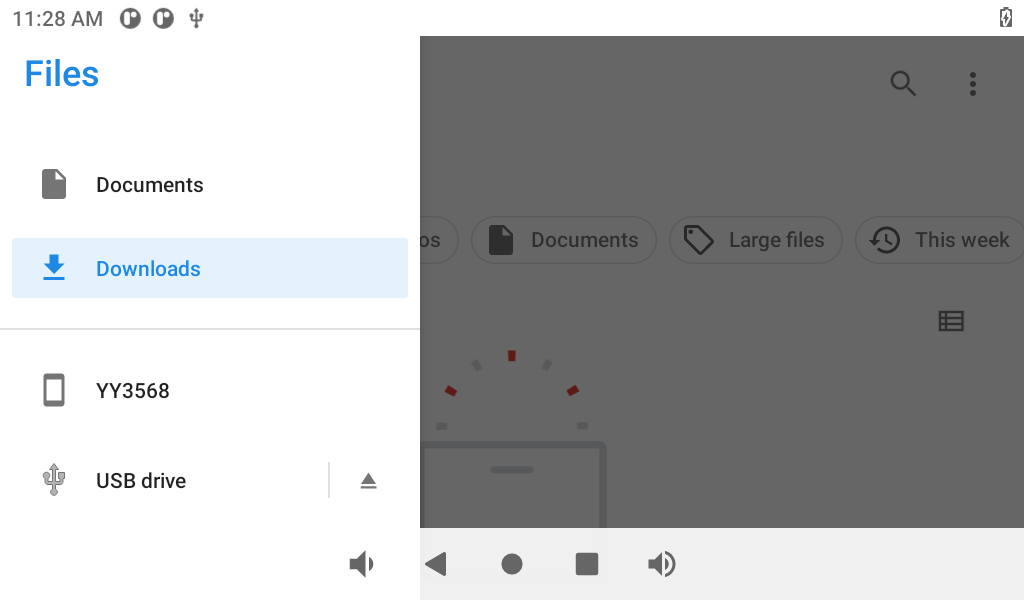
- After inserting the U disk, you can find the corresponding U disk in the "File" on the desktop. as the picture shows:

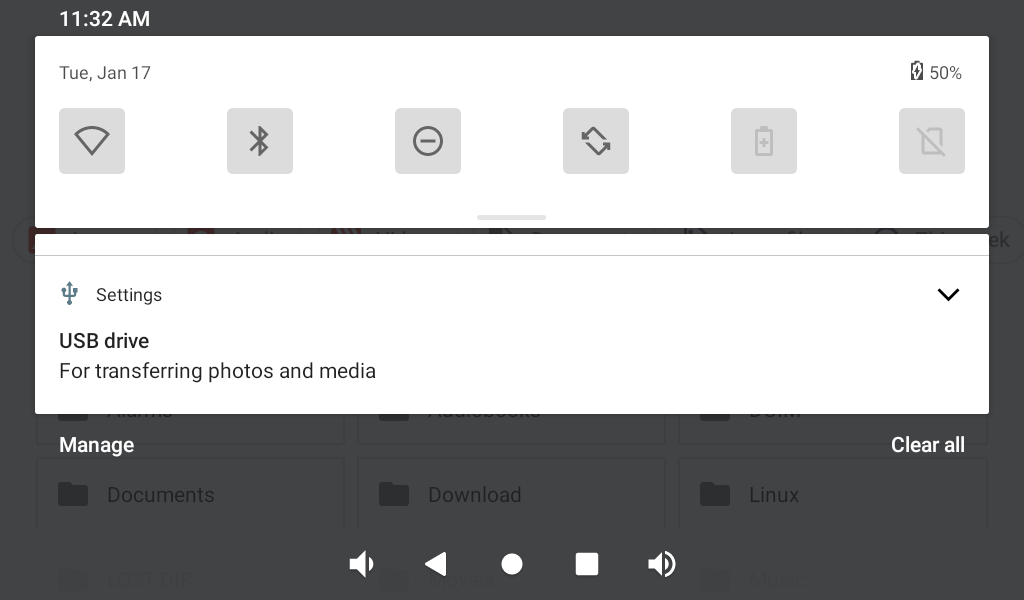
- After inserting the U disk, the system will automatically detect the insertion of the U disk. For example, click "U disk" here to browse files.

¶ Check TF Card
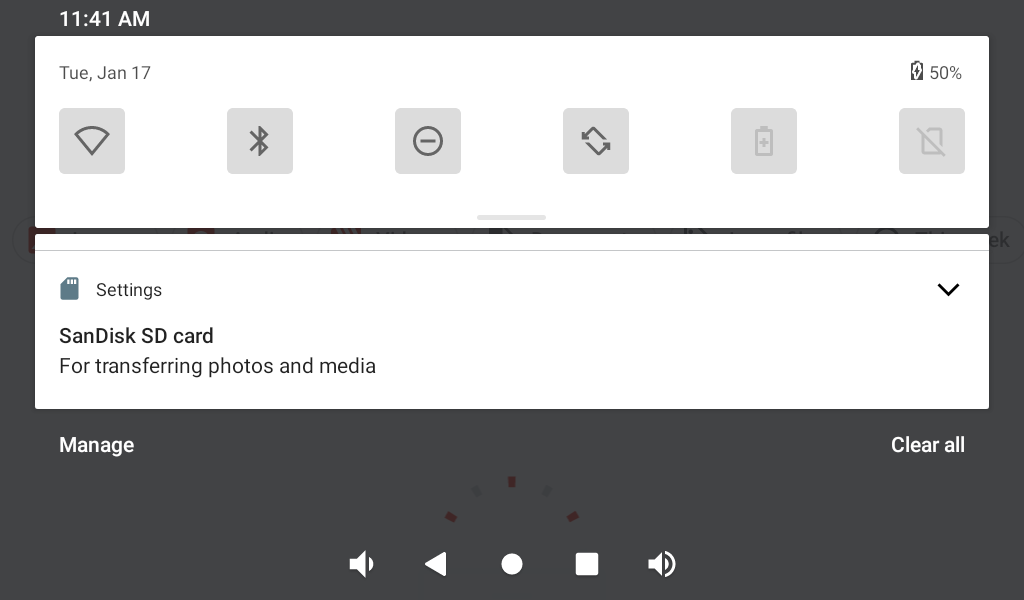
- Insert the TF card into the development board. The system will automatically detect the insertion of the TF card. For example, click "SD card" here to browse files. As shown below:

¶ Check SSD
¶ Check SATA
¶ Network
¶ Connect to wired network
1.First prepare a router and a network cable, as shown in the figure below, both network ports can be connected to the external network, and connect the network port to the Gigabit port of the router through a network cable. The Android 11 system is DHCP, and the development board can automatically obtain an IP address when it is connected to the router, and then you can open the webpage and go online, as shown in the figure below:

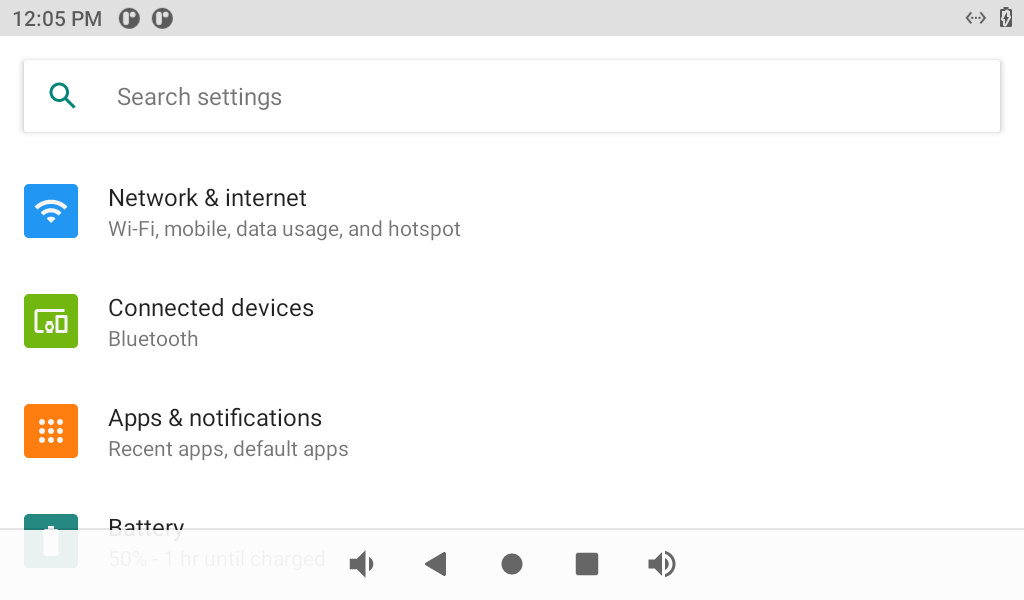
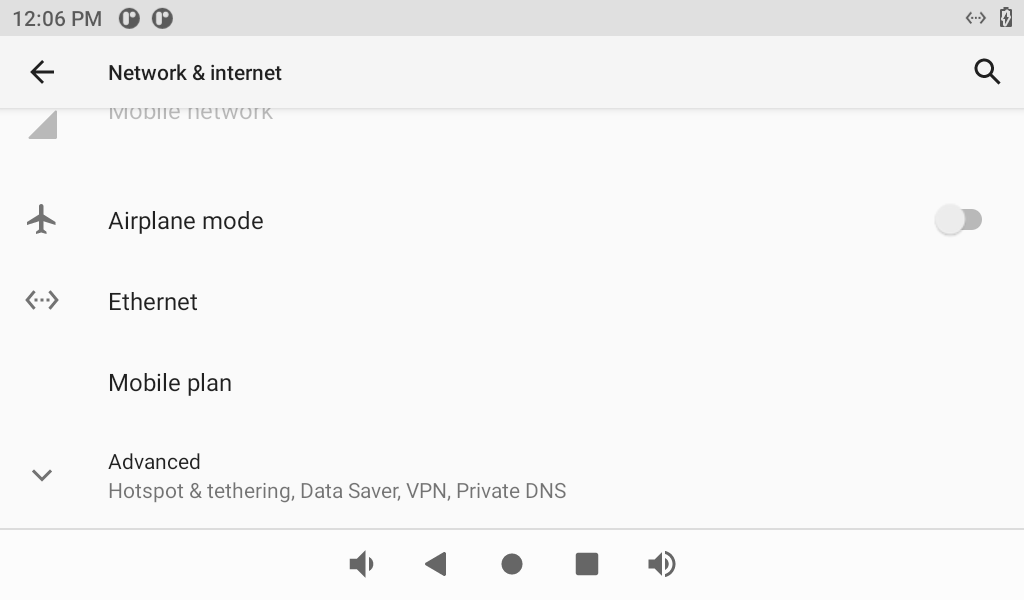
- Enter the setting interface,click "Network & internet", click "Ethernet", as shown in the figure below:
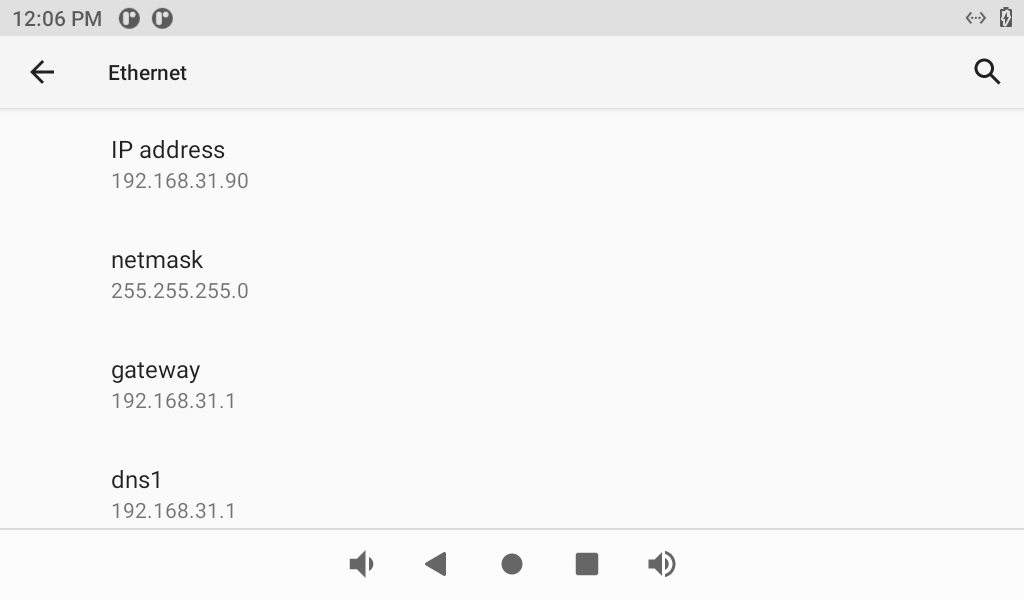
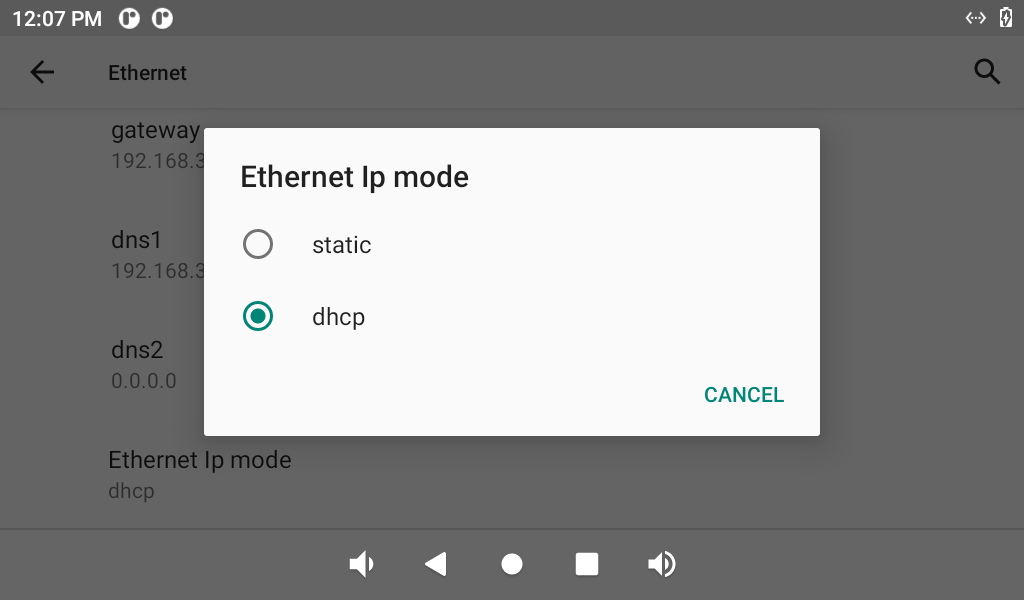
- Enter the "Ethernet" setting interface and you can choose to obtain IPDHCP or static IP automatically. It is recommended to use DHCP. If you want to set a static IP, make sure your network parameters are available, as shown in the figure below:
¶ Connect wifi
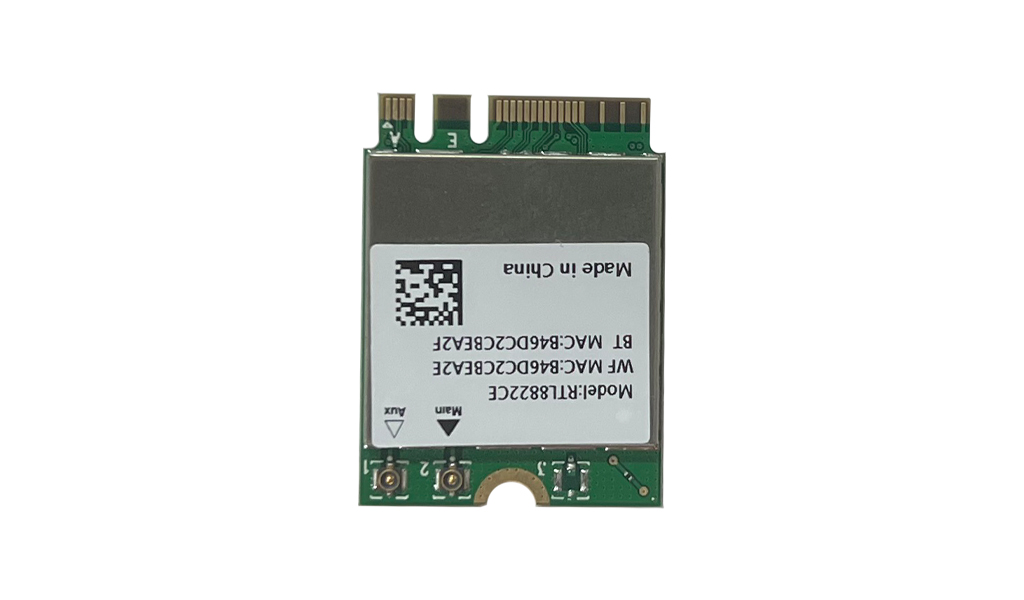
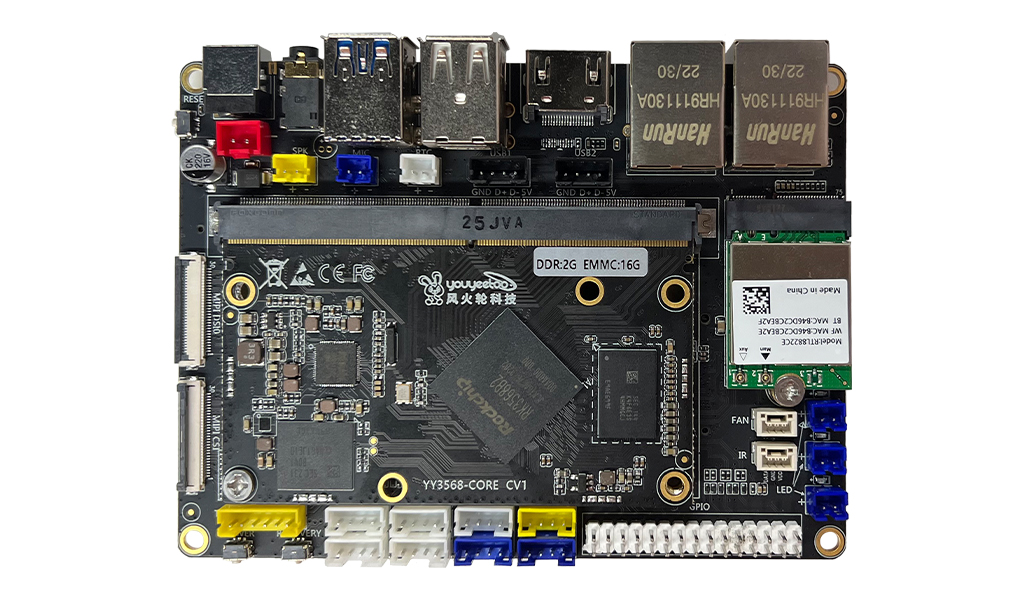
- Install the WiFi module and antenna, as shown in the figure:
Wifi module:
WiFi module interface:

Install Wifi module:
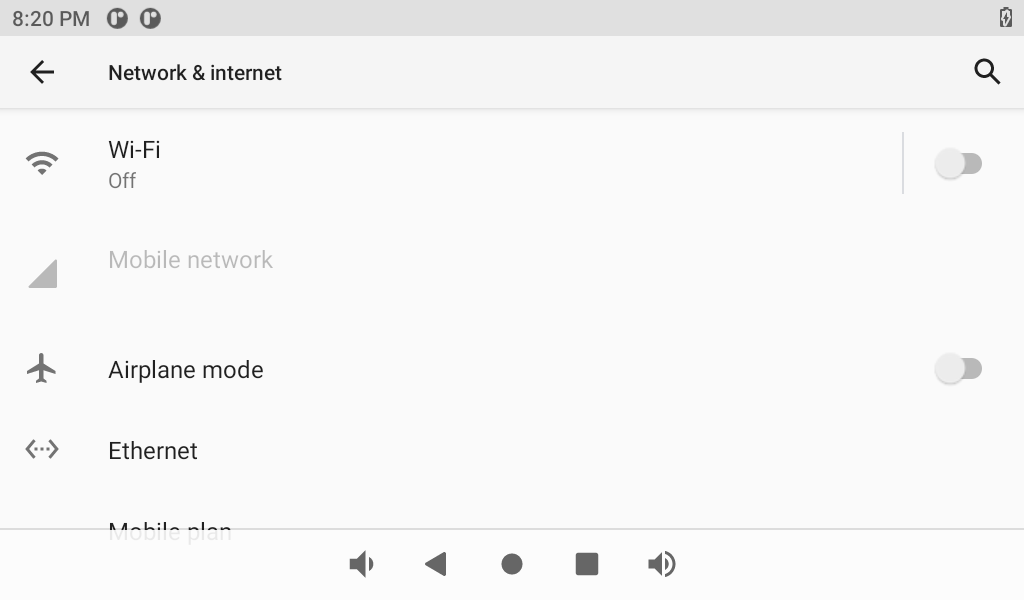
- Click "Settings" on the application interface to enter the setting interface, click "Network and Internet", as shown in the following figure:
- Click "Wireless and Networks" and turn on the WiFi switch, as shown in the figure below:
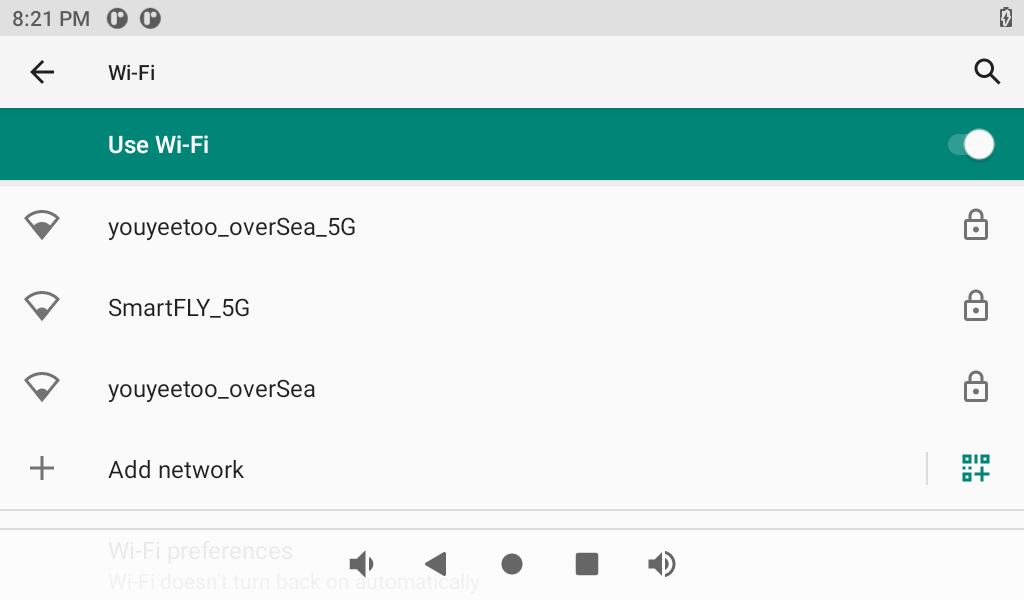
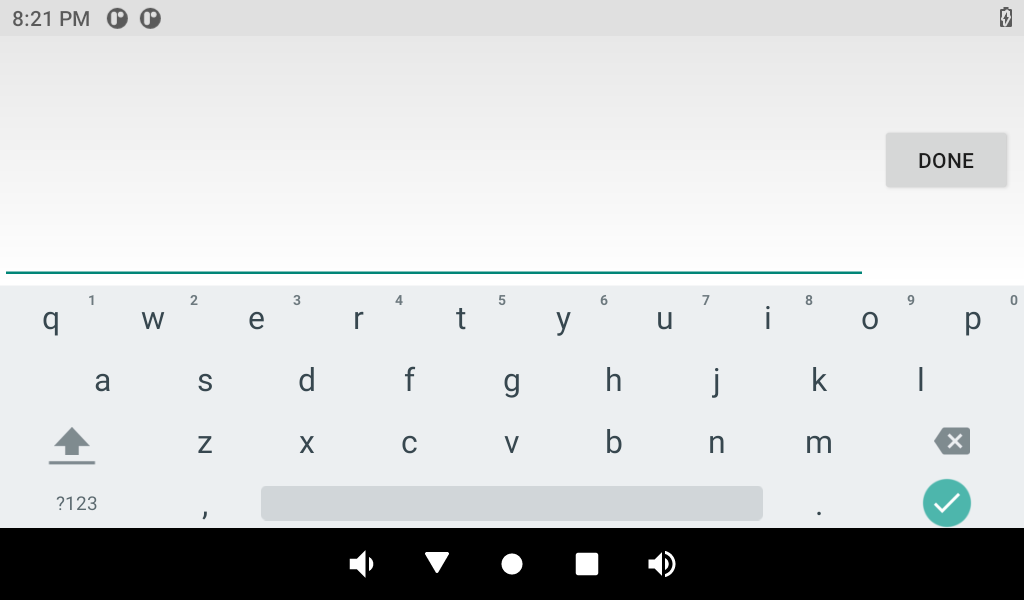
- Click the hotspot to be connected and enter the password, as shown in the figure below:
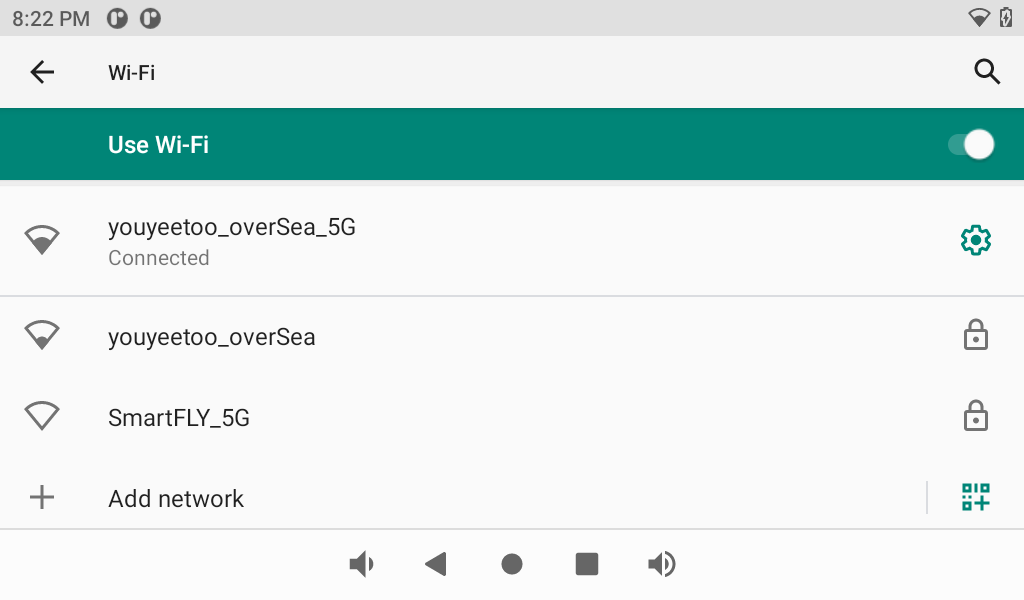
- After the connection is successful, as shown in the figure below:
¶ Use 4G to dial
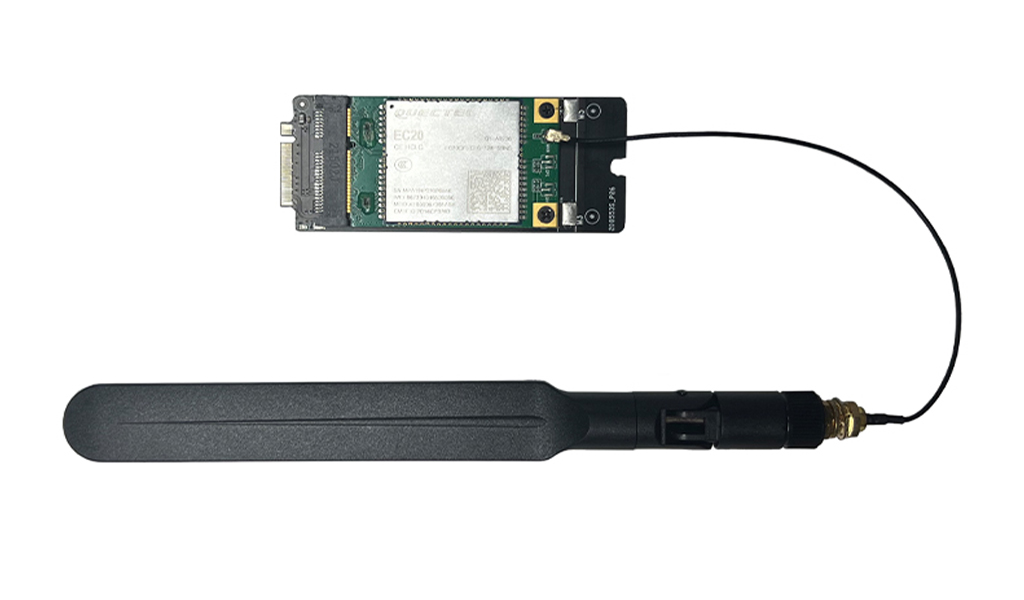
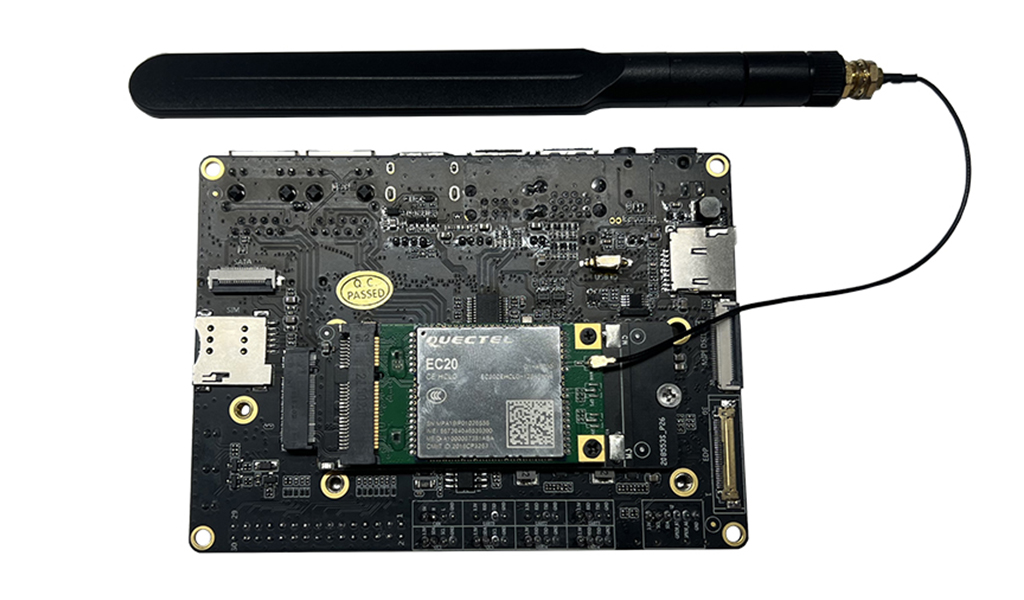
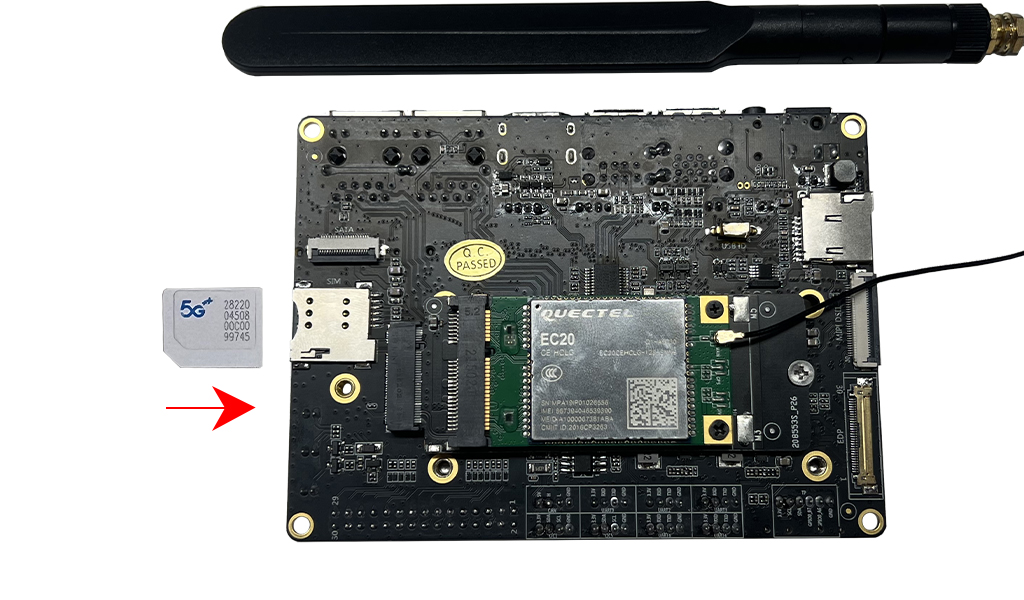
- Install the 4G module, antenna and SIM card, as shown in the figure:
Antenna,4G module and adapter board:
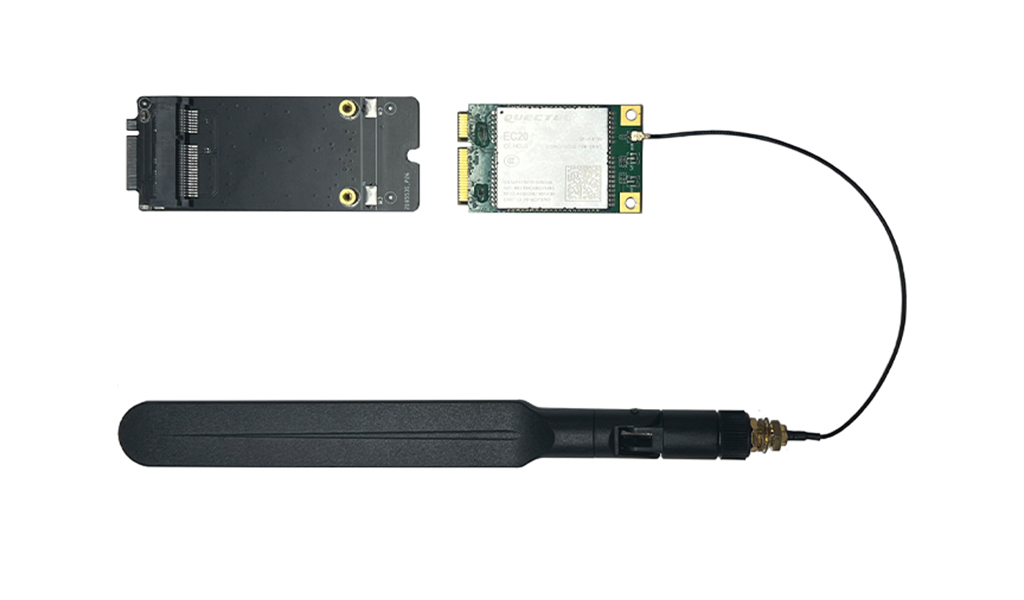
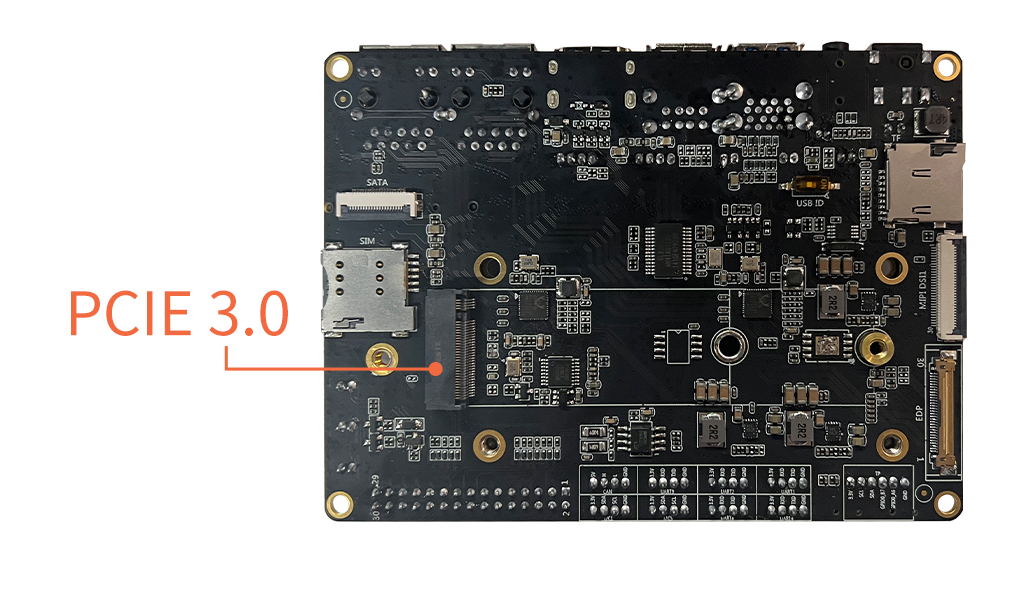
4G module interface:
Assemble 4G module:
Install 4G module:
Install 4G module and SIM card:
- Then you can dial 4G, turn on the 4G switch, you can directly open it in the drop-down menu, as shown in the figure below:

- After turning on 4G, Click "Lightning" to see if you can access the Internet, as shown in the figure below:

¶ Communication
¶ Bluetooth
- Bluetooth module and install the Bluetooth module, as shown in the figure:
Bluetooth module:

Bluetooth module interface:

Install bluetooth module:

- Click "Bluetooth" on the application interface:
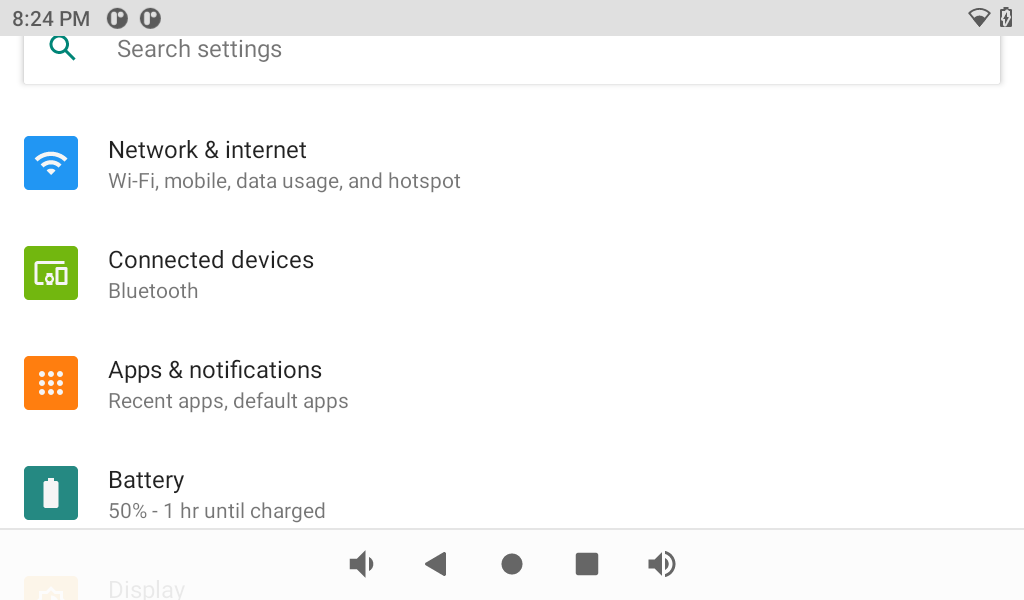
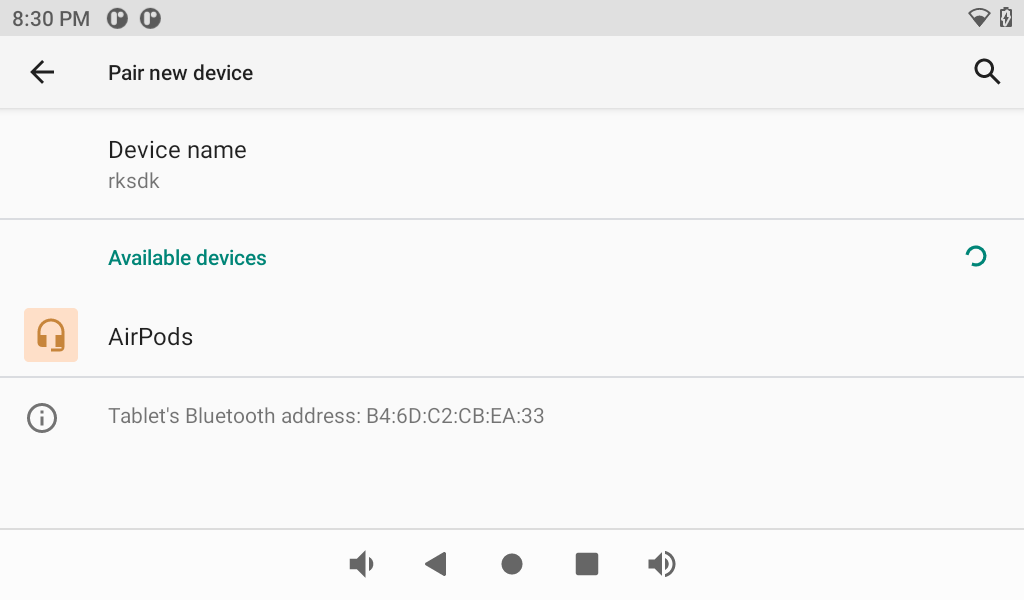
- Click "Pair New Device" as shown below:
¶ Uart
Use a serial port module, connect the tx of the serial port module to the rx of the board, connect the rx of the serial port module to the tx of the board, and then connect the GND of the serial port module to the GND of the board (GND must be connected).
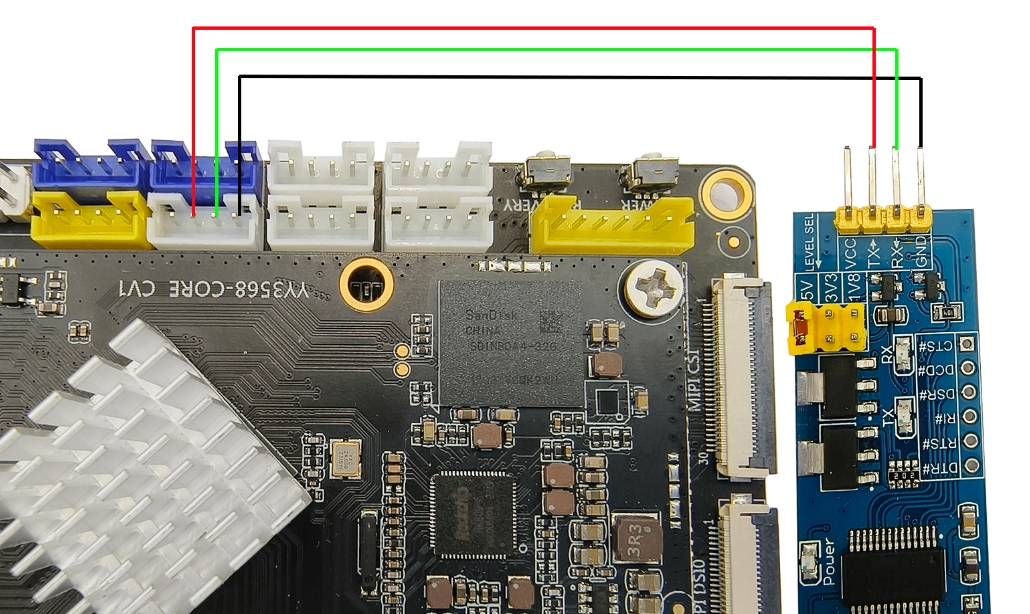
Connect the serial port module to the computer.
-
Open the serial port software on the computer. Set the baud rate to 9600
-
The computer sends the serial port data, and the development board receives the serial port data.
¶ I2C
¶ CAN
¶ IR
- Install the IR (infrared) module, as shown in the picture:
Infrared module and remote control:
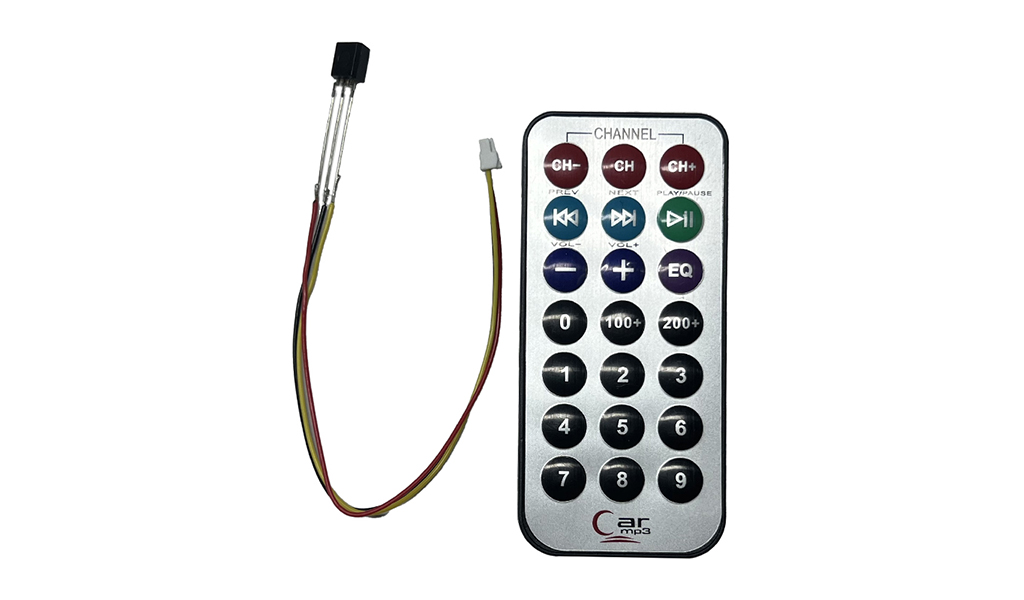
Infrared module interface:
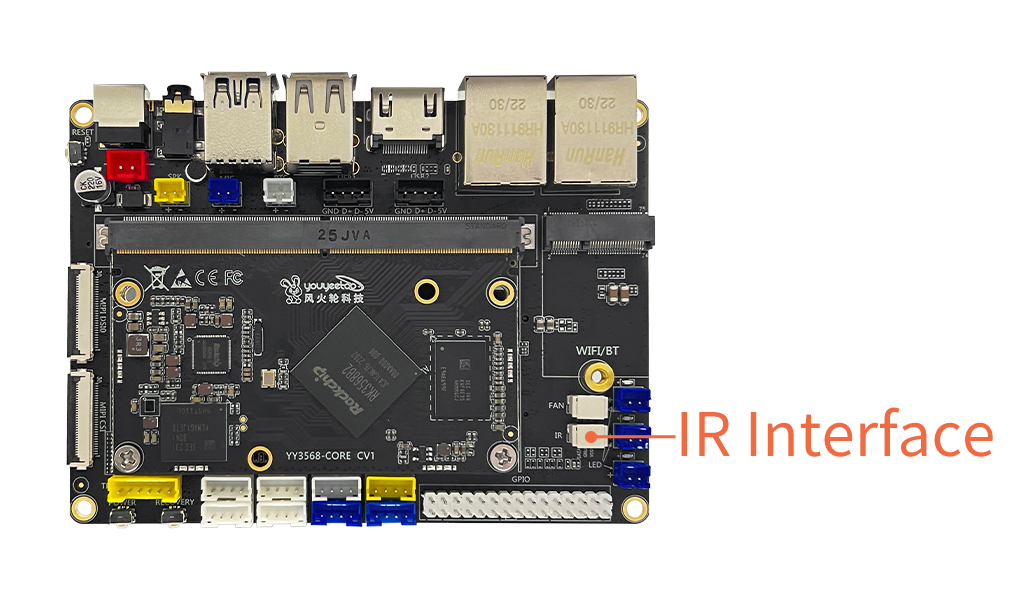
Install Infrared module:
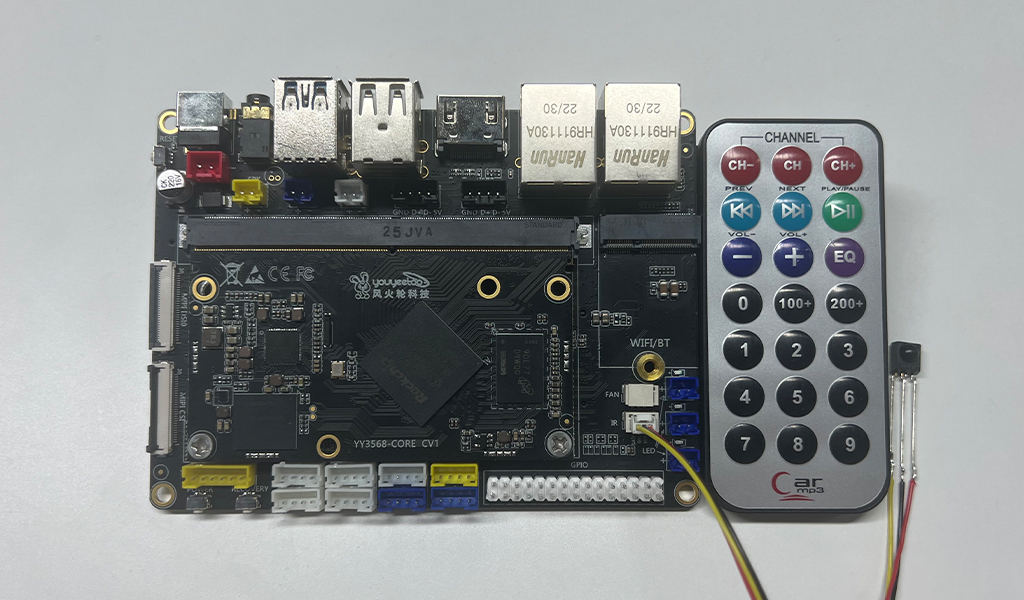
- Then you can control it by remote control
¶ Audio frequency
¶ SPK
- Install SPK(Speaker module)
Speaker module:
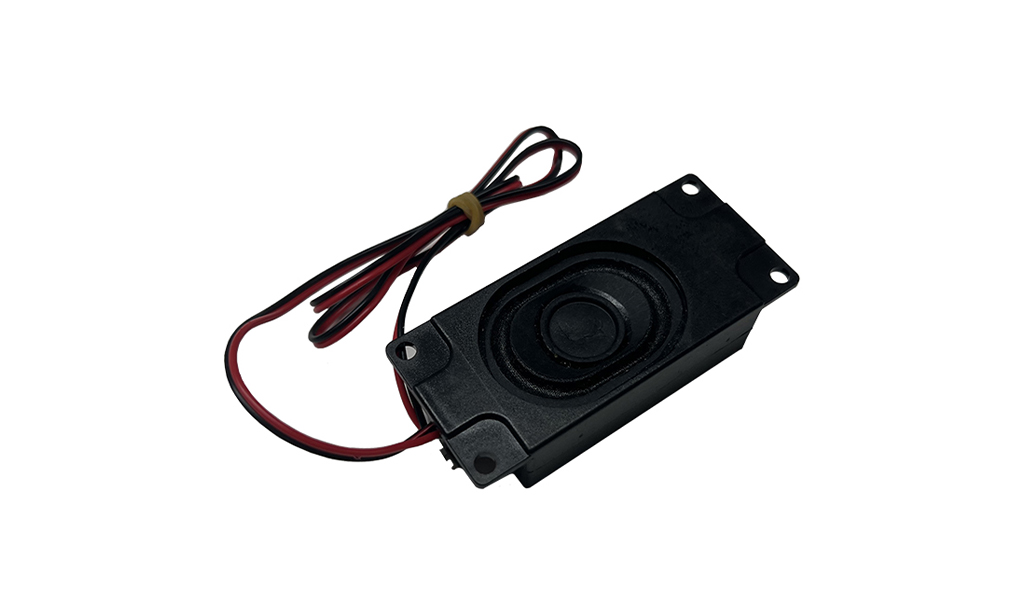
Speaker interface:
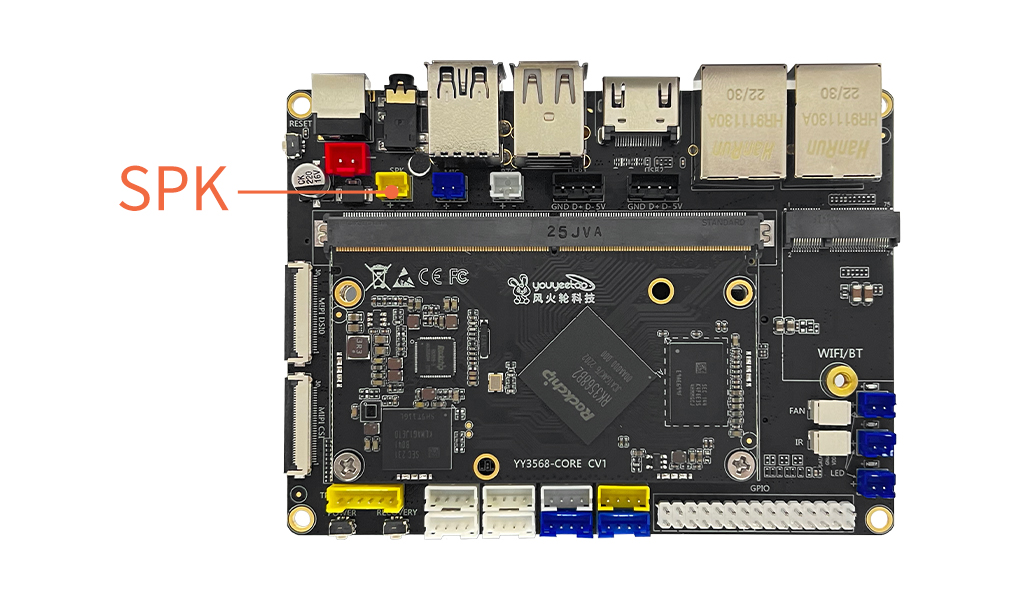
Install Speaker module:
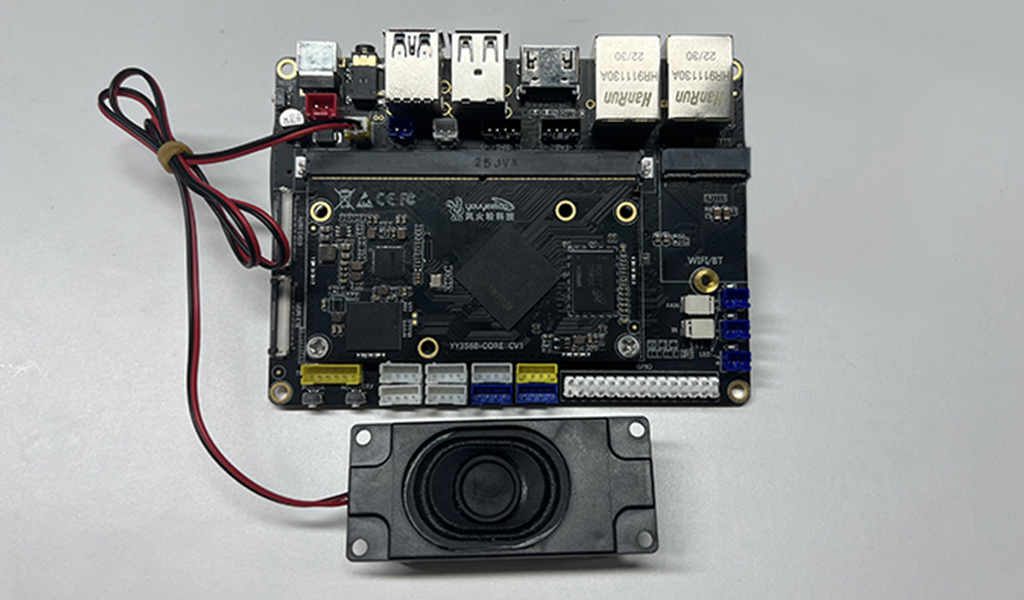
- You can test whether the SPK is available through the music player
¶ MIC
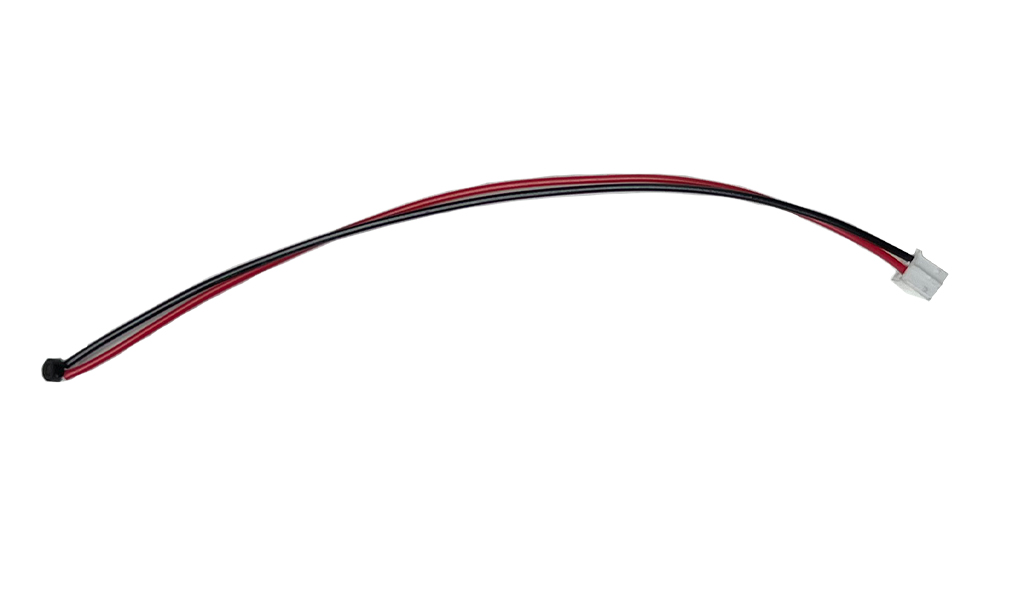
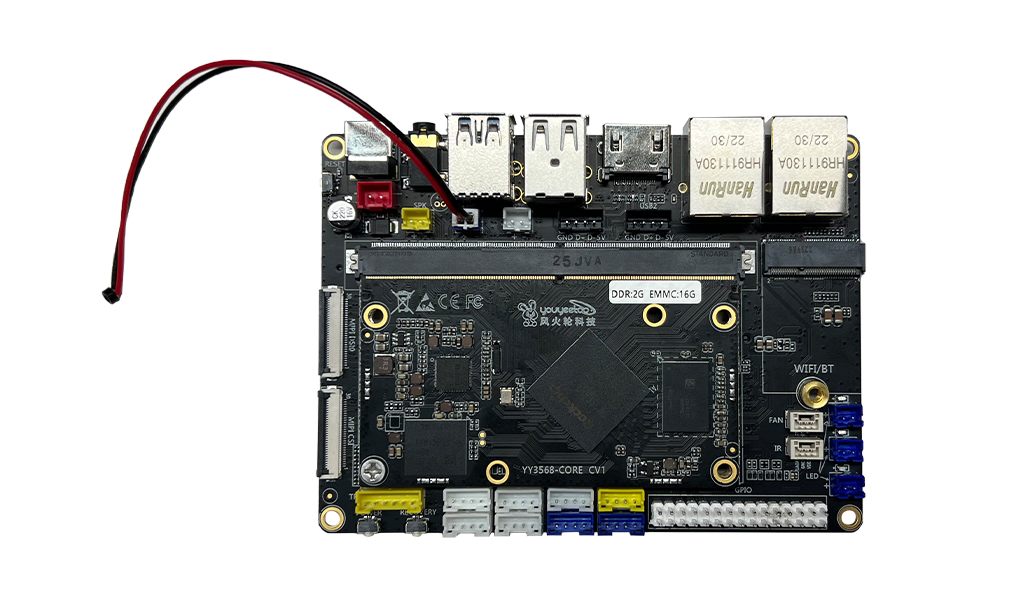
- Install the mic module, as shown in the figure:
MIC module
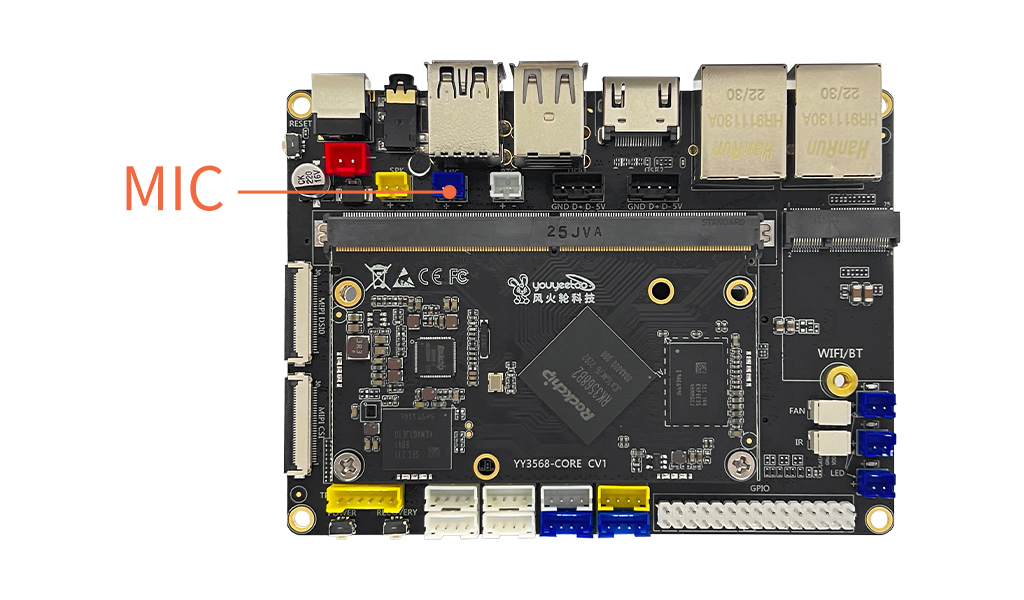
MIC interface:
Install MIC module:
- You can use the recorder to test whether the mic is available
¶ Audio switching
Insert 3-segment headphones directly into the headphone jack.
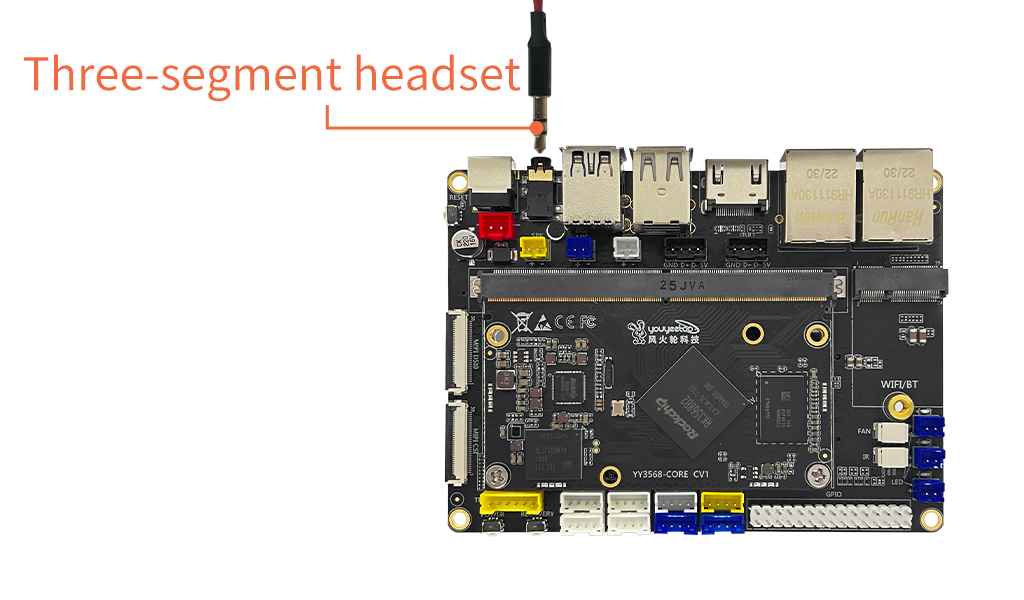
Note: It must be a 3-segment earphone
¶ Camera
¶ USB camera
1.Install the USB camera, as shown in the figure:
USB camera:
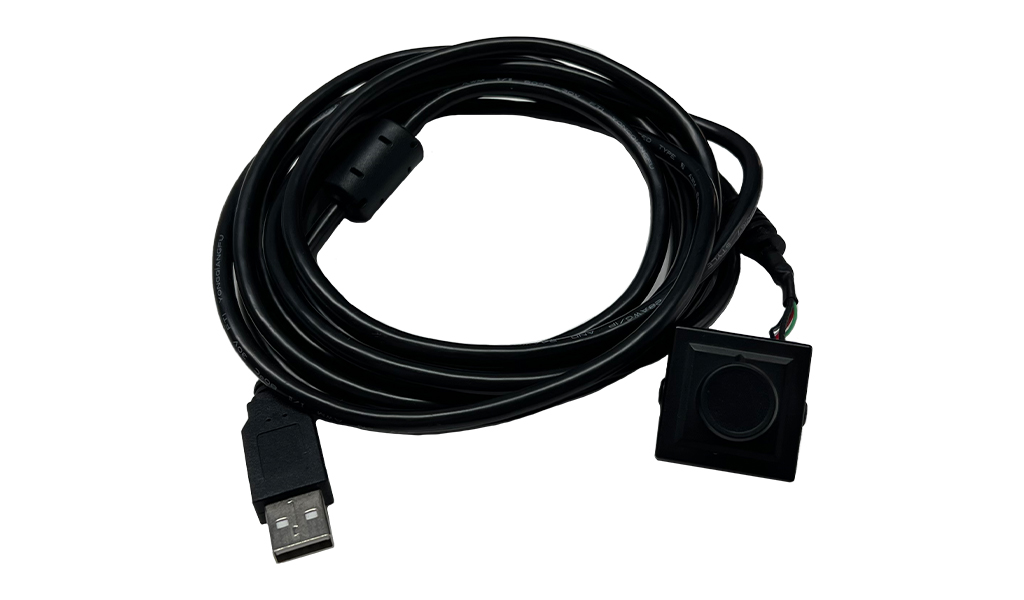
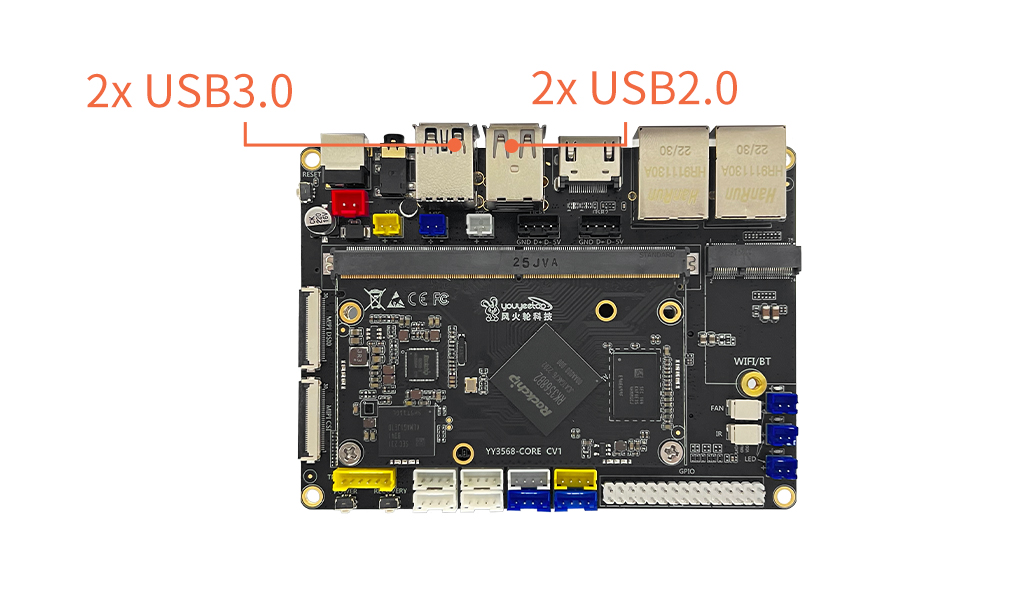
USB interface:
Install USB camera:
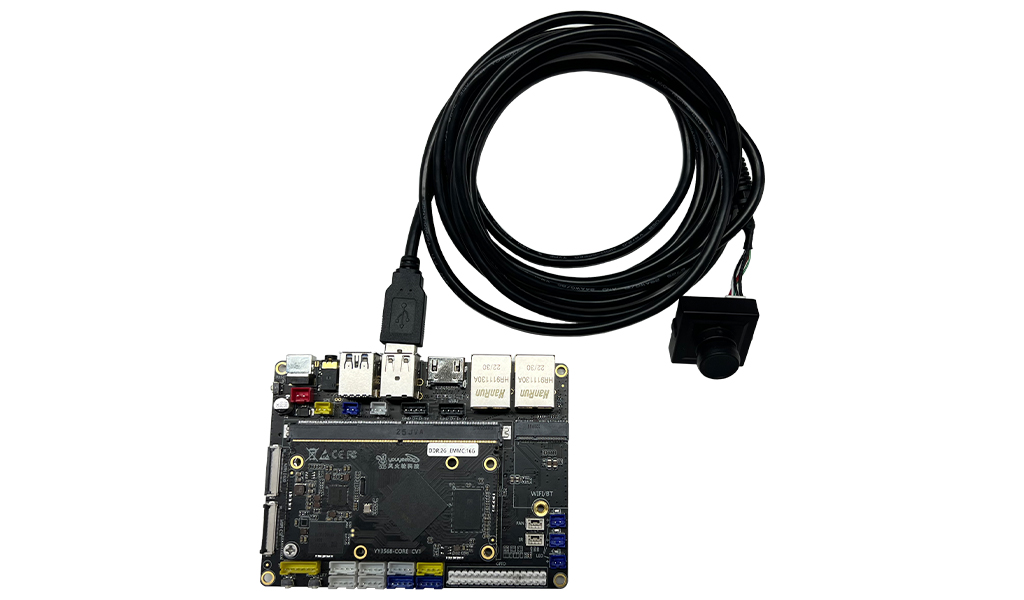
- You can test whether the camera is available by taking pictures
¶ MIPI camera
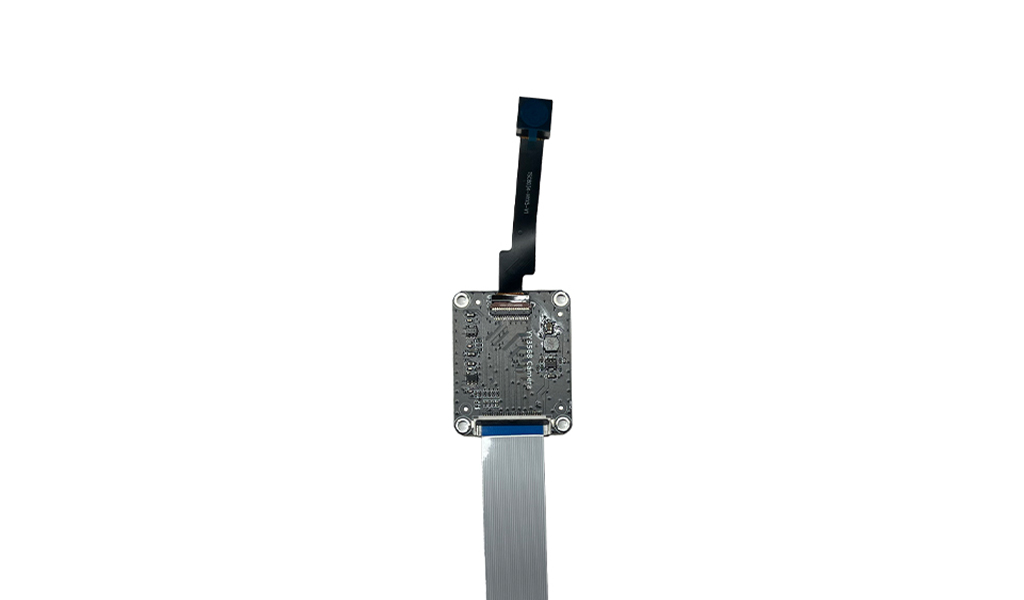
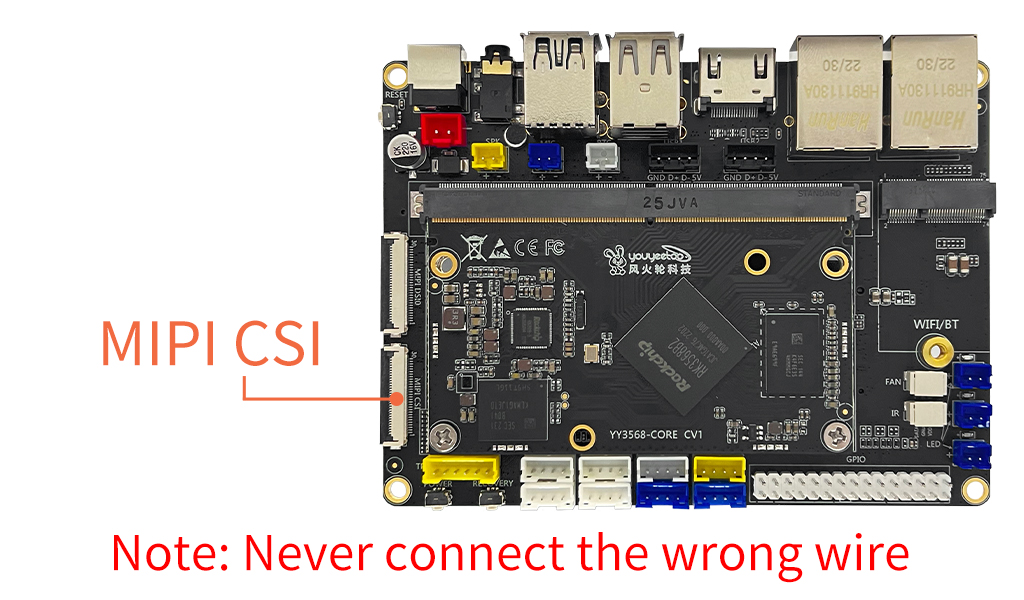
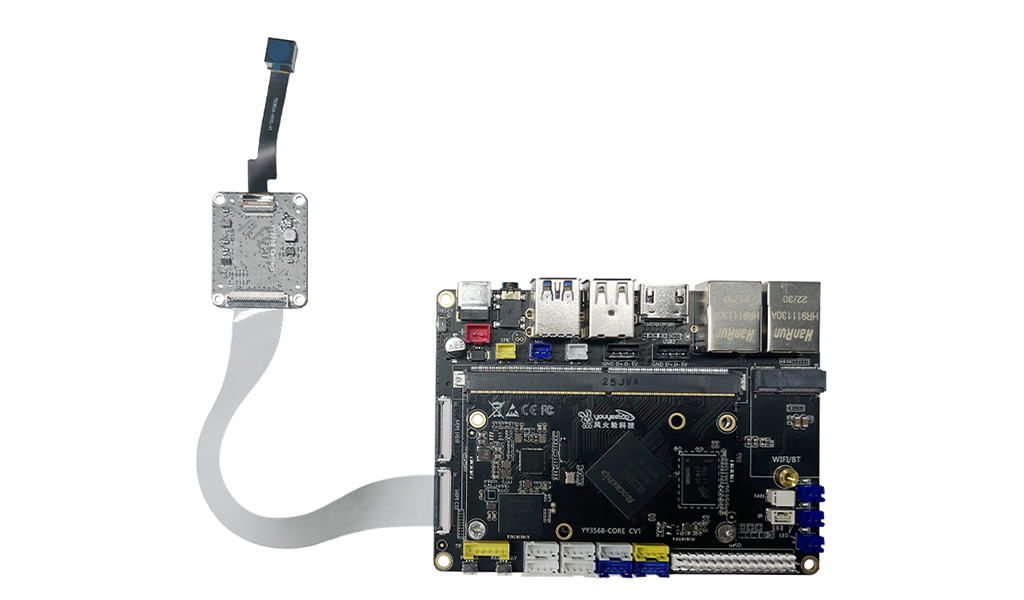
- Install the mipi camera, as shown in the figure:
Mipi-csi camera:
Mipi-csi camera interface:
Install mipi-csi camera:
- You can test whether the camera is available by taking pictures
¶ Install app
¶ Install apk
- install apk software:
adb install test.apk
¶ System Information Query
¶ CPU information
- Get device serial number
adb get-serialno

- Specify the connected device using the command:
adb -s 618f78ea7c2441d0 shell

- View CPU information
cat /proc/cpuinfo

¶ Memory information
- Get device serial number
adb get-serialno

- Specify the connected device using the command:
adb -s 618f78ea7c2441d0 shell

- View memory information
df -h

¶ Disk partition info
- Get device serial number
adb get-serialno

- Specify the connected device using the command:
adb -s 618f78ea7c2441d0 shell

- View disk partition information
cat /proc/partitions

¶ The kernel version
- Check the kernel version
adb shell getprop ro.product.cpu.abi (Exit first to exit the device connection)

¶ Network equipment
- View network devices
ifconfig
