¶ Account and password
- account:
youyeetoo - password:
123456
¶ youyeetoo_utils command
¶ Restore to Factory Settings
sudo youyeetoo_utils --reset_rootfs=1
¶ Distribute the differential root file system
- Use the following command to export modified, deleted, and newly added files from the system to a directory. After executing the command, a rootfs directory will be generated in the current directory. If you want to save it elsewhere, replace the parameter
./with another path.
sudo youyeetoo_utils --export_rootfs=./
- Copy the rootfs directory to the source code directory and use the following command to copy to the corresponding directory.
The content in the exported rootfs includes not only files modified, added, and deleted by oneself, but also files generated by the system at that time. Suggest copying only a portion of your own files to the source code directory.
cp -frp rootfs/* device/rockchip/common/extra-parts/userdata/normal/
- The following command is operated on the source code SDK
rm -fr output
# Compile the OEM and UserData partitions first to ensure they are problem free, and then fully compile them
./build.sh extra-parts
# Fully compiled
./yy3588_build.sh
- The compiled image is then burned back to the development board.
¶ Switching between command-line mode and graphical mode
Switch to command-line mode without graphical interface
youyeetoo_utils --display=0
sudo reboot
Enter your account password to log in
Switch to graphical mode
youyeetoo_utils --display=1
sudo reboot
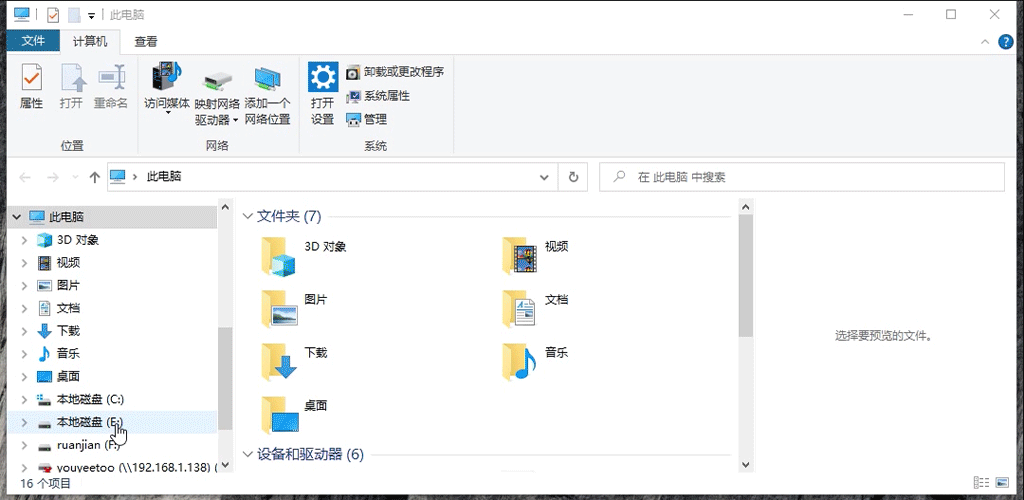
¶ ADB connection
¶ Rockchip USB driver
- Go to the data download section and download any version of Rockchip's USB driver archive
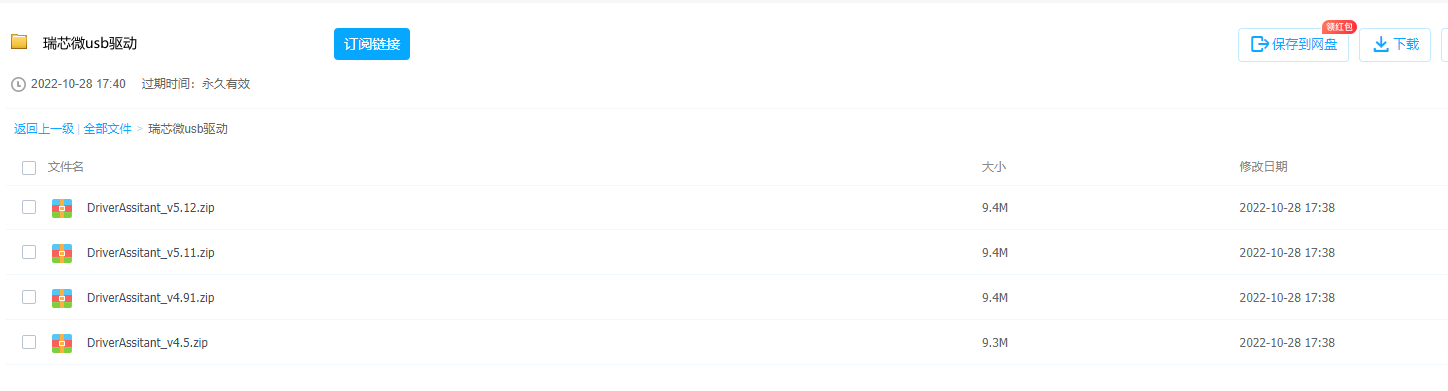
- Click to install the driver

Install the RK USB driver and download the adb software.
- RK USB Driver https://pan.baidu.com/s/1WHxhBwtLSpMFWFBzpbr2-g?pwd=u6z1 提取码:u6z1
- adb under windows https://pan.baidu.com/s/1T2etgoSFGGNe37QlmAQ7xQ 提取码:kfqm
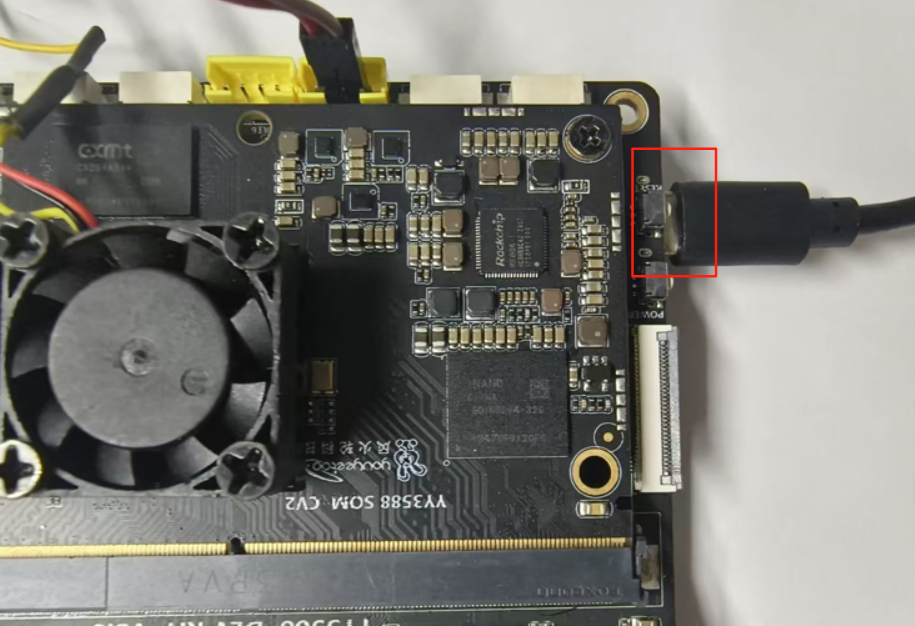
¶ hardware connection
Connect the OTG port on the back of the development board to the computer using a Type-C cable, as shown in the figure:
¶ Using under Windows
- To use it under Windows, you need to first install the RK USB driver, download the adb software, enter the adb directory, change the adb directory field to cmd, as shown below, and then start the terminal
- ADB login system
adb shell
¶ Used under Ubuntu virtual machine
- Enter the following command to install the ADB tool:
sudo apt-get install android-tools-adb
- Add device tag:
mkdir -p ~/.android
vi ~/.android/adb_usb.ini
# Add the following line
0x2207
- Add udev rule:
sudo vi /etc/udev/rules.d/51-android.rules
# Add the following line:
SUBSYSTEM=="usb", ATTR{idVendor}=="2207", MODE="0666"
- Re plug and unplug the USB cable, or run the following command to make the udev rule take effect:
sudo udevadm control --reload-rules
sudo udevadm trigger
- Restart ADB server:
sudo adb kill-server
adb start-server
- Adb login system
adb shell
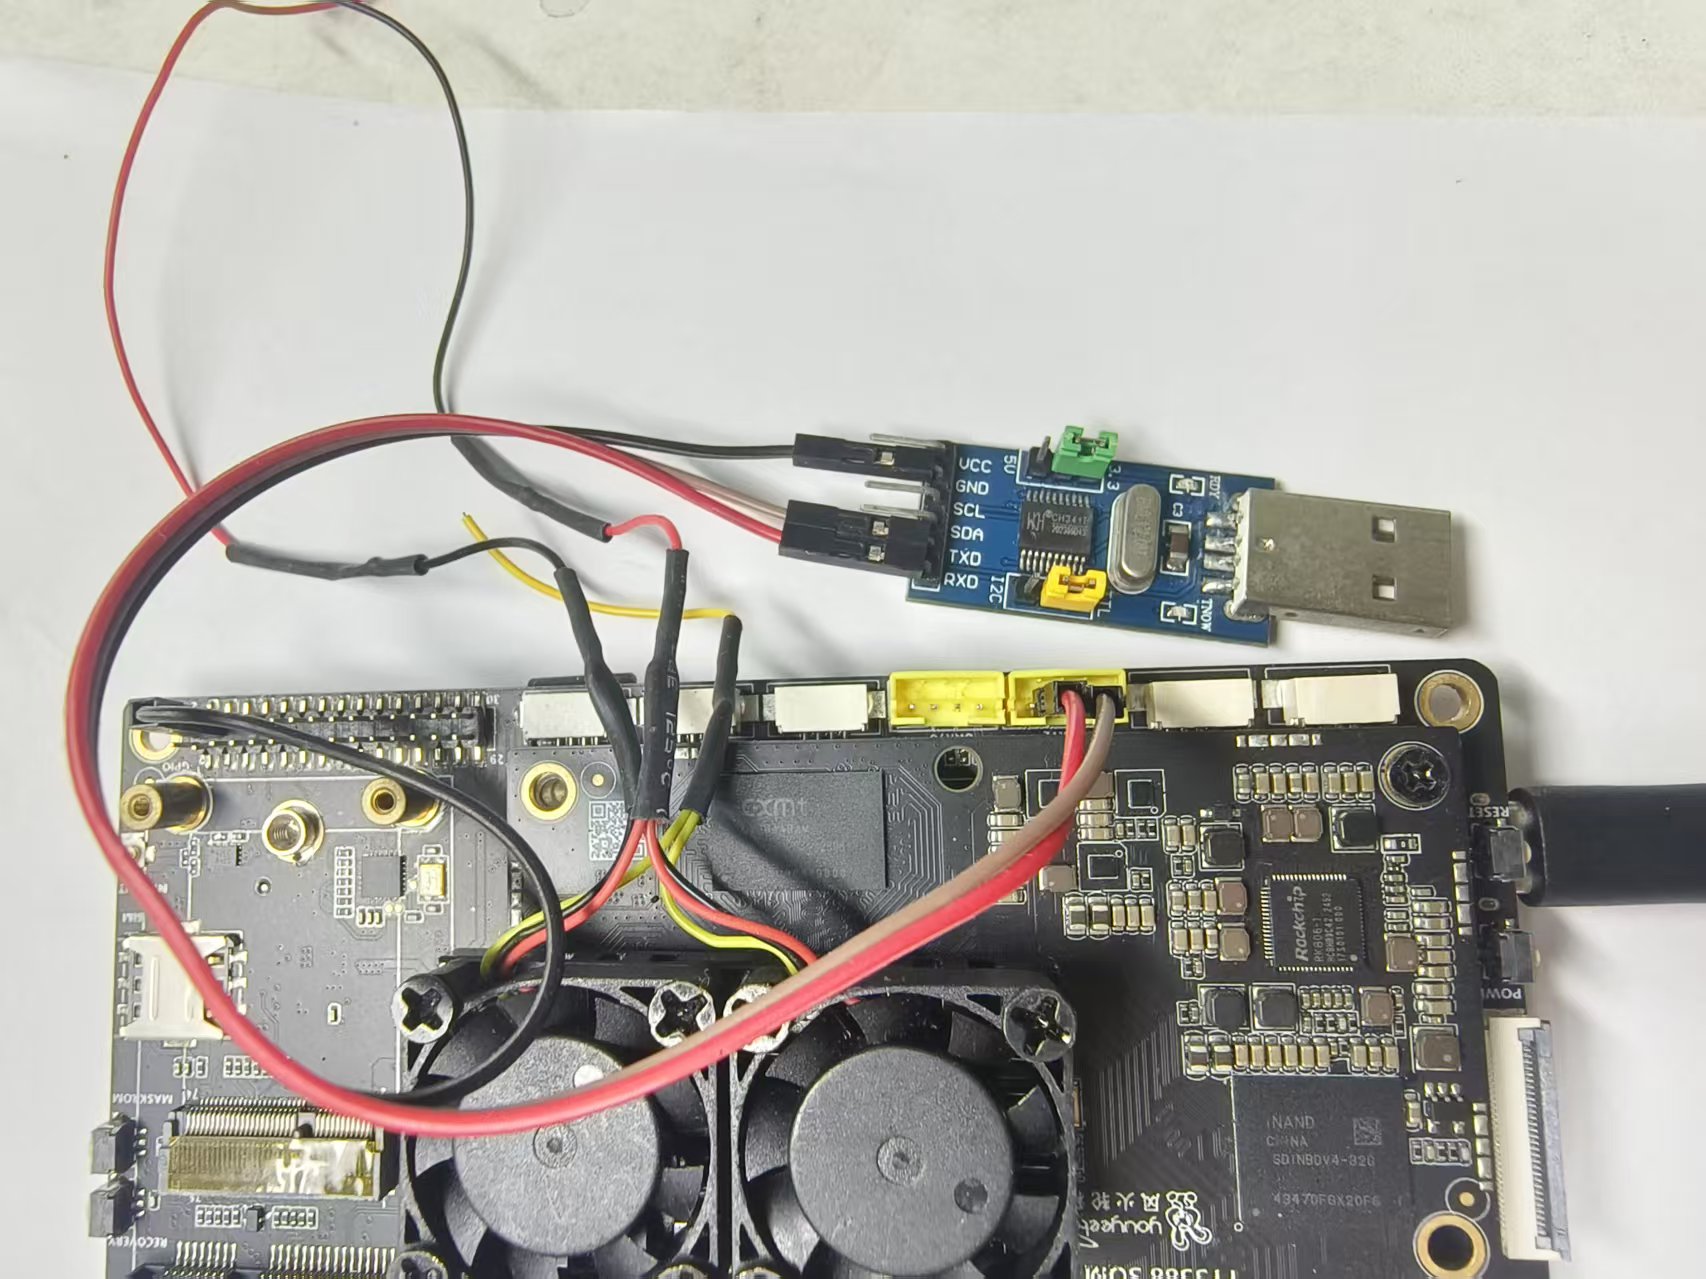
¶ Serial Port Debugging
The baud rate of YY3588 DEBUG serial port is
1500000
- Connect the TX pin of the serial module to the RX pin of the development board, and connect the RX pin of the serial module to the TX pin of the development board. Connect the GND of the serial module to the GND of the board (GND must be connected).
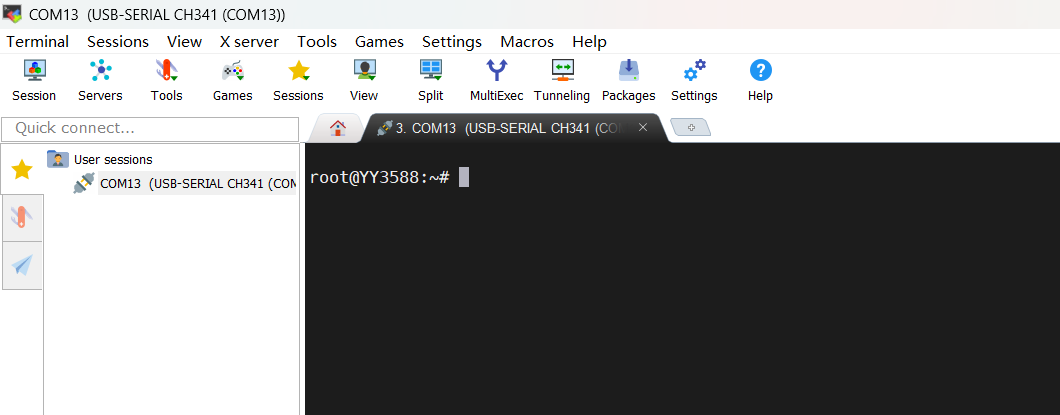
- The author here is using MobaXterm-Personal_22.0 software, which cannot be downloaded from the official website through the following link.
- Open the MobaXterm software, click on the Session icon in the upper left corner, then click on the Serial icon, select Serial port *, and fill in the baud rate of '1500000'. Finally, click OK.


- Power on the development board and print the startup log information on the MobaXterm software on the computer. Printing completed. You can enter the board system and enter shell commands.
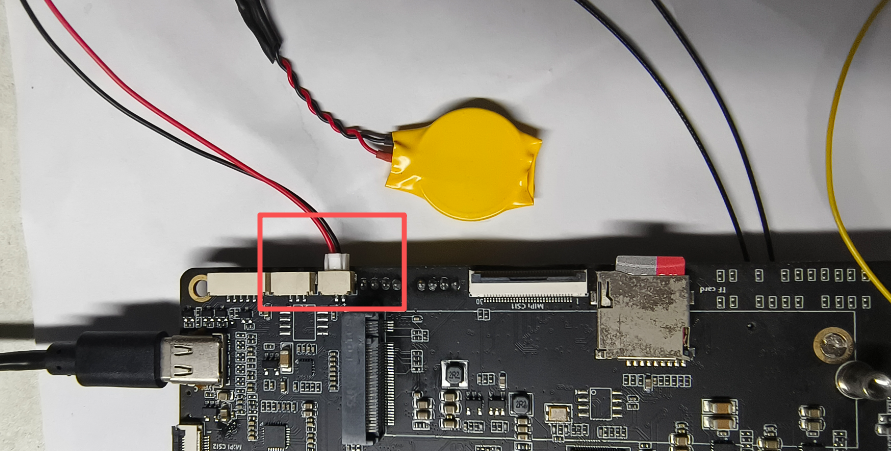
¶ Set RTC time
The hardware connection is as follows:
- Check the system time and enter the following command
sudo date
- Set system time
sudo date --set='2025-12-30 15:17:42'
- Synchronize system time to RTC: and restart
sudo hwclock --systohc
- Check the hardware time.
sudo hwclock --show
- Hardware time synchronization displays system time
hwclock ----hctosys
¶ Solid state drive SSD usage
- Install the SSD onto the development board as shown in the figure:
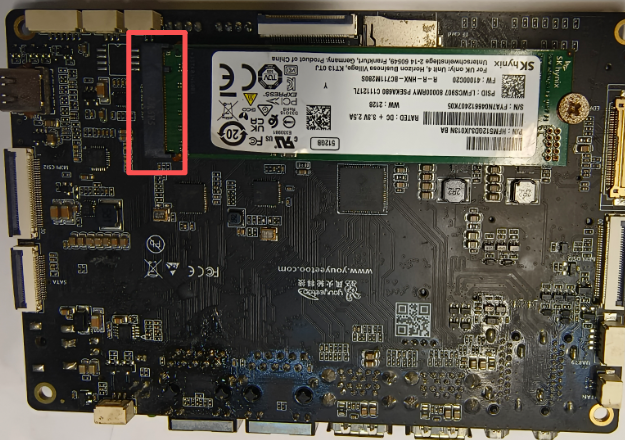
- Mounting SSD
¶ GPU testing
There are many types of Ubuntu desktop systems, among which the Gnome desktop system is the default desktop system for Ubuntu. However, due to the high resource consumption required to run the Gnome desktop system, without GPU support, the RK chip is difficult to run and can easily cause freezing during operation. And this Ubuntu is a Gnome desktop system with GPU support. It can run smoothly on the RK3588 chip.
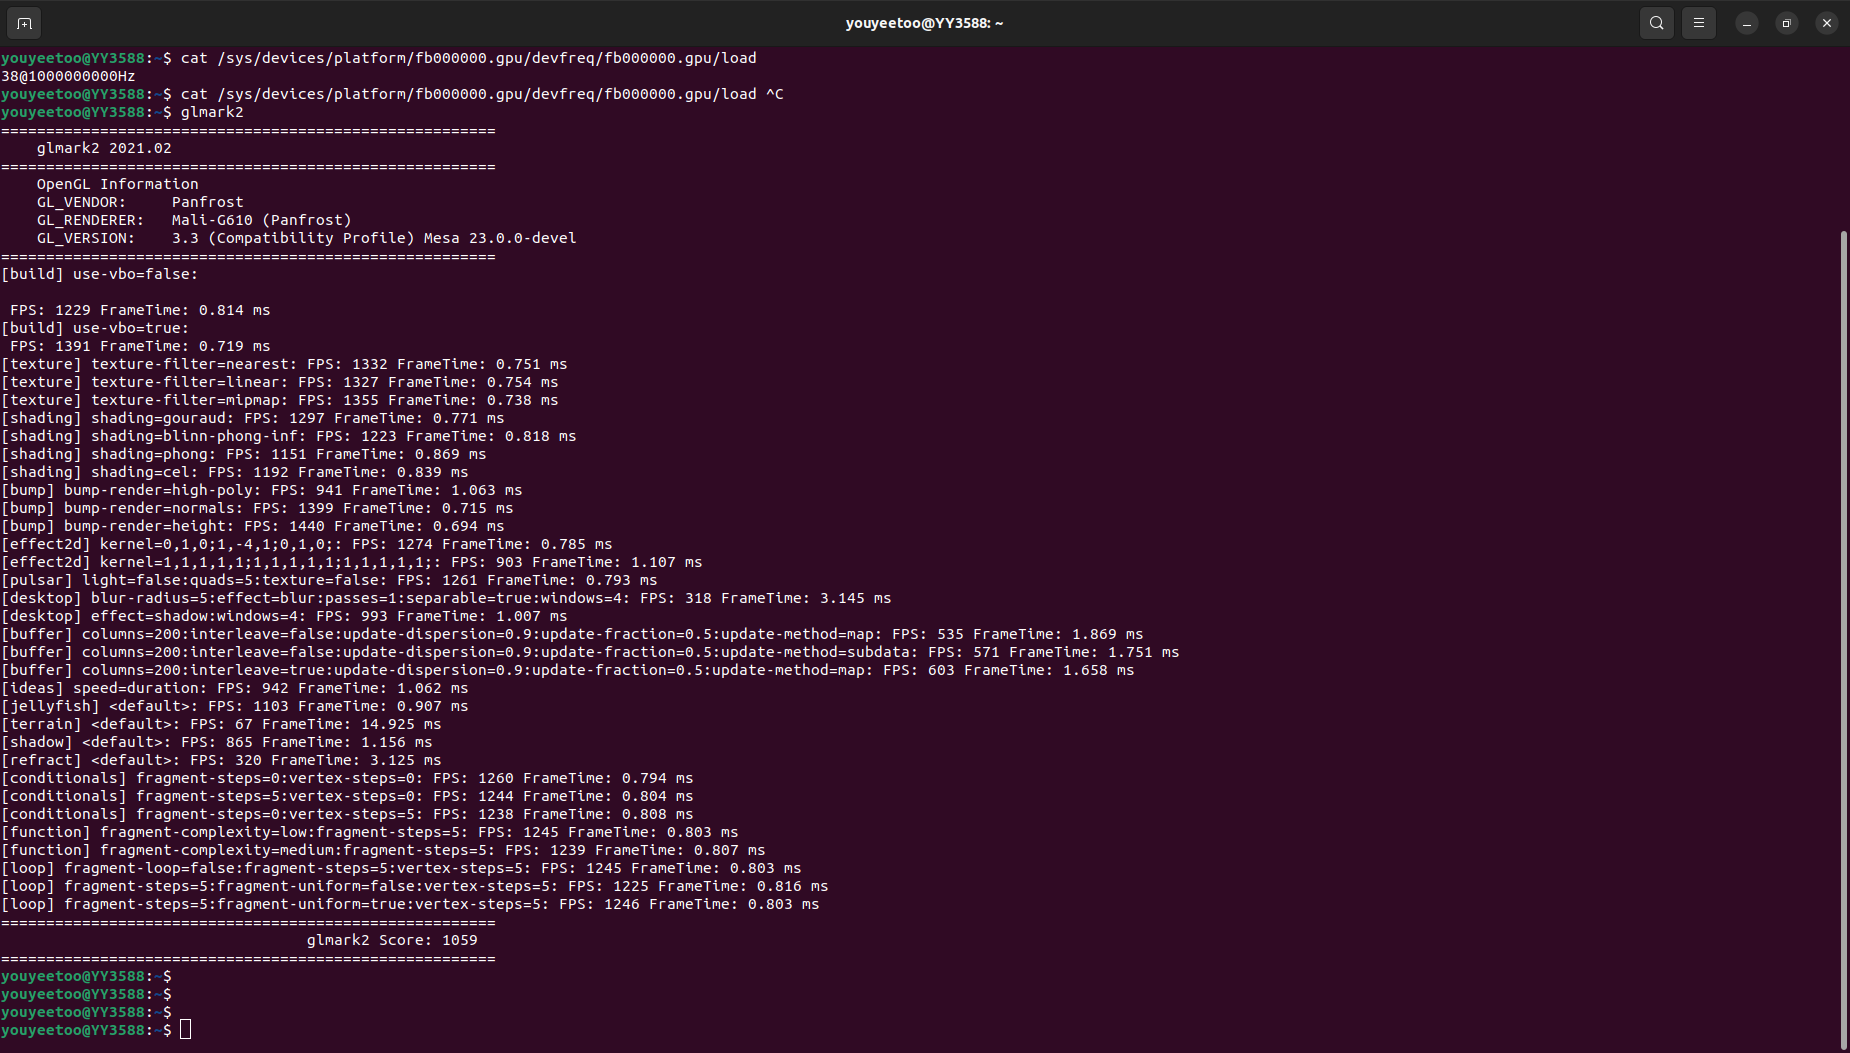
RK3588 integrates MALI G610 GPU. You can use the glmark2 graphics performance testing tool to test the GPU performance of RK3588.
Execute the following command on the shell terminal to test the performance of graphics engine, shaders, lighting, textures, and other aspects.
glmark2
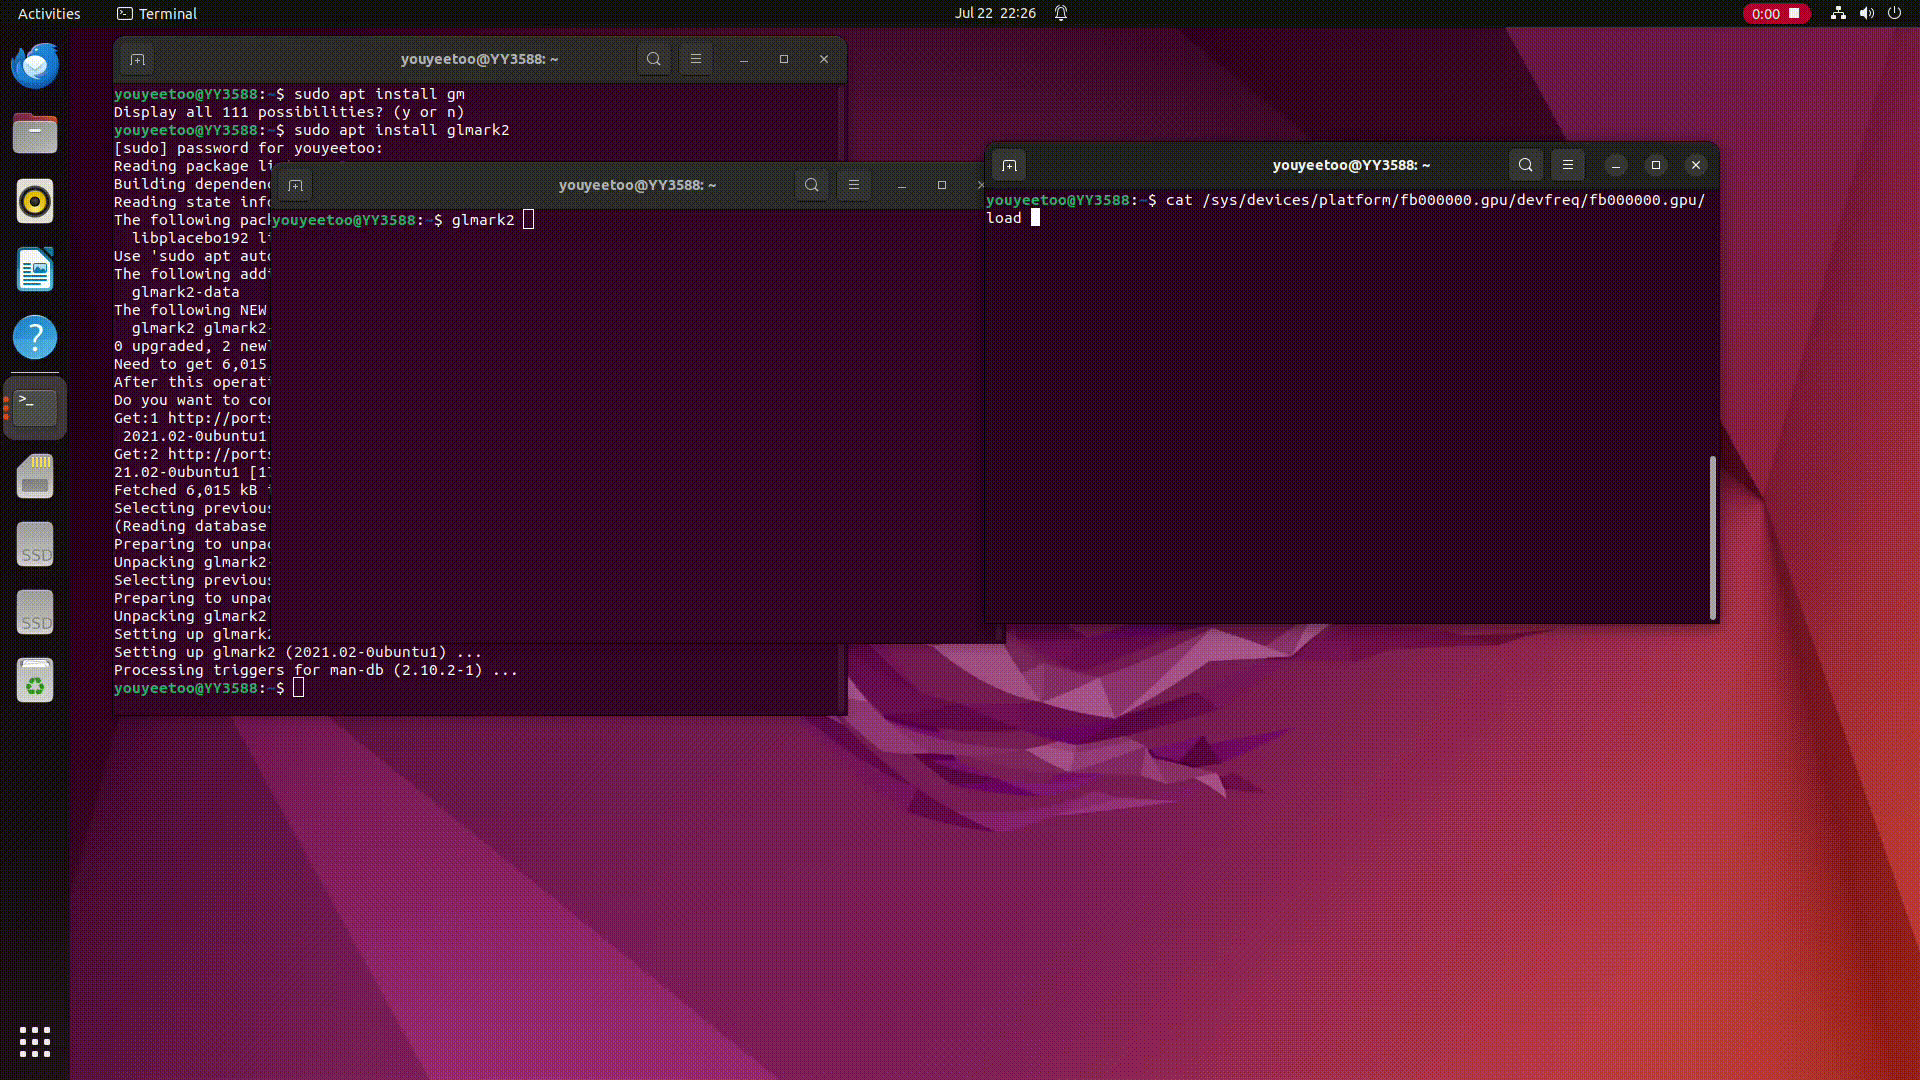
During the process of running glmark2, you can open another terminal and execute the following command to check GPU usage
cat /sys/devices/platform/fb000000.gpu/devfreq/fb000000.gpu/load
The actual glmark score is around 1059.
¶ Camera usage
The Linux camera driver adopts the v4l2 framework. The camera corresponds to two devices in user space, one for image or video capture and the other for metadata capture.
Before using a camera, it is necessary to know the corresponding nodes and supported camera parameters. The following introduces the process of using the camera.
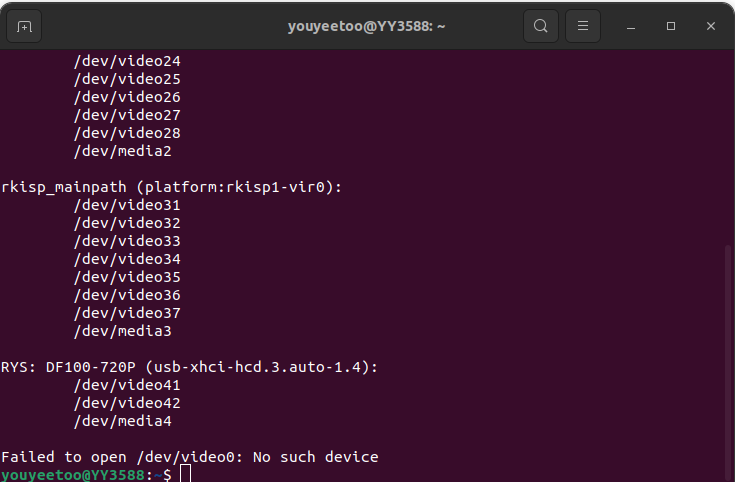
1、The first step is to identify the device nodes.
v4l2-ctl --list-devices
Find the keywords rkisp0-vir0 (corresponding to the CSI1 interface on the board) and rkisp1-vir0 (corresponding to the CSI2 interface on the board) among all the printed devices. Below them are the corresponding camera nodes.
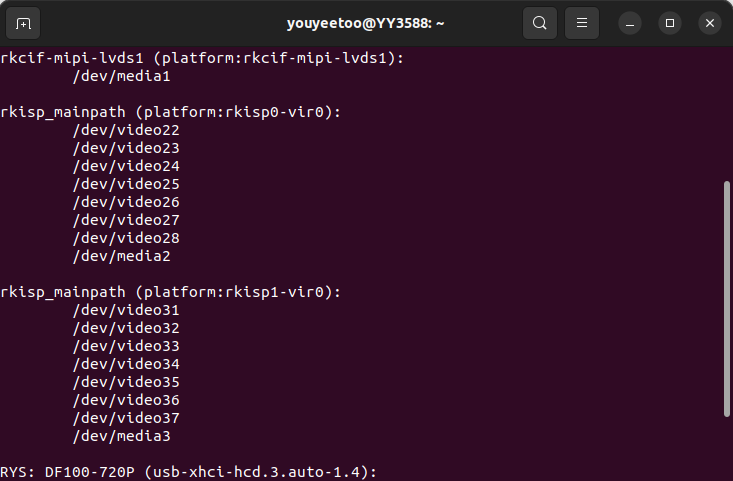
And displaying usb-xhci-hcd.3.auto-1.4 below indicates the USB camera node.
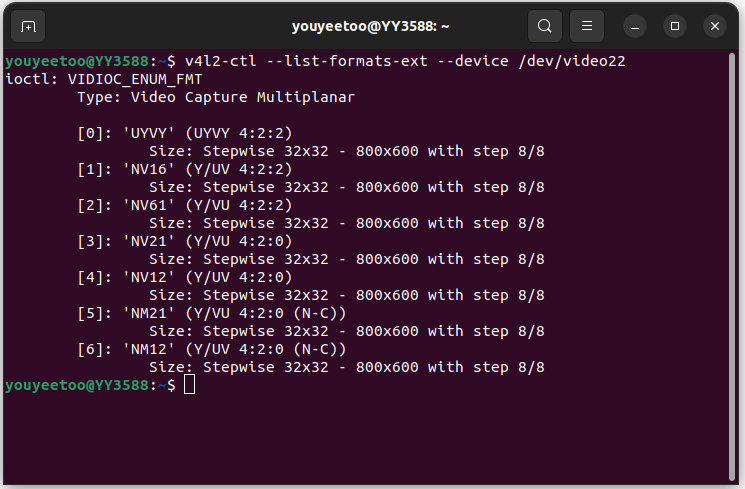
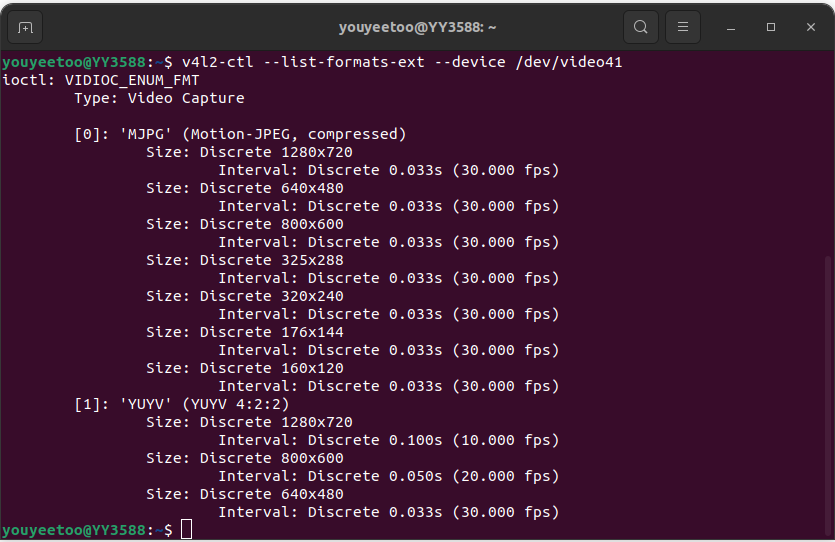
2、 Step 2, list the preview support formats for the specified device
# Check the supported formats of CSI1 camera
v4l2-ctl --list-formats-ext --device /dev/video22
# Check the supported formats of USB cameras
v4l2-ctl --list-formats-ext --device /dev/video41
3、Step three, capture frames. Taking the USb camera as an example, let's see the effect
# frame grabbing
v4l2-ctl -d /dev/video41 --set-fmt-video=width=1280,height=720,pixelformat=MJPG --stream-mmap --stream-to=/sdcard/out.jpg --stream-count=1
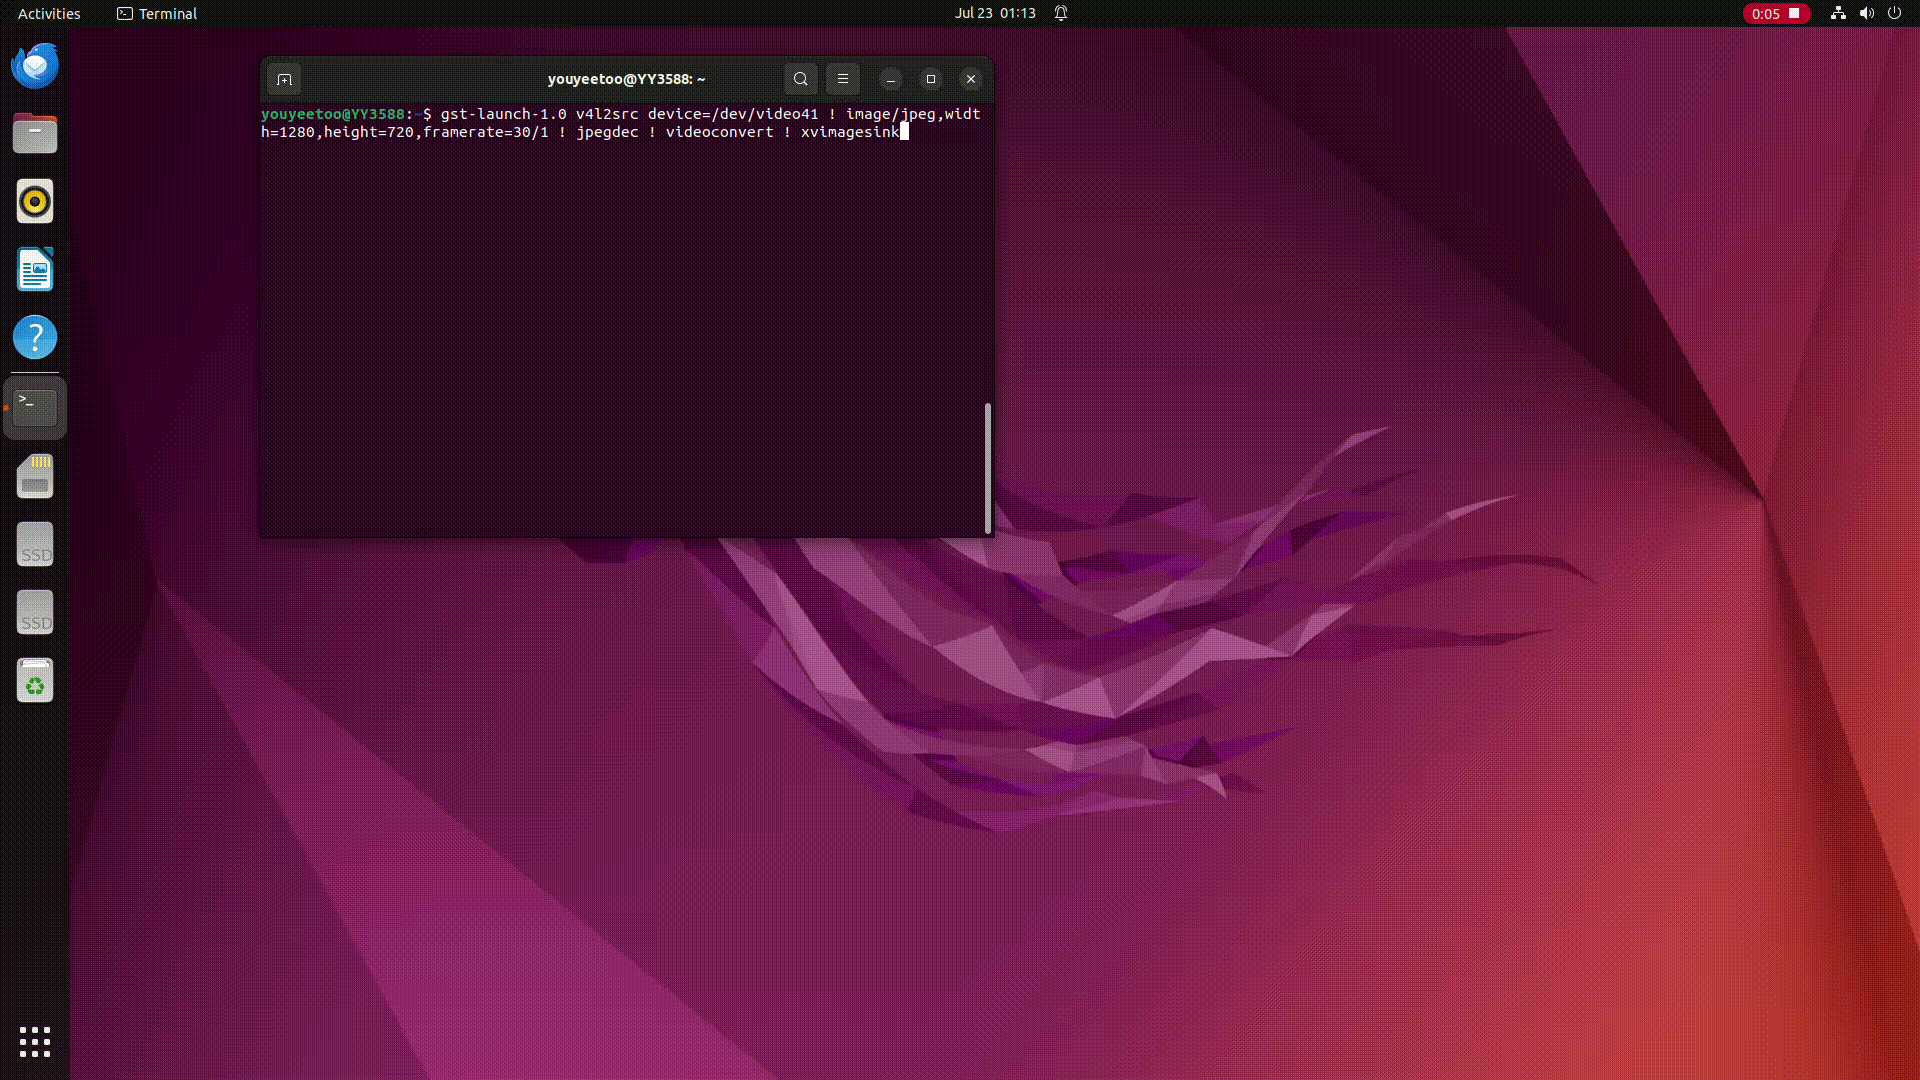
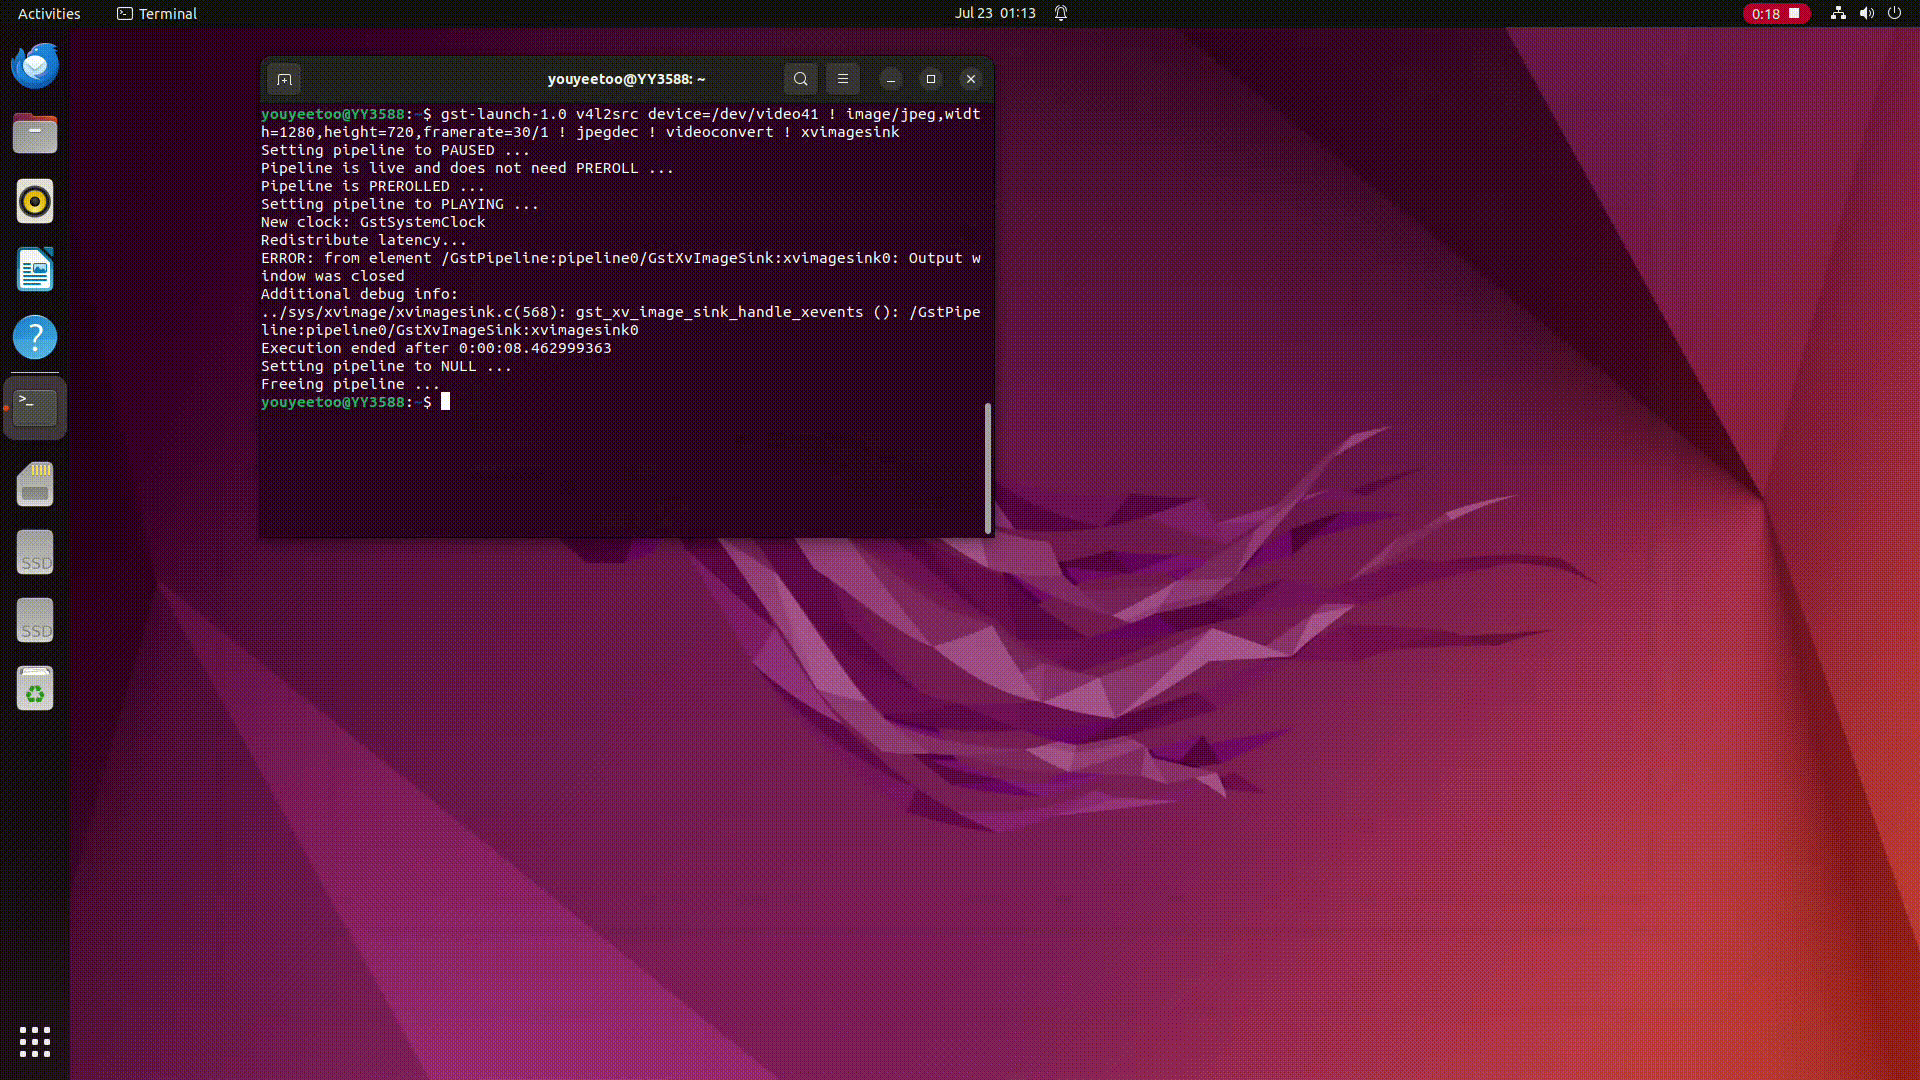
4、Step four, use gstreamer to play the camera image, taking a USB camera as an example.
# Display MJPG format, 1280* 720@30fps video
gst-launch-1.0 v4l2src device=/dev/video41 ! image/jpeg,width=1280,height=720,framerate=30/1 ! jpegdec ! videoconvert ! xvimagesink
# Display YUV format
gst-launch-1.0 v4l2src  device=/dev/video41 ! video/x-raw,format=YUY2,width=1280,height=720,framerate=10/1 ! videorate ! videoscale ! videoconvert ! xvimagesink
¶ Using ffmpeg
Ffmpeg is a very useful toolkit for processing audio and video. It is like a universal toolbox, covering a series of audio and video processing functions such as recording, conversion, streaming, etc. It supports massive audio and video formats such as AVI, MP4, MOV, FLV, WMV, MPEG, MKV, etc. Below is a brief introduction to the usage of ffmpeg for playing and converting video formats
- Play H264 raw data using ffplay. Ruixin Micro has stored some test video files in the OEM and UserData partitions.
ffplay /media/youyeetoo/userdata/200frames_count.h264
- Convert video format using ffmpeg
ffmpeg -f h264 -i /media/youyeetoo/userdata/200frames_count.h264 -vcodec copy output.mp4
ffplay output.mp4

¶ Docker Usage Tutorial
- Downloading the system image may fail due to network issues. It is recommended that readers download more times or add an accelerated image source.
sudo docker pull ubuntu
- Create a container based on the downloaded image. Note that the -- net parameter needs to be used to specify the network when creating a container, otherwise the container cannot be created.
sudo docker run -ti --net=host e149199029d1 /bin/bash
- After modifying the container, export the container to save the image
exit
docker export <Container ID> -o ubuntu.tar
- Create a container from a saved tar file
docker import ubuntu.tar ubuntu:laster