¶ Ubuntu GPIO Operation Guide
This document introduces how to use RK3588 GPIO from user space.
Hardware: YY3588 Development Board Firmware: yy3588_ubuntu22.04_linux6.1_release_v1.1_dsi0.img
¶ 1. GPIO Basics
¶ 1.1 RK3588 GPIO Numbering System
RK3588 GPIO uses the standard Linux GPIO numbering system.
¶ 1.1.1 Basic Structure
-
Each bank has 32 pins
-
Each bank is divided into 4 groups, each group has 8 pins
- Group A (PA): 0-7
- Group B (PB): 8-15
- Group C (PC): 16-23
- Group D (PD): 24-31
¶ 1.2 Pin Number Calculation Method
¶ 1.2.1 Calculation Formula
Linux GPIO Number = bank number × 32 + group offset
¶ 1.2.2 Group Offset Reference Table
In kernel/arch/include/dt-bindings/pinctrl/rockchip.h, offset definitions for each pin:
#define RK_PA0  0
#define RK_PA1  1
...
#define RK_PA7  7
#define RK_PB0  8
...
#define RK_PB7  15
#define RK_PC0  16
...
#define RK_PC7  23
#define RK_PD0  24
...
#define RK_PD7  31
¶ 1.2.3 Practical Calculation Examples
| Pin Name | Calculation Process | Linux GPIO Number |
|---|---|---|
| GPIO0_A0 | 32 × 0 + 0 = 0 | 0 |
| GPIO1_B5 | 32 × 1 + 13 = 45 | 45 |
| GPIO2_B2 | 32 × 2 + 10 = 74 | 74 |
| GPIO4_C5 | 32 × 4 + 21 = 149 | 149 |
| GPIO4_D7 | 32 × 4 + 31 = 159 | 159 |
¶ 1.3 Available GPIO Pins
GPIO pins actually available and routed to headers on YY3588 development board:
| Pin Name | Linux GPIO Number |
|---|---|
| GPIO4_C4 | 148 |
| GPIO4_C5 | 149 |
| GPIO2_B2 | 74 |
| GPIO0_B0 | 8 |
| GPIO2_B1 | 73 |
| GPIO2_C0 | 80 |
| GPIO4_C3 | 147 |
| GPIO0_C5 | 21 |
¶ 1.4 Pin Number Calculator Tool
In the package/scripts/00GPIO/ directory, there is a script named calculator_gpio.py for quick GPIO number calculation.
¶ Usage
Pass pins to calculate as parameters, separated by spaces. Parameters can use full names or abbreviations, case-insensitive:
python calculator_gpio.py GPIO1_A1 1_A1 2A1 GPIO0_B0
Output:
GPIO1_A1             -> bank=1, offset= 1, Linux GPIO number = 33
1_A1                 -> bank=1, offset= 1, Linux GPIO number = 33
2A1                  -> bank=2, offset= 1, Linux GPIO number = 65
GPIO0_B0             -> bank=0, offset= 8, Linux GPIO number = 8
In ADB environment without Python, you can use calculator_gpio.sh for calculation, usage is the same as calculator_gpio.py.
./calculator_gpio.sh GPIO1_A1 1_A1 2A1 GPIO0_B0
¶ 2. User Space GPIO Control
¶ 2.1 Use Cases
Mainly for quick GPIO functionality verification, or scenarios requiring shell script integration, without third-party dependencies. For testing convenience, GPIO operations have been written as scripts.
¶ 2.2 Script Operations
¶ 2.2.1 Script List
| Script Name | Function Description |
|---|---|
export.sh |
Export GPIO pin to user space |
unexport.sh |
Release GPIO pin |
get.sh |
Query GPIO current state |
set.sh |
Set GPIO direction and level |
blink.sh |
Periodically toggle GPIO level (LED blink) |
tests.sh |
Automated testing of all GPIO functions |
¶ 2.2.2 Hardware and Connections
This document uses LED modules to test GPIO functionality. The module requires three wires: VCC, GND, and IN input control pin. When IN is high, LED lights up; when low, LED turns off.
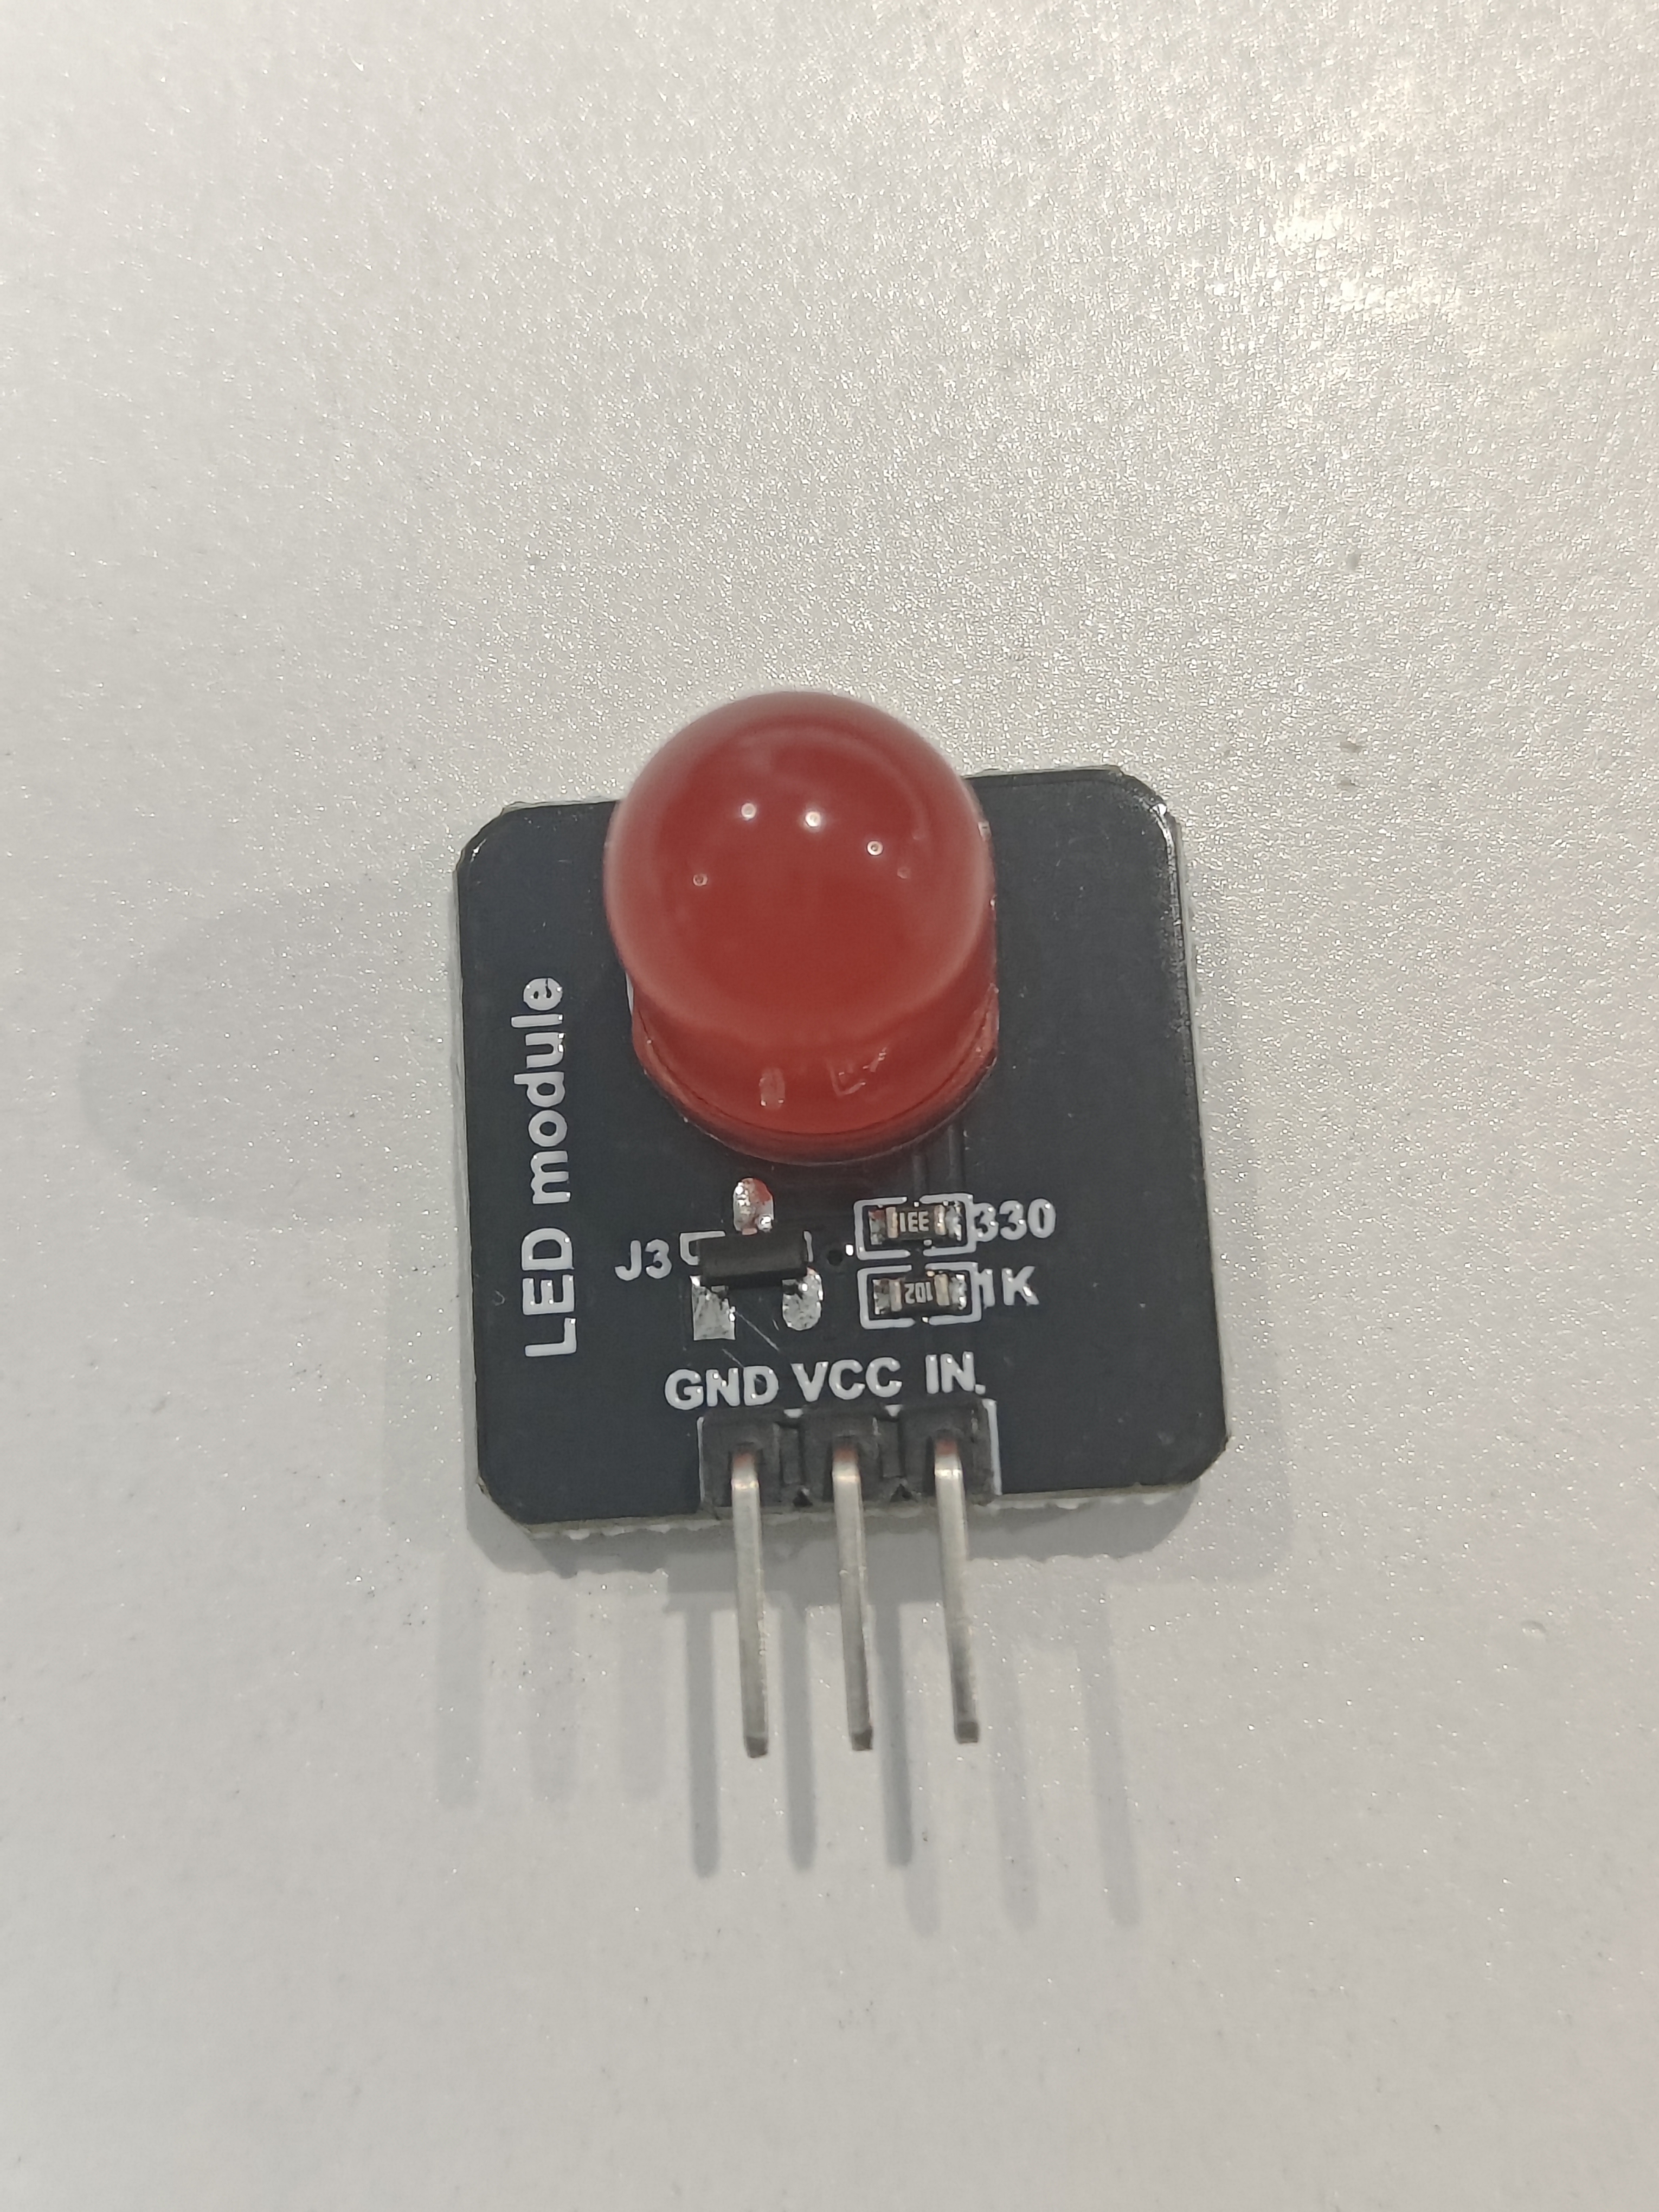
| Development Board | LED |
|---|---|
| VCC3V3_SYS | VCC |
| GND | GND |
| GPIO4_C5 | IN |
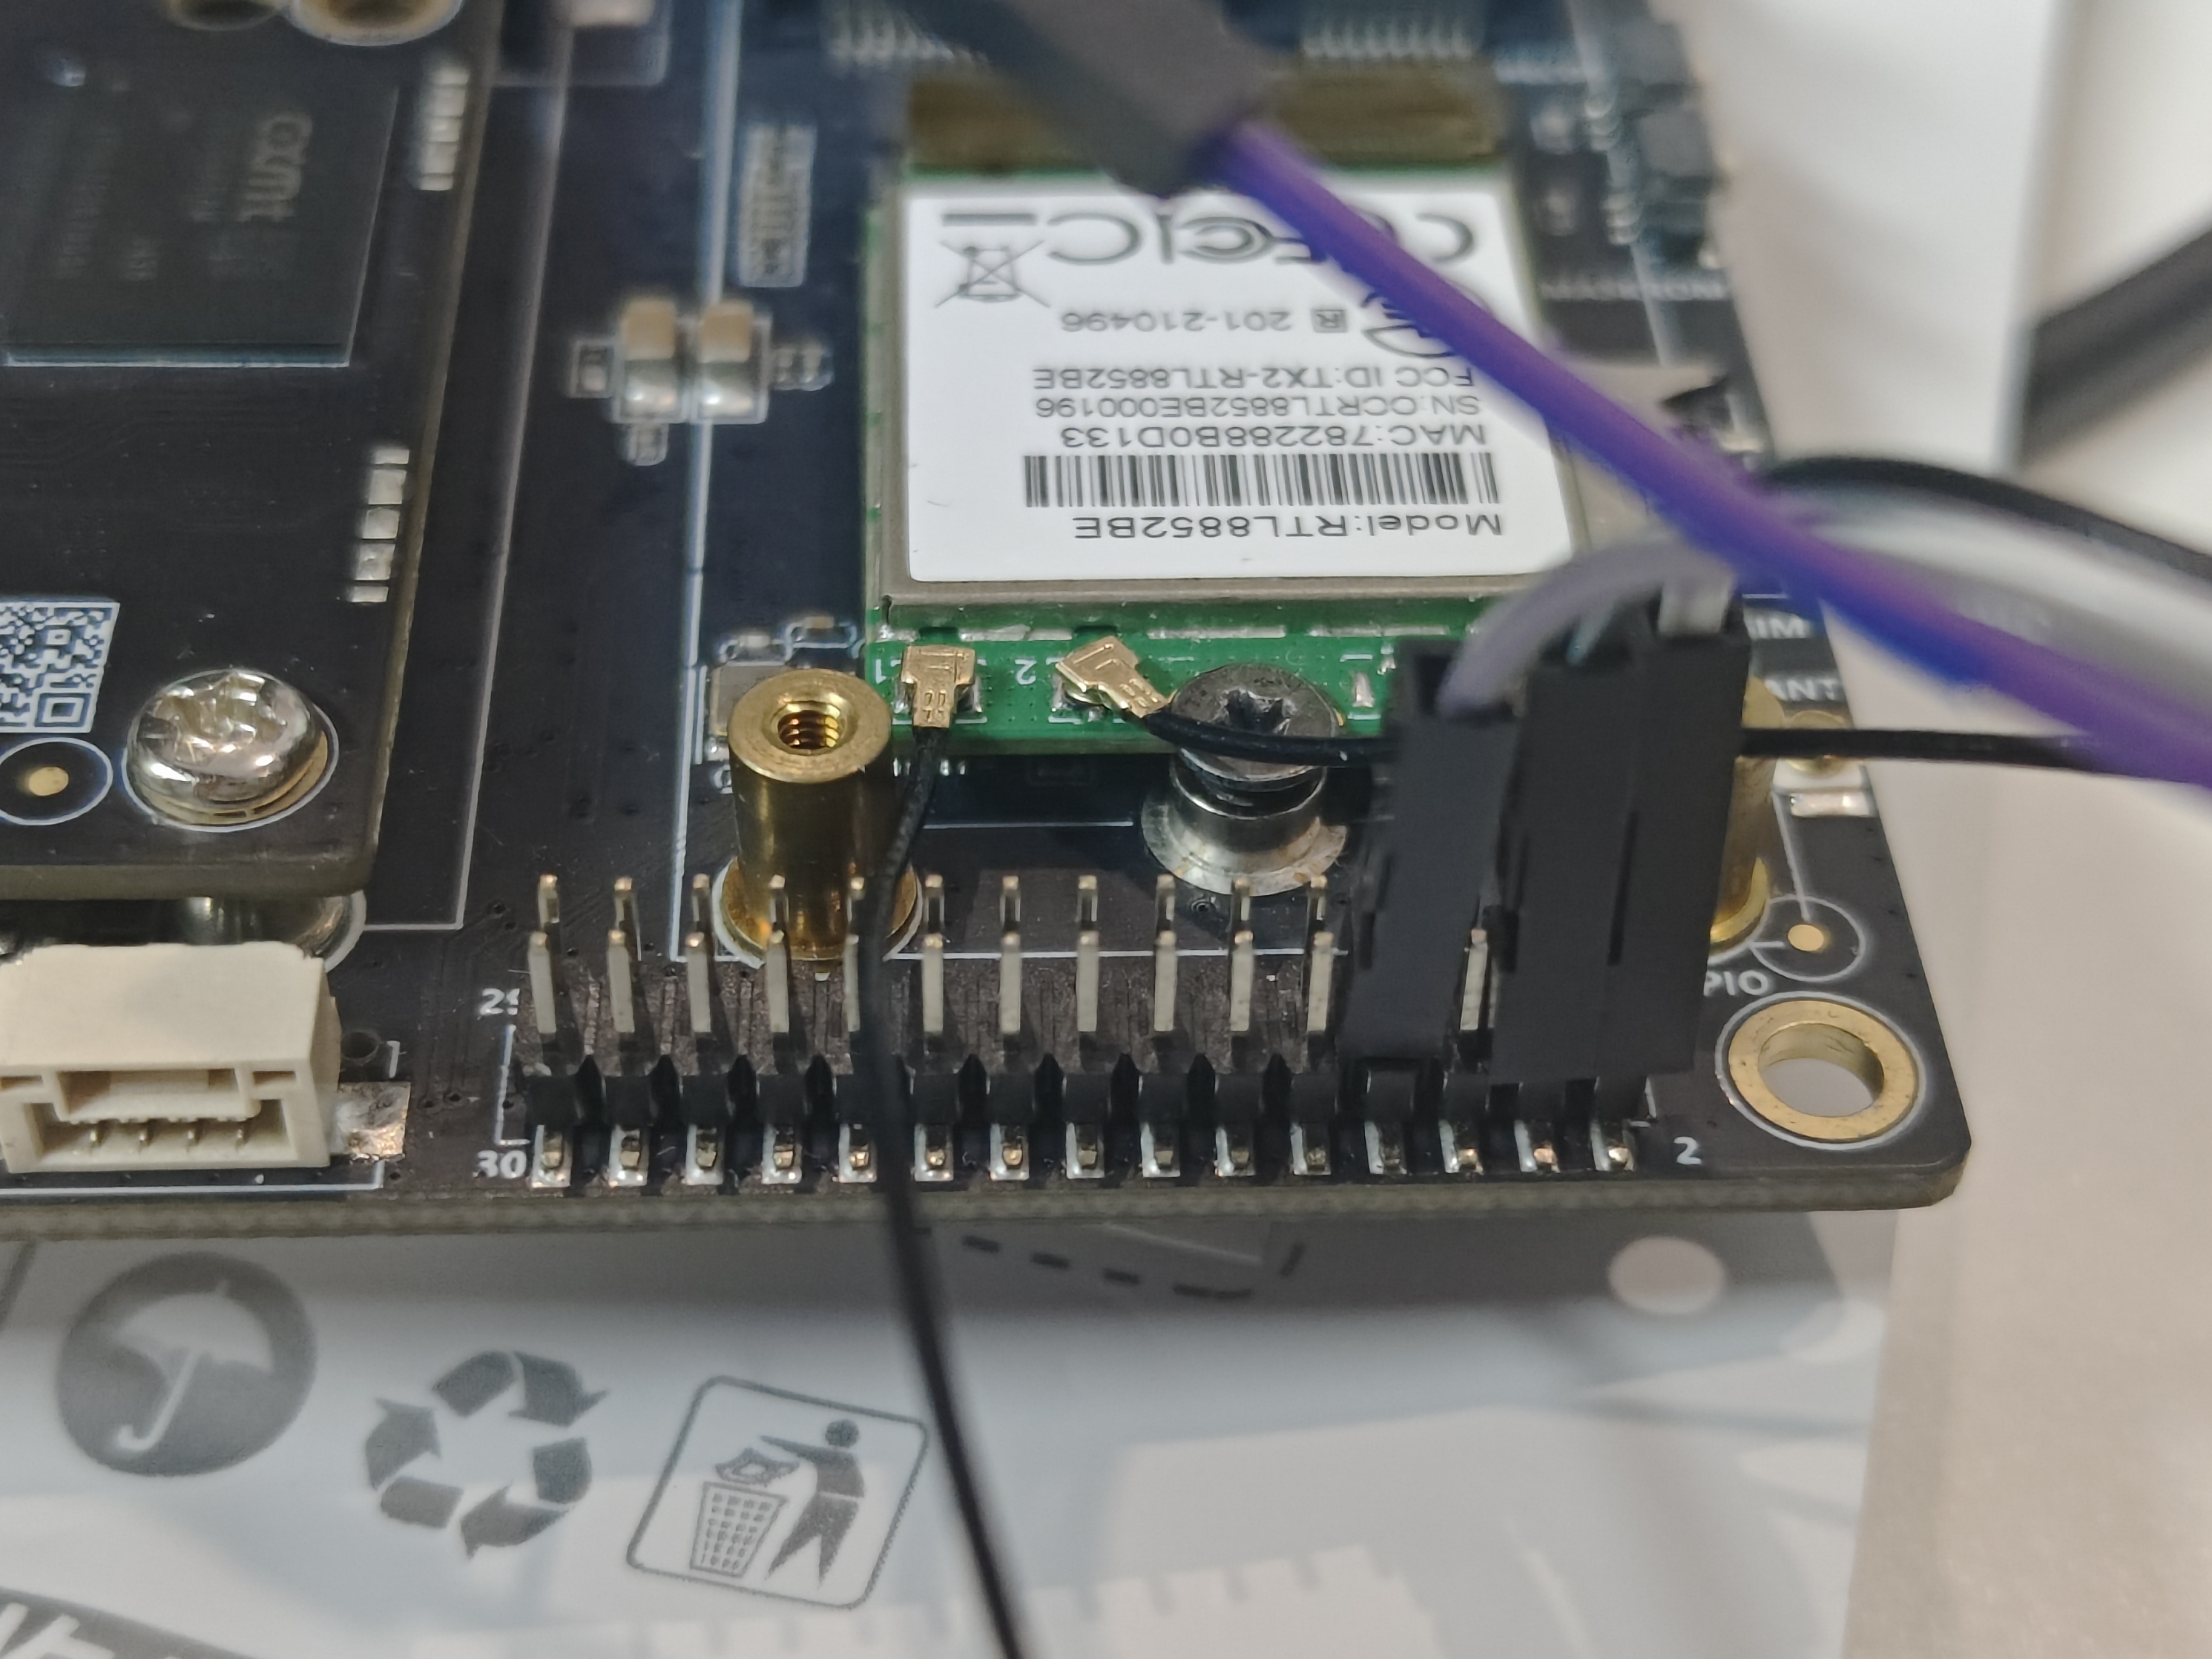
Pin positions can be determined according to silkscreen on the board and Hardware Interface Diagram. This document uses VCC3V3_SYS, GND, GPIO4_C5 corresponding to pins 2, 4, 8 of the 30-pin header. Wiring diagram is shown below:
¶ 2.2.3 Upload Scripts to Development Board via ADB
Connect the development board to PC, open PC Command Prompt or PowerShell, then use ADB command to upload scripts to development board. D:\package\scripts\00GPIO\adb below is the script directory on PC, replace with your actual path. /home/youyeetoo/adb is the adb directory on development board, modify according to actual situation:
adb devices # Check device connection
adb push D:\package\scripts\00GPIO\adb /home/youyeetoo # Upload
adb shell # Enter development board shell
cd /home/youyeetoo/adb # Switch to upload directory
chmod a+x *.sh # Add execute permission to all scripts
Here the author directly uploaded the script directory:
PS C:\Users\youyeetoo> adb devices
List of devices attached
52d4c5b82df38192        device

PS C:\Users\youyeetoo> adb push D:\package\scripts /home/youyeetoo
D:\package\scripts\: 10 files pushed, 0 skipped. 4.8 MB/s (37482 bytes in 0.007s)

PS C:\Users\youyeetoo> adb shell
root@YY3588:/# cd /home/youyeetoo/scripts/00GPIO/adb/
root@YY3588:/home/youyeetoo/scripts/00GPIO/adb# chmod a+x *.sh
root@YY3588:/home/youyeetoo/scripts/00GPIO/adb#
¶ 2.2.4 Using Scripts in Ubuntu System
Scripts uploaded via ADB are only visible in ADB. When using scripts in Ubuntu system, upload via other methods such as USB drive or network transfer. Linux-specific scripts are in the package/scripts/00GPIO/linux directory. Running in Ubuntu system requires root privileges, while ADB already has root privileges, so scripts are slightly different. After uploading scripts, grant execute permissions following the previous process. Other operations are consistent with ADB operations.
¶ 2.2.5 Script Usage Methods
The following script executions are performed in ADB's /home/youyeetoo/scripts/00GPIO/adb directory. All scripts will print usage instructions when run without parameters. For example, export.sh script, running ./export.sh without parameters will output:
root@YY3588:/home/youyeetoo/scripts/00GPIO/adb# ./export.sh
Usage: ./export.sh <gpio_number>
Example: ./export.sh 149
- Export GPIO
Use the following command to export GPIO pin number 149 (GPIO4_C5).
root@YY3588:/home/youyeetoo/scripts/00GPIO/adb# ./export.sh 149
GPIO149 exported successfully
path: /sys/class/gpio/gpio149
- Get GPIO Direction and Level
You can use get.sh script to query the status of a pin. This script first checks if the corresponding pin is exported to user space. If not exported, it prompts the user to export first, otherwise it prints pin information including direction and level.
root@YY3588:/home/youyeetoo/scripts/00GPIO/adb# ./get.sh 149
GPIO149 is exported
-----------------------------------
Direction: in
Value:     0 (LOW)
-----------------------------------
Path: /sys/class/gpio/gpio149
- Set GPIO Direction and Level
set.sh script is used to set GPIO pin direction and level, requiring three parameters: pin number, direction (in/out), and level (0/1). For example, set 149 to output high (HIGH):
root@YY3588:/home/youyeetoo/scripts/00GPIO/adb# ./set.sh 149 out 1
GPIO149 direction set to: out
GPIO149 value set to: 1 (HIGH)
-----------------------------------
Current status:
GPIO149 is exported
-----------------------------------
Direction: out
Value:     1 (HIGH)
-----------------------------------
Path: /sys/class/gpio/gpio149
- Release GPIO
unexport.sh script is used to release GPIO pin, requiring one parameter: pin number. Before releasing, the pin is set to input low level. For example, release 149:
root@YY3588:/home/youyeetoo/scripts/00GPIO/adb# ./unexport.sh 149
Preparing GPIO149 for unexport...
Set to output LOW
Set to input mode
GPIO149 unexported successfully
- Test GPIO Functionality
tests.sh script is used for automated testing of all GPIO functions, including export, setting direction and level, querying status, release, etc., and outputs test results. Used to test if a pin works properly. This script tests import and export functions. It's best to release the pin before testing. Below is testing pin 149 functionality:
root@YY3588:/home/youyeetoo/scripts/00GPIO/adb# ./tests.sh 149
================================
GPIO FUNCTIONALITY TEST
================================
GPIO Number: 149
Test Time: 2026-01-28 10:52:25
================================

[TEST 1] Check initial GPIO state
-----------------------------------
GPIO149 is not exported
To export: ./export.sh 149
GPIO149 is not exported initially
✓ PASSED

[TEST 2] Export GPIO149
-----------------------------------
GPIO149 exported successfully
path: /sys/class/gpio/gpio149
✓ PASSED

[TEST 3] Verify GPIO state after export
-----------------------------------
GPIO149 is exported
-----------------------------------
Direction: in
Value:     0 (LOW)
-----------------------------------
Path: /sys/class/gpio/gpio149
✓ PASSED

[TEST 4] Set GPIO149 to output HIGH
-----------------------------------
GPIO149 direction set to: out
GPIO149 value set to: 1 (HIGH)
-----------------------------------
Current status:
GPIO149 is exported
-----------------------------------
Direction: out
Value:     1 (HIGH)
-----------------------------------
Path: /sys/class/gpio/gpio149
✓ PASSED

[TEST 5] Verify GPIO149 is output HIGH
-----------------------------------
GPIO149 is exported
-----------------------------------
Direction: out
Value:     1 (HIGH)
-----------------------------------
Path: /sys/class/gpio/gpio149
✓ PASSED

[TEST 6] Set GPIO149 to output LOW
-----------------------------------
GPIO149 direction set to: out
GPIO149 value set to: 0 (LOW)
-----------------------------------
Current status:
GPIO149 is exported
-----------------------------------
Direction: out
Value:     0 (LOW)
-----------------------------------
Path: /sys/class/gpio/gpio149
✓ PASSED

[TEST 7] Verify GPIO149 is output LOW
-----------------------------------
GPIO149 is exported
-----------------------------------
Direction: out
Value:     0 (LOW)
-----------------------------------
Path: /sys/class/gpio/gpio149
✓ PASSED

[TEST 8] Set GPIO149 to input mode
-----------------------------------
GPIO149 direction set to: in
-----------------------------------
Current status:
GPIO149 is exported
-----------------------------------
Direction: in
Value:     0 (LOW)
-----------------------------------
Path: /sys/class/gpio/gpio149
✓ PASSED

[TEST 9] Verify GPIO149 is in input mode
-----------------------------------
GPIO149 is exported
-----------------------------------
Direction: in
Value:     0 (LOW)
-----------------------------------
Path: /sys/class/gpio/gpio149
✓ PASSED

[TEST 10] Unexport GPIO149
-----------------------------------
Preparing GPIO149 for unexport...
Set to output LOW
Set to input mode
GPIO149 unexported successfully
✓ PASSED

[TEST 11] Verify GPIO149 is unexported
-----------------------------------
GPIO149 is not exported
To export: ./export.sh 149
✓ PASSED

================================
TEST REPORT
================================
GPIO Number: 149
Test Time: 2026-01-28 10:52:25
-----------------------------------
Total Tests: 11
Passed: 11
Failed: 0
-----------------------------------
Result: ALL TESTS PASSED ✓
================================
- LED Blink Function
blink.sh is used to control GPIO to blink LED. Parameters are GPIO number, blink interval (milliseconds), and blink count. For example: 149, blink interval 1000ms, blink count 10 times:
root@YY3588:/home/youyeetoo/scripts/00GPIO/adb# ./blink.sh 149 1000 10
================================
GPIO BLINK TEST
================================
GPIO Number: 149
Interval: 1000ms (1.000s)
Mode: Blink 10 times
================================

GPIO149 is not exported, exporting now...
GPIO149 exported successfully
Setting GPIO149 to output mode...
GPIO149 is now in output mode

Starting blink (HIGH -> LOW -> HIGH -> ...)...
Press Ctrl+C to stop

[10:58:36] Blink #1: GPIO149 = HIGH (1)
[10:58:37] Blink #2: GPIO149 = LOW (0)
[10:58:38] Blink #3: GPIO149 = HIGH (1)
[10:58:39] Blink #4: GPIO149 = LOW (0)
[10:58:40] Blink #5: GPIO149 = HIGH (1)
[10:58:41] Blink #6: GPIO149 = LOW (0)
[10:58:42] Blink #7: GPIO149 = HIGH (1)
[10:58:43] Blink #8: GPIO149 = LOW (0)
[10:58:44] Blink #9: GPIO149 = HIGH (1)
[10:58:45] Blink #10: GPIO149 = LOW (0)

Completed 10 blinks

Stopping blink...
Setting GPIO149 to input mode...
GPIO149 set to input mode
Blink stopped.
Special note: To prevent users from setting blink time too small, causing too fast blinking or parameter passing errors, the script will not execute when detecting blink time is too small. If you really need to test GPIO performance in short time, add --certain parameter after the command, for example: ./blink.sh 149 20 10 --certain. Additionally, blink parameter can be passed as 0, indicating infinite loop blinking. For example, loop blink once per second: ./blink.sh 149 1000 0. You can use Ctrl+C to stop blinking.
¶ 3. Principle Explanation
The essence of this GPIO operation method is through the interface reserved by Rockchip. Executing the export.sh script essentially writes the GPIO number to the sys/class/gpio/export file, for example:
echo 149 > /sys/class/gpio/export
This exports GPIO149 as user space accessible GPIO. Other operations such as setting direction, setting level, etc., are all implemented by writing files in the sys/class/gpio/gpio149 directory. Scripts essentially encapsulate operations, simplifying the operation process.
- Export GPIO
echo 149 > /sys/class/gpio/export
- Set Direction (Input/Output)
echo in > /sys/class/gpio/gpio149/direction   # Set as input
echo out > /sys/class/gpio/gpio149/direction  # Set as output
- Read Direction
cat /sys/class/gpio/gpio149/direction
- Set Level (Output Mode)
echo 1 > /sys/class/gpio/gpio149/value  # High level
echo 0 > /sys/class/gpio/gpio149/value  # Low level
- Read Level
cat /sys/class/gpio/gpio149/value
- Release GPIO
echo 149 > /sys/class/gpio/unexport