¶ UART serial port development(Linux)
1. Hardware interface diagram
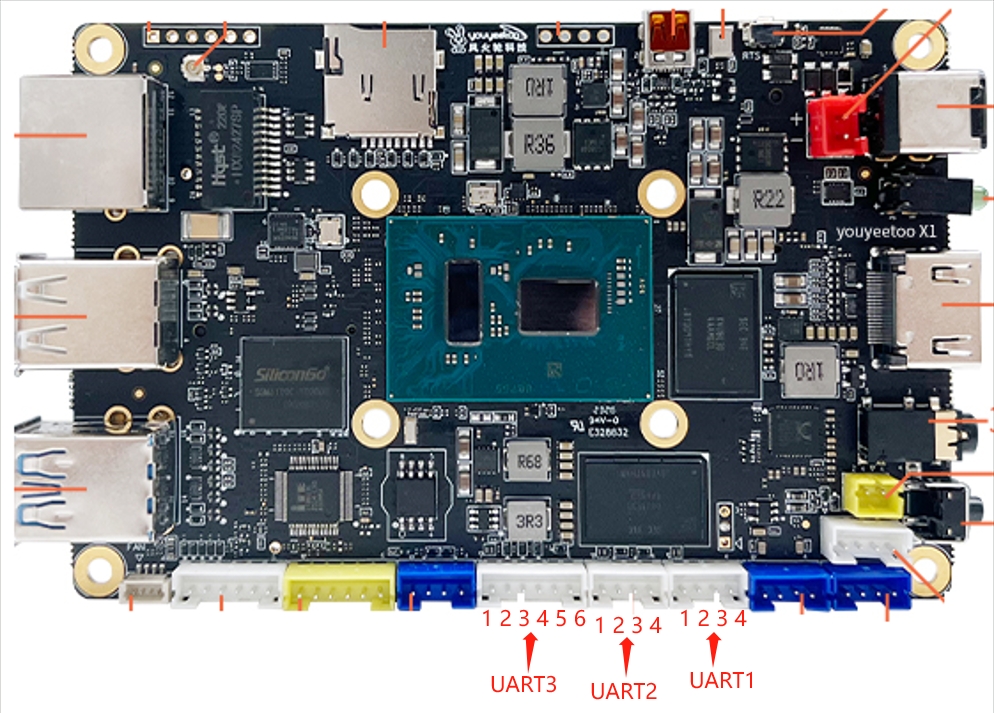
UART1 interface description :
| Serial Number | Description | Remarks |
|---|---|---|
| 1 | VCC | Output voltage 3.3V |
| 2 | TXD | Sending data TTL level |
| 3 | RXD | Receive data TTL level |
| 4 | GND | Power reference ground |
UART2 interface description :
| Serial Number | Description | Remarks |
|---|---|---|
| 1 | VCC | Output voltage 3.3V |
| 2 | TXD | Sending data TTL level |
| 3 | RXD | Receive data TTL level |
| 4 | GND | Power reference ground |
UART3 interface description :
| Serial Number | Description | Remarks |
|---|---|---|
| 1 | VCC | Output voltage 3.3V |
| 2 | TXD | Sending data TTL level |
| 3 | RXD | Receive data TTL level |
| 4 | RTS | Flow control: It is an output signal used to indicate that the device is ready to receive data. Low level is effective, and low level indicates that the device can receive data |
| 5 | CTS | Flow control: It is an input signal used to determine whether data can be sent to the other party. Low level is effective, and low level indicates that the device can send data to the other party |
| 6 | GND | Power reference ground |
Note: X1 BIOS automatically allocates serial port resources incorrectly, causing UART to not align with the COM port in Windows/LINUX systems. The Ubuntu system serial port test I installed is as follows:
UART1->/dev/ttyS4
UART2->/dev/ttyS5
UART3->/dev/ttyS0
Note ! ! ! X1 will scan UART1 when powered on. X1 will scan UART1 when powered on. UART1 connection will cause X1 not to power on. If you want to use UART1, please power on and enter the system before connecting UART1.
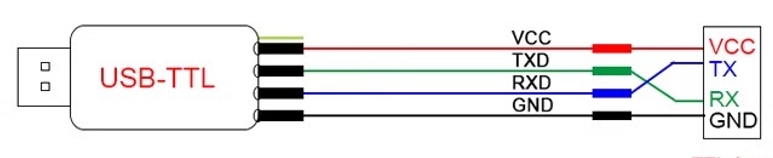
Reminder: When connecting UART serial port and peripheral devices, RX and TX need to be cross wired, as shown in the figure:
2. Viewing Serial Ports under Linux
Enter the following command to see which serial ports are available
sudo dmesg | grep ttyS*
youyeetoo@youyeetoo-X1-SBC:~$ dmesg | grep ttyS*
[    0.133809] printk: console [tty0] enabled
[    0.415795] 00:01: ttyS0 at I/O 0x3f8 (irq = 4, base_baud = 115200) is a 16550A
[    0.437960] 00:08: ttyS4 at MMIO 0xfe034000 (irq = 21, base_baud = 115200) is a U6_16550A
[    0.460004] 00:09: ttyS5 at MMIO 0xfe036000 (irq = 34, base_baud = 115200) is a U6_16550A
[    3.112368] dw-apb-uart.5: ttyS6 at MMIO 0x4010005000 (irq = 20, base_baud = 7500000) is a 16550A
3. Install and use the serial port testing tool cutecom
Cutecom is an open source tool. If you are interested, please check the source page:https://gitlab.com/cutecom/cutecom
The following is the installation and testing of the application. Please note that it must be run with sudo or root privileges
#install
sudo apt -y install cutecom

#Run Cutecom
sudo cutecom
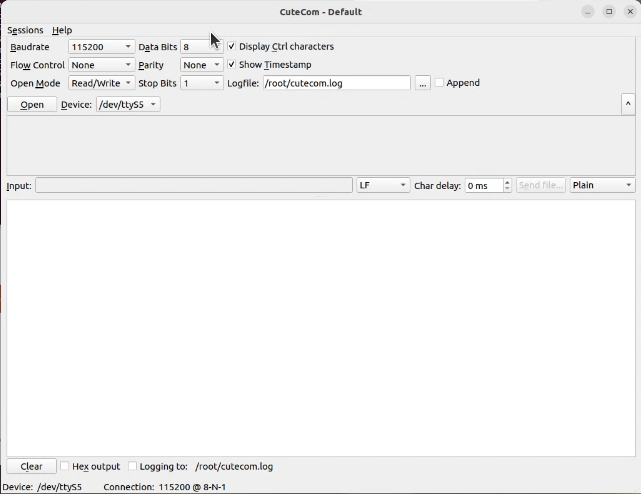
Cutecom is introduced as follows:
Open: Open UART
Device: Select the UART that needs to be opened
Settings: Configure UART parameters, such as baud rate, data bits, etc
Input ": It refers to the input area that needs to be sent. After input, a carriage return is required to send it out

Click "Settings" to enter the configuration serial interface and configure as needed
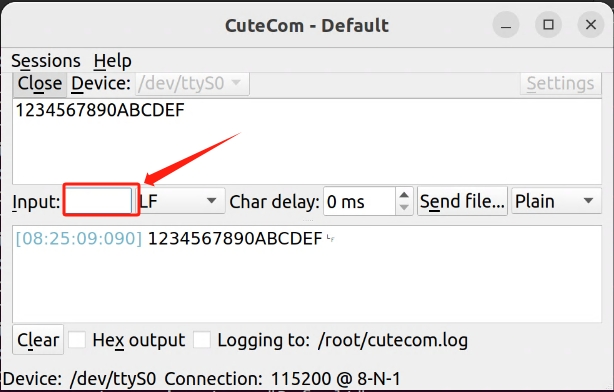
UART3 loop back test: First, short circuit the RX and TX of UART3,
Test UART3 (corresponding device name:/dev/ttyS0)
Enter "1234567890ABCDEF" in "Input" and press Enter. The serial port is sent out through TX and received from RX to complete the loopback test