¶ Onboard NFC development and testing
1、 Hardware interface description:
The NFC chip ST25DV04K on the motherboard is controlled through the I2C4 of the CPU. The circuit diagram is as follows:

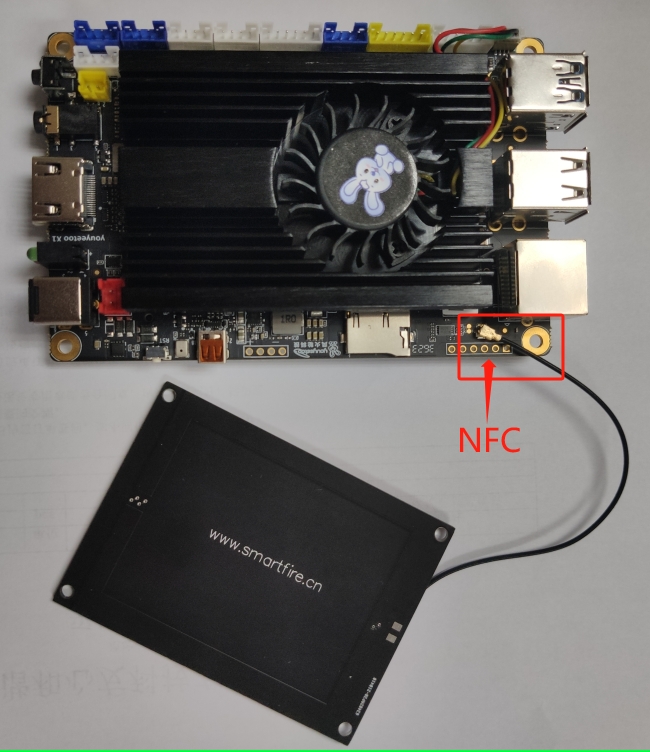
The use of onboard NFC function requires an external antenna, as shown in the wiring diagram

2、 Download and install testing software
Test software download:
Execution File
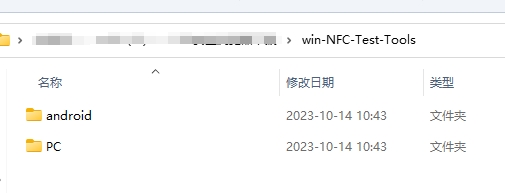
After downloading and testing the software decompression, there are two folders inside: Android and PC

Explanation:
The Android folder contains supporting apps that need to be installed on NFC enabled phones
The PC folder contains testing software used on the development board under Windows
Download of testing software source code:
Source Code
Android App Source Code
3、 Testing NFC functionality
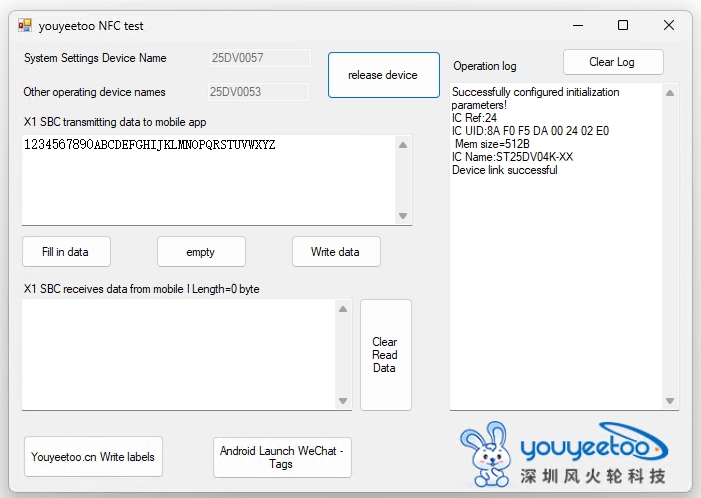
3.1 We provide a C # sample program to demonstrate NFC read and write testing. Run the downloaded test program St25Dv Test.exe on the development board Windows system as shown in the figure

Operation process:
- Connect devices first
- Action:
X1 SBC data transmission area to mobile APP: Development version NFC chip sends data to APP
X1 SBC receives data area from mobile NFC: reads data from mobile NFC based on interrupt.
Write tags: Fenghuolun official website ": Use NDEF to write www.youyeetoo.cn into the chip for labeling
Write tag: Start WeChat ": Write the WeChat activation method into the tag. This way, the Android NFC phone can scan and start WeChat
3.2 Test program NFC2023v1.1 for installing and downloading on Android phones_ 20230927_ Debug.apk
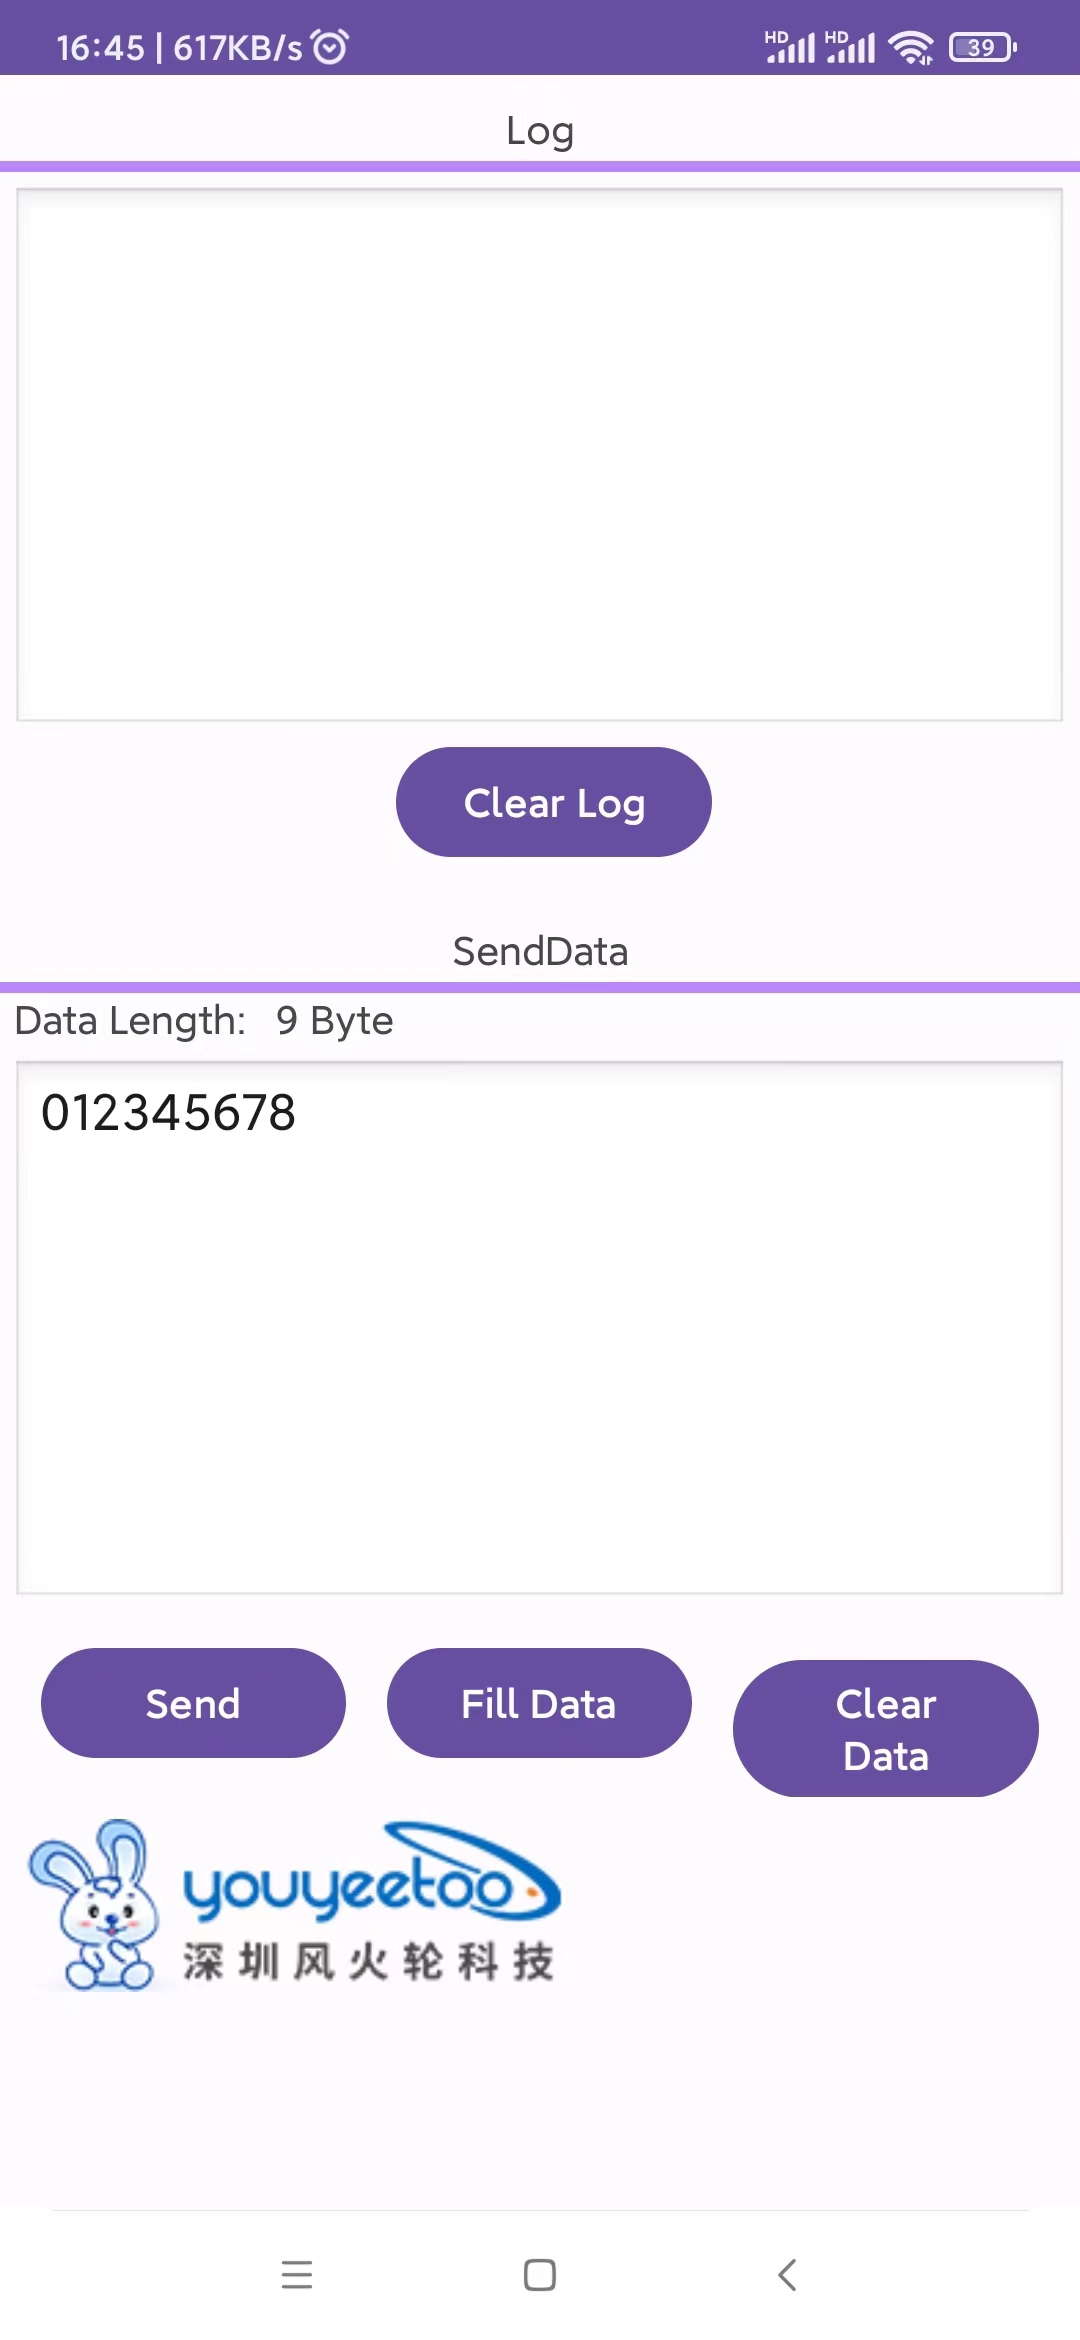
Taking Android phones as an example, as shown in the figure: Testing NFC using Android APP

The upper part: mainly consists of logs,
Part 2: Mobile phones transmit data to X1 SBC development version through NFC
4、 Extended knowledge reference (these have been integrated into BIOS and Win systems and do not require hands-on operation)
The following is an introduction to how to add NFC devices and configure drivers to the development board. These processes are completed by default at the factory and do not require any action. They can be used as a reference for deep secondary development
4.1 Adding MFC Devices to BIOS
Adding method: Please refer to the following section of the "Windows Driver Development" description. Here, only the ASL code that needs to be added is indicated. The key information is annotated in Chinese and modified according to the actual hardware. It should be emphasized that Chinese cannot appear in the formal ASL code, and the Chinese annotations should be removed or replaced with English annotations
Because ST25DV04K has two device addresses, two devices have been added here
I2C address: 0X53 allows access to user memory, dynamic registers, or FTM mailbox (fast transfer)
I2C address: 0X57 allows access to static registers (system), as well as setting I2C access passwords, user memory partitions, etc
Scope (_SB.PC00.I2C4)
{
    Device (NFC0)
    {
        Name (_ADR, Zero)  // _ADR: Address
        Name (_HID, "25DV0053")  // _HID: Hardware ID
        Name (_CID, "25DV0053")  // _CID: Compatible ID
        Name (_S0W, Zero)  // _S0W: S0 Device Wake State
        Name (_UID, One)  // _UID: Unique ID
        Method (_STA, 0, NotSerialized)  // _STA: Status
        {
            Return (0x0F)
        }

        Name (SBFB, ResourceTemplate ()
        {
            I2cSerialBusV2 (0x0053, ControllerInitiated, 0x00061A80,
                AddressingMode7Bit, "\\_SB.PC00.I2C4",
                0x00, ResourceConsumer, _Y50, Exclusive,
                )
        })
        Name (SBFG, ResourceTemplate ()
        {
            GpioInt (Edge, ActiveLow, ExclusiveAndWake, PullUp, 0x0000,
                "\\_SB.GPI0", 0x00, ResourceConsumer, ,
                )
                {   // Pin list
                    0x0000
                }

        })
        CreateDWordField (SBFB, \_SB.PC00.I2C4.NFC0._Y50._SPE, SPEX)  // _SPE: Speed
        CreateWordField (SBFG, 0x17, INT1)

        Method (_INI, 0, NotSerialized)  // _INI: Initialize
        {
            //pin-list 0x07010004
            INT1 = GNUM (0x07010004)
            SHPO (0x07010004, One)
            SPEX = 0x00061A80
            Return (Zero)
        }

        Method (_CRS, 0, NotSerialized)  // _CRS: Current Resource Settings
        {
            Return (ConcatenateResTemplate (SBFB, SBFG))
        }
    }
}

Scope (_SB.PC00.I2C4)
{
    Device (NFC1)
    {
        Name (_ADR, Zero)  // _ADR: Address
        Name (_HID, "25DV0057")  // _HID: Hardware ID
        Name (_CID, "25DV0057")  // _CID: Compatible ID
        Name (_S0W, Zero)  // _S0W: S0 Device Wake State
        Name (_UID, One)  // _UID: Unique ID
        Method (_CRS, 0, NotSerialized)  // _CRS: Current Resource Settings
        {
            Name (RBUF, ResourceTemplate ()
            {
                I2cSerialBusV2 (0x0057, ControllerInitiated, 0x00061A80,
                    AddressingMode7Bit, "\\_SB.PC00.I2C4",
                    0x00, ResourceConsumer, , Exclusive,
                    )
            })
            Return (RBUF) /* \_SB_.PC00.I2C4.NFC1._CRS.RBUF */
        }

        Method (_STA, 0, NotSerialized)  // _STA: Status
        {
            Return (0x0F)
        }
    }
}
After adding SPI devices to the BIOS, you can view them from the Device Manager: Unknown devices, corresponding hardware IDs, and descriptions in the ASL code_ HID (25DV0053) and_ HID (25DV0057) 2 devices
4.2 Device ID and Driver Association
We will provide an I2C driver and add the hardware ID SPI1001 to the driver installation file "SpbDriver. inf". The full text of the driver file is as follows:
[Version]
Signature   = "$WINDOWS NT$"
Class = HIDClass
ClassGuid ={745a17a0-74d3-11d0-b6fe-00a0c90f57da}

Provider    = %ProviderName%
DriverVer = 08/13/2023,16.5.5.7
CatalogFile = SpbDriver.cat
PnpLockdown = 1

[DestinationDirs]
DefaultDestDir = 13

[SourceDisksNames]
1 = %DiskId1%,,,""

[SourceDisksFiles]
SpbDriver.sys  = 1,,

[Manufacturer]
%StdMfg%=Standard,NTamd64

[Standard.NTamd64]
%SpbDriver.DeviceDesc%=SpbDriver_Device, ACPI\25DV0053
%SpbDriver1.DeviceDesc%=SpbDriver_Device, ACPI\25DV0057

%SpbDriver2.DeviceDesc%=SpbDriver_Device, ACPI\I2C30001
%SpbDriver3.DeviceDesc%=SpbDriver_Device, ACPI\SPI1001


[SpbDriver_Device.NT]
CopyFiles=Drivers_Dir

[SpbDriver_Device.NT.HW]
AddReg=SpbDriver_AddReg

[Drivers_Dir]
SpbDriver.sys

[SpbDriver_AddReg]
HKR,Settings,"ConnectInterrupt",0x00010001,1


[SpbDriver_Device.NT.Services]
AddService = SpbDriver,%SPSVCINST_ASSOCSERVICE%, SpbDriver_Service_Inst


[SpbDriver_Service_Inst]
DisplayName    = %SpbDriver.SVCDESC%
ServiceType    = 1               ; SERVICE_KERNEL_DRIVER
StartType      = 3               ; SERVICE_DEMAND_START
ErrorControl   = 1               ; SERVICE_ERROR_NORMAL
ServiceBinary  = %13%\SpbDriver.sys

[Strings]
SPSVCINST_ASSOCSERVICE= 0x00000002
ProviderName           = "www.youyeetoo.com"
StdMfg                 = "(Standard system devices)"
DiskId1                = "SPB Driver Peripheral Installation Disk #1"
SpbDriver.DeviceDesc =  "25DV0053 NFC I2C4 Address 0X53"
SpbDriver.SVCDESC    =  "SPB Driver Peripheral desc"
SpbDriver1.DeviceDesc = "25DV0057 NFC I2C4 Address 0X57"

SpbDriver2.DeviceDesc = "I2C30001 Address 0X50"

SpbDriver3.DeviceDesc = "SPI1001 Driver"

ClassName              = "I2C"
The two most critical lines in the file, which are also modified according to the actual situation, are as follows:
[Standard.NTamd64]
%SpbDriver.DeviceDesc%=SpbDriver_Device, ACPI\25DV0053
%SpbDriver1.DeviceDesc%=SpbDriver_Device, ACPI\25DV0057

[Strings]
SpbDriver.DeviceDesc =  "25DV0053 NFC I2C4 Address 0X53"
SpbDriver1.DeviceDesc = "25DV0057 NFC I2C4 Address 0X57"
4.3 Installing Drivers
After modifying the above steps, right-click on the "SpbDriver. inf" file and select "Install". The system will prompt you with "Always Install Driver". After a while, a successful installation pop-up window will appear. In the "Human Machine Interface Device" section of the Device Manager, you can see that the SPI device driver has been successfully installed