¶ UART serial port development(Win)
1. Hardware interface diagram
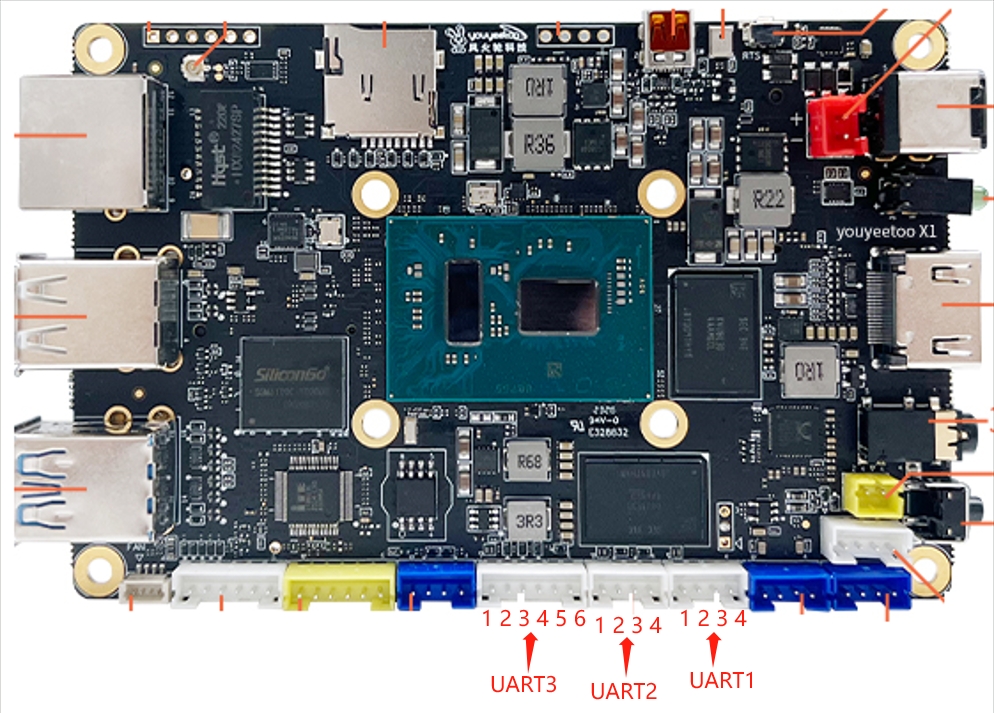
UART1 interface description :
| Serial Number | Description | Remarks |
|---|---|---|
| 1 | VCC | Output voltage 3.3V |
| 2 | TXD | Sending data TTL level |
| 3 | RXD | Receive data TTL level |
| 4 | GND | Power reference ground |
UART2 interface description :
| Serial Number | Description | Remarks |
|---|---|---|
| 1 | VCC | Output voltage 3.3V |
| 2 | TXD | Sending data TTL level |
| 3 | RXD | Receive data TTL level |
| 4 | GND | Power reference ground |
UART3 interface description :
| Serial Number | Description | Remarks |
|---|---|---|
| 1 | VCC | Output voltage 3.3V |
| 2 | TXD | Sending data TTL level |
| 3 | RXD | Receive data TTL level |
| 4 | RTS | Flow control: It is an output signal used to indicate that the device is ready to receive data. Low level is effective, and low level indicates that the device can receive data |
| 5 | CTS | Flow control: It is an input signal used to determine whether data can be sent to the other party. Low level is effective, and low level indicates that the device can send data to the other party |
| 6 | GND | Power reference ground |
Note: X1 BIOS automatically allocates serial port resources incorrectly, causing UART to not align with the COM port in Windows/LINUX systems.
Specific distribution is as follows:
UART1 -> COM2
UART2 -> COM3
UART3 -> COM1
If you need to change the serial number to a different one, Windows can go to Communication Port (COM*)->Properties->Advanced->modify the COM port number in the Device Manager.
Note ! ! ! X1 will scan UART1 when powered on. X1 will scan UART1 when powered on. UART1 connection will cause X1 not to power on. If you want to use UART1, please power on and enter the system before connecting UART1.
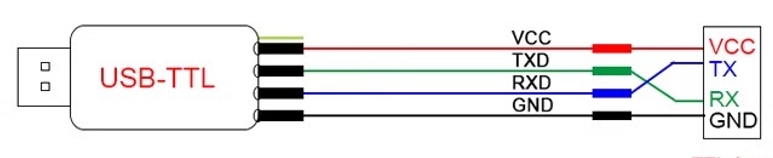
Reminder: When connecting UART serial port and peripheral devices, RX and TX need to be cross wired, as shown in the figure:
2. UART serial port test
Due to the simplicity of the serial port, we will directly use open source project programs for testing here
Link to open source project: https://github.com/naihaishy/SerialPort-Communication
Compiled executable file in Release https://github.com/naihaishy/SerialPort-Communication/releases
The software interface is as follows:
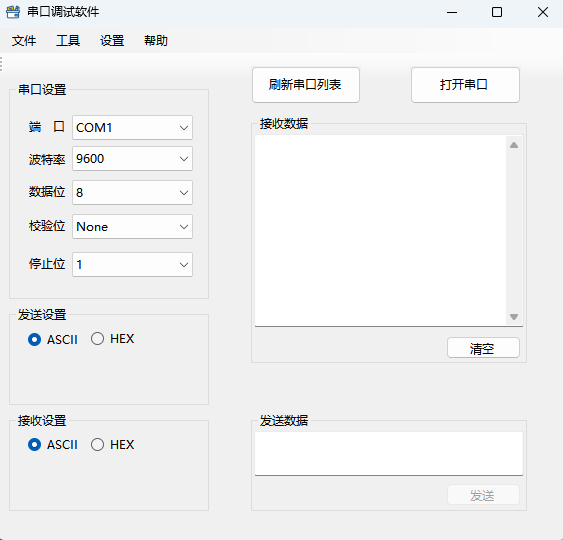
First, click the "刷新串口列表" button, and the "端口" on the left will list all available UART serial ports on X1
Left side serial port parameter settings:
端口:serial number, COM
波特率:Serial port baud rate
数据位:Serial port Data bit: 5-8 bits, usually using 8 bits
校验位:Serial port check bit: Parity check, usually select None No check
停止位:Serial port stop bit, 1, 1.5, 2 bits, usually 1 bit is used*
For example, selecting parameters:
COM1,9600,8,None,1
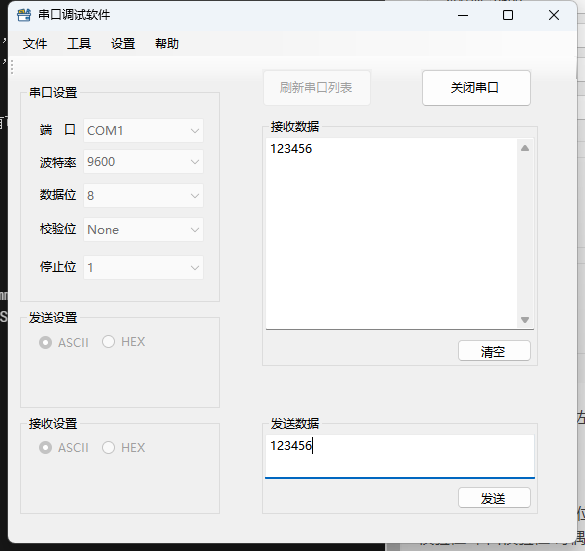
Before testing, remember to short-circuit the RXD and TXD of COM1 on the hardware and perform a loopback test
Click the "打开串口t" button for Open Serial Por in the upper right corner,
"发送数据"Send data box input: 123456
Then click the '发送' button
If the serial port is normal, the "接受数据" Accept Data box should receive the 123456 message