¶ LED light control(Linux)
1. Hardware Description:
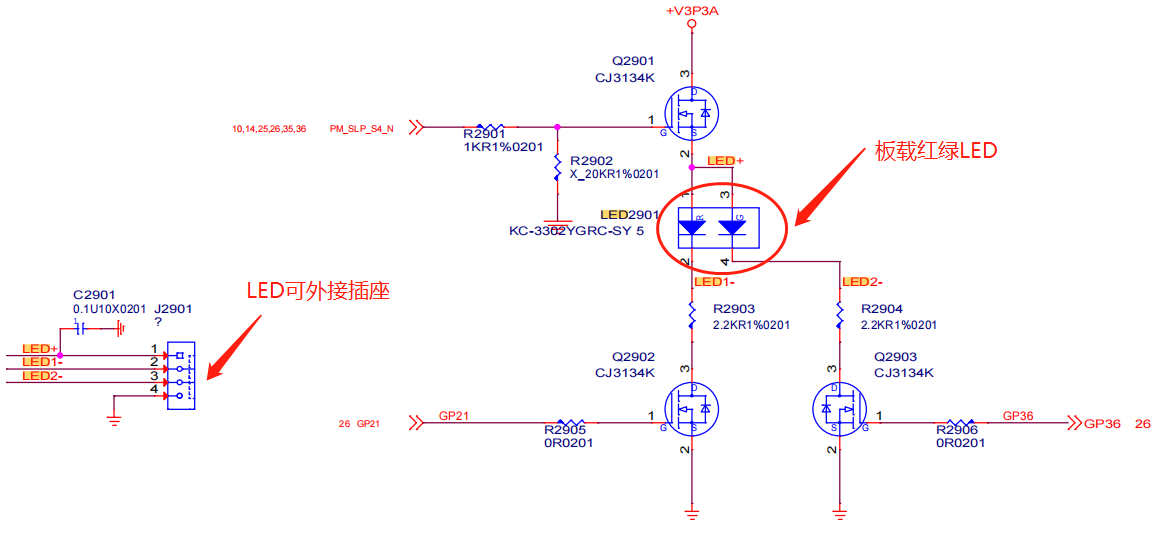
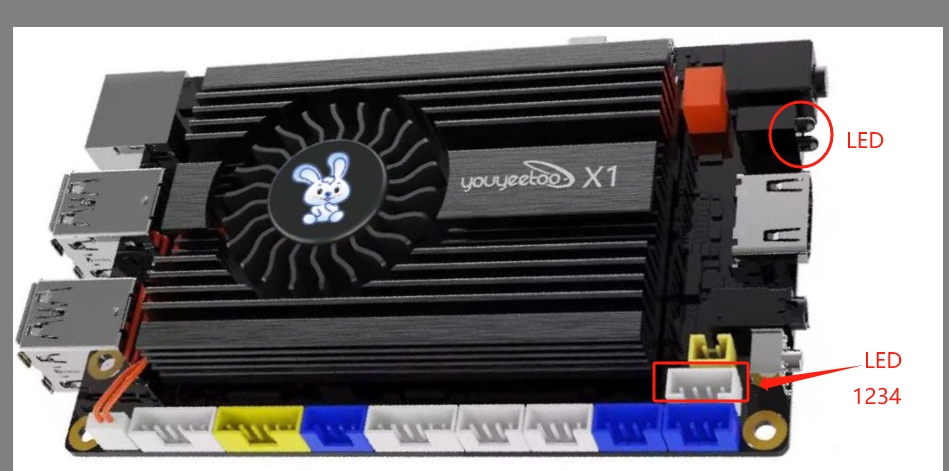
The J2901 socket on the motherboard is an LED external socket, and the circuit is connected to the onboard LED2901. We need to use the inpoutx64 library for LED operation


** 2. Test software download:**
Download the source code of Linux GPIO/LED testing software:
linux-gpio-test-src-File
** 3.Compilation and testing of testing software:**
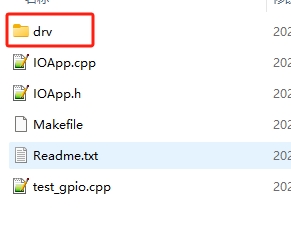
Download the source code of the testing software, extract it, and the linux-gpio directory is shown in the figure:

Source code directory structure description:
| File/Folder | Description |
|---|---|
| DRV folder | GPIO kernel mapping driver |
| IOApp. h | gpio/led application interface header file |
| IOApp. cpp | gpio/led application interface source file |
| Test_ Gpio. cpp | Test code main |
| Makefile | Make Compilation Script File |
| Readme. txt | Compilation process description file |
The compilation and operation process is as follows. The starting directory is linux-gpio
Before performing the compilation operation, it is necessary to first install the basic compilation tools. Please refer to the instructions in "Linux Application Development (Calling Hardware)" for the installation method
#Enter the gpio driver source directory
user@X1:~/linux-gpio$  cd  drv

#Compile GPIO driver
user@X1:~/linux-gpio/drv$  make

#Return to the previous level directory
user@X1:~/linux-gpio/drv$  cd  ..

#Copy the driver ko to the current directory
user@X1:~/linux-gpio$  cp  drv/gpio_drv.ko   ./

#Compiling GPIO Test Applications
user@X1:~/linux-gpio$  make

#Execute program program
user@X1:~/linux-gpio$  sudo ./test_gpio
If there are no errors in the above operation, the test results will be displayed as follows:
$ sudo ./test_gpio

GPIO输出成功,LED控制成功,GPIO-H19输入电平:84000102
Special reminder: Because it is controlling hardware, sudo is required to run the test program. If it is a root account, it can be run directly
** 3. GPIO application interface description:**
3.1 The following is a description of the structure of the IOApp. h file
#ifndef _IOAPP_H
#define _IOAPP_H

#include <stdint.h>

//5 IO control addresses
#define GPIO_H19_ADR 0xFD6D0730
#define GPIO_H18_ADR 0xFD6D0720
#define GPIO_H17_ADR 0xFD6D0710
#define GPIO_H16_ADR 0xFD6D0700
#define GPIO_H00_ADR 0xFD6D0600

//Before use, it is necessary to dynamically load the driver: Load module method 1: (Only load this module)
//Command Line:  sudo chmod 644  gpio_drv.ko
//Command Line:  sudo insmod gpio_drv.ko
class IOApp
{
    //Drive
    int fd;
public:
    IOApp();
    ~IOApp();

 //Connecting the GPIO kernel driver
    bool Open();

  //Release GPIO kernel driver
    void Release();
public:
    //GPIO output high and low levels
    bool Gpio_Out(uint32_t PhysAddr,bool HightLevel);

    //GPIO input level: If the value is 0X84000102, it indicates high level; if the value is 0X84000100, it indicates low level
    bool Gpio_In(uint32_t PhysAddr,uint32_t *lpVal);

    //Set gpio to output mode
    bool Gpio_SetModel_OutPut(uint32_t PhysAddr);

    //Set gpio as input mode
    bool Gpio_SetModel_InPut(uint32_t PhysAddr);

    //Setting GPIO to interrupt mode has not been implemented yet
    bool Gpio_SetModel_Interrupt(uint32_t PhysAddr);

//The following are LED controls----
//Control the red LED to turn on and off
    bool Led_Ctrl_Red(bool isOn);
 //Control red LED flashing
    bool Led_Ctrl_Red_Flash(bool isOn);

 //Control the green LED to turn on and off
  bool Led_Ctrl_Green(bool isOn);
  //Control green LED flashing
    bool Led_Ctrl_Green_Flash(bool isOn);

};

#endif
核心控制代码
Under the IOApp class:
//The following are LED controls----
//Control the red LED to turn on and off
    bool Led_Ctrl_Red(bool isOn);
 //Control red LED flashing
    bool Led_Ctrl_Red_Flash(bool isOn);

 //Control the green LED to turn on and off
  bool Led_Ctrl_Green(bool isOn);
  //Control green LED flashing
    bool Led_Ctrl_Green_Flash(bool isOn);
** 4.LED testing sample program Qt interface (kernel mapping driver mode)*

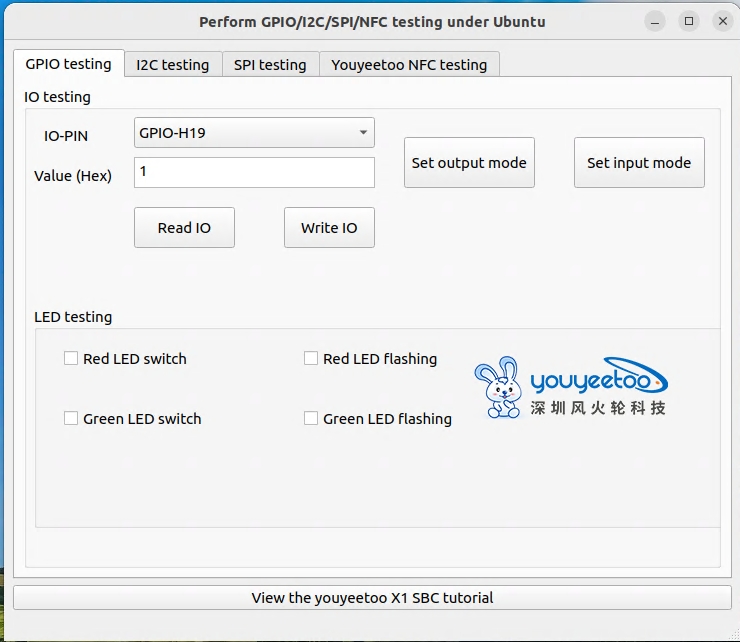
On the GPIO testing page, the lower part is LED testing
Click on the checkbox on the software to observe the corresponding LED status changes
Please refer to the following page for sample source code and how to compile and use the QT interface of the testing program:
https://wiki.youyeetoo.com/en/x1/linux/qt-build