¶ Using Armbian System
Currently, the Armbian system can run normally on yy3568, yy3588, and youyeetoo R1. This document uses youyeetoo R1 as an example to introduce how to use the Armbian system.
¶ 0. Notes
Do NOT hot-swap the SD card during the system building process!!!
¶ 1. Prerequisites
¶ Hardware Requirements
- youyeetoo R1(V3) / yy3568 / yy3588
- TF card (16GB or larger recommended) and card reader
- 12V power supply
- HDMI monitor or DSI screen
- Keyboard and mouse
If you need to connect to the network, you can use WiFi modules such as RTL8852/RTL8822 or connect an Ethernet cable.
¶ Software Requirements
- Armbian Imager
- RKDevTool (Rockchip development tool), download link in references at the end
¶ 2. Download/Install Armbian Imager
Armbian Imager is used to write the Armbian image to the TF card, packaging it into a form that can be booted by simply inserting the TF card into the board.
- Armbian Imager Official Download
- Armbian Imager Google Netdisk Download
- Armbian Imager Official Network Disk Download
Installation process omitted.
¶ 3. Armbian Image
¶ 3.1 Image Description
The Armbian system is not a completely new distribution built from scratch, but is based on mature Debian or Ubuntu systems, with the addition of armbian-config and some extra features and optimizations.
Armbian images are divided into 4 kernel version categories: edge, current, vendor, and legacy.
- edge: Contains the latest features but has the worst stability and may have issues at any time. Only recommended for experienced users for testing.
- current: LTS version of the mainline Linux kernel, contains the latest features and optimizations, but may not be compatible with older hardware.
- vendor: Version provided by hardware manufacturers, with the fastest and most complete support for new hardware.
- legacy: Old stable kernel version. Mainly used as an alternative when the current kernel is unavailable or when there are serious issues affecting your usage.
Simply put, vendor and current kernel versions are generally recommended. The vendor kernel is more stable with the best hardware compatibility; the current kernel version is more recent with more modern features, but may not be compatible with older hardware.
For images built based on Ubuntu systems, there are two versions: GNOME and KDE. Actual testing shows that only GNOME has a desktop environment, while KDE only has a command-line interface.
¶ 3.2 Obtain Armbian Image
Images can be downloaded from the Armbian official website or in Armbian Imager, but the speed is relatively slow. Here are the download links:
To accommodate users with network issues, the following download links are provided:
After downloading, you will get an xxx.img.xz file that can be imported directly into Armbian Imager, or you can extract the xxx.img file from it and then import it into Armbian Imager. Extracting first before importing will be faster.
¶ 4. Build System
This document mainly demonstrates building the system through custom images. You can also search for youyeetoo through the search box at the top of Armbian Imager and build the system according to the prompts. This method may have network issues. The specific operations are shown in the following image:
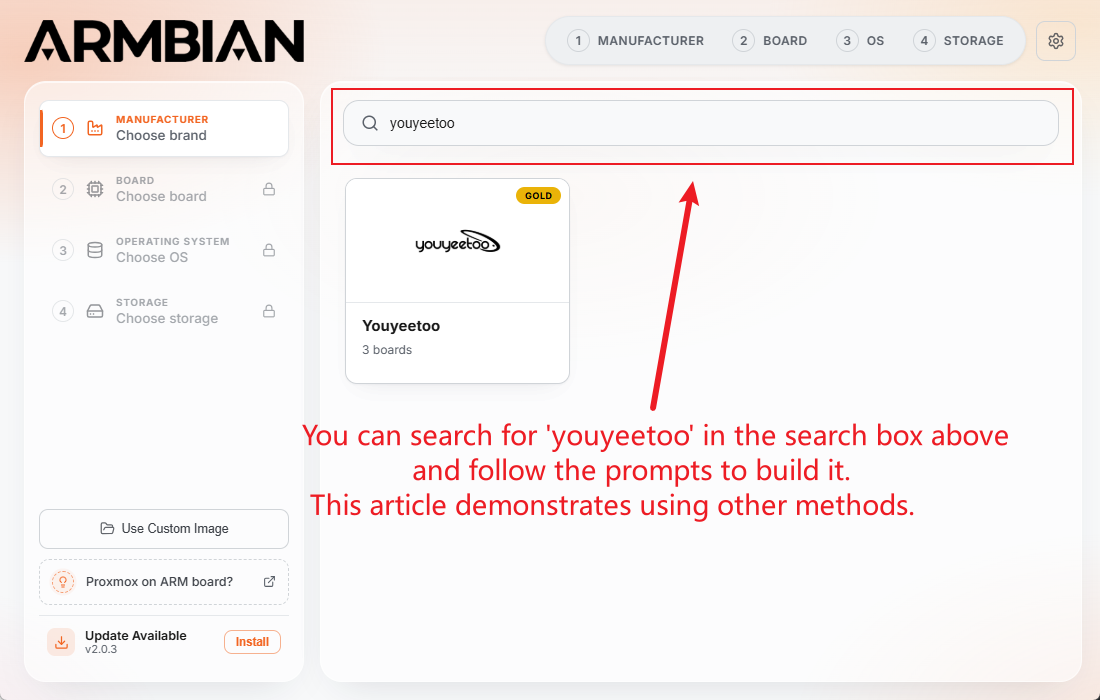
Below shows using a custom image to build the system, with the same effect.
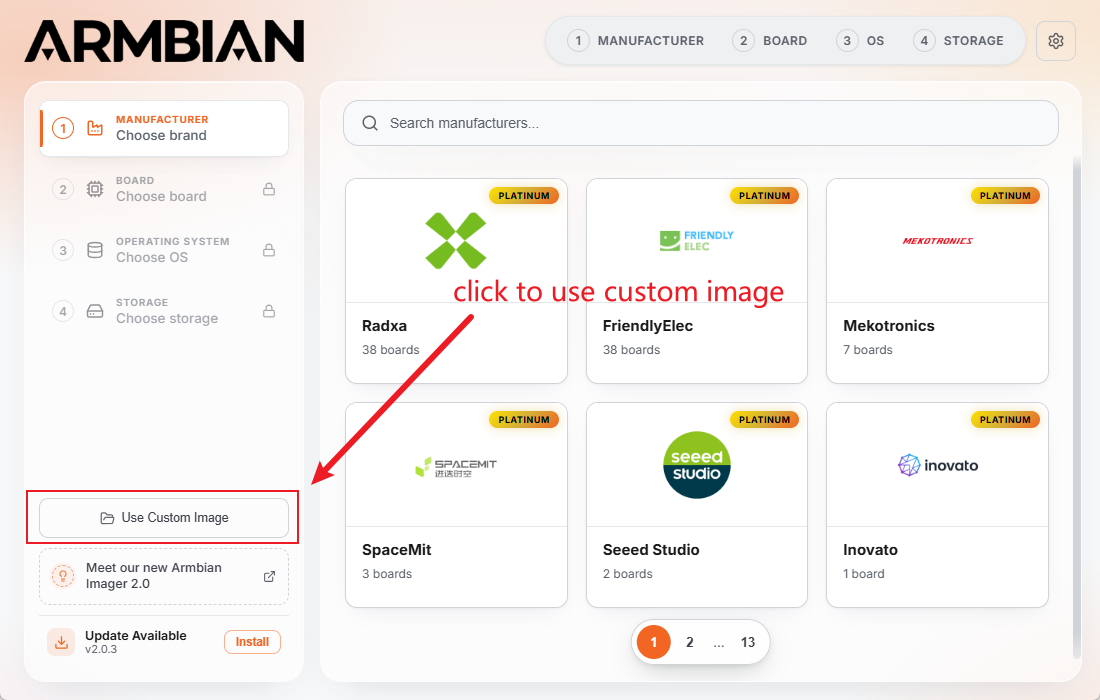
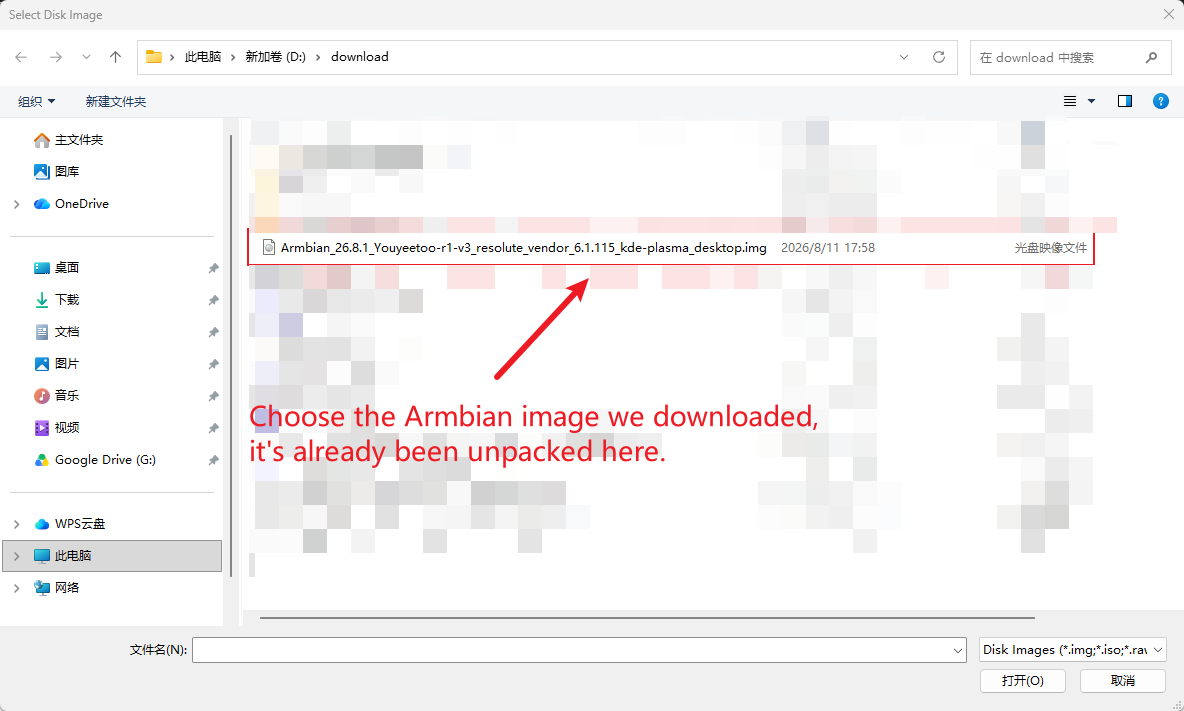
Then import the image. Here the file has been extracted from the xz archive in advance. You can also import the xz archive directly without extracting, but the speed will be slower.
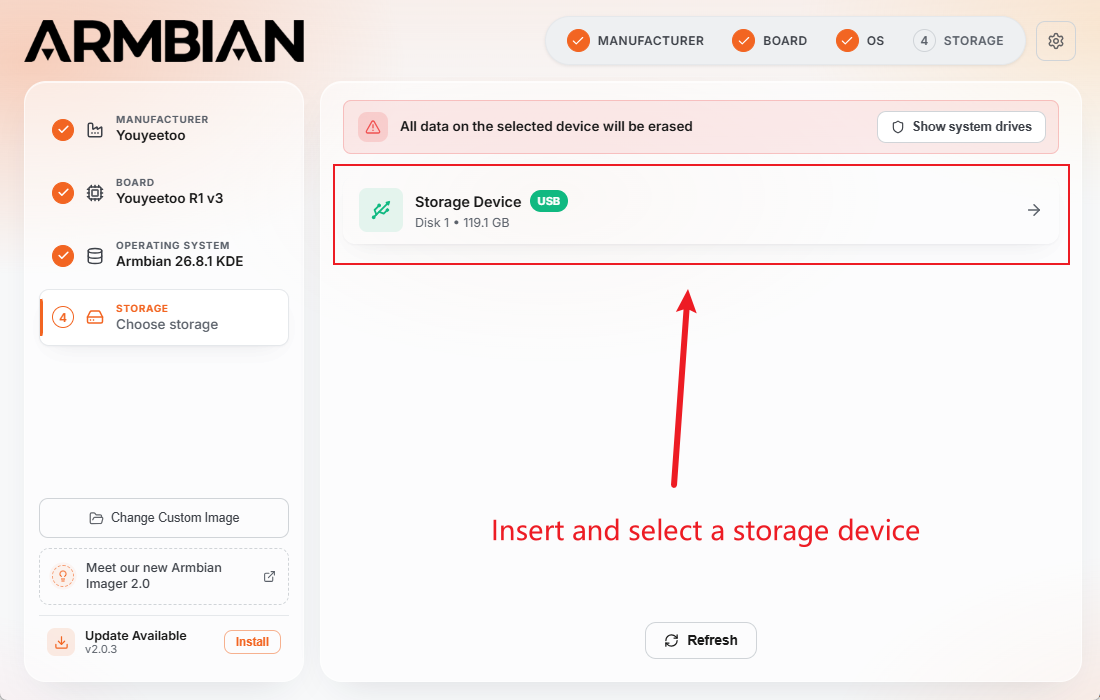
Insert and select the storage device. Note to check if the information on the left corresponds.
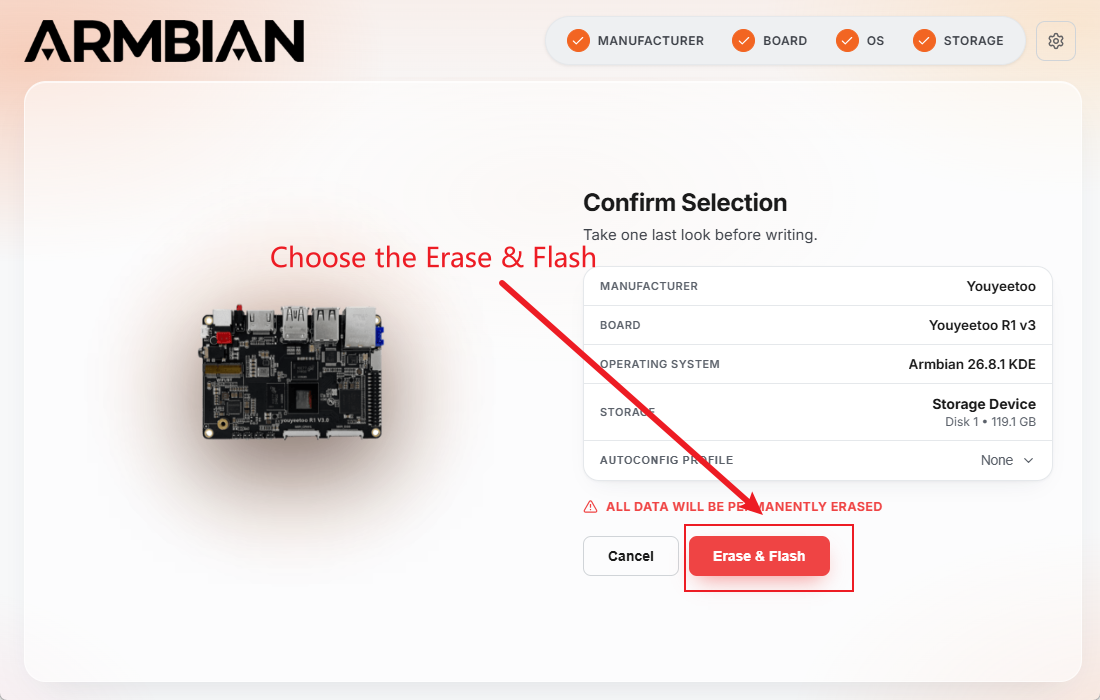
After selecting the storage device, it will jump to the following page. If there is important information, please back it up in advance. This process will clear all data on the storage device. After ensuring there is no important data, click Erase and Flash.
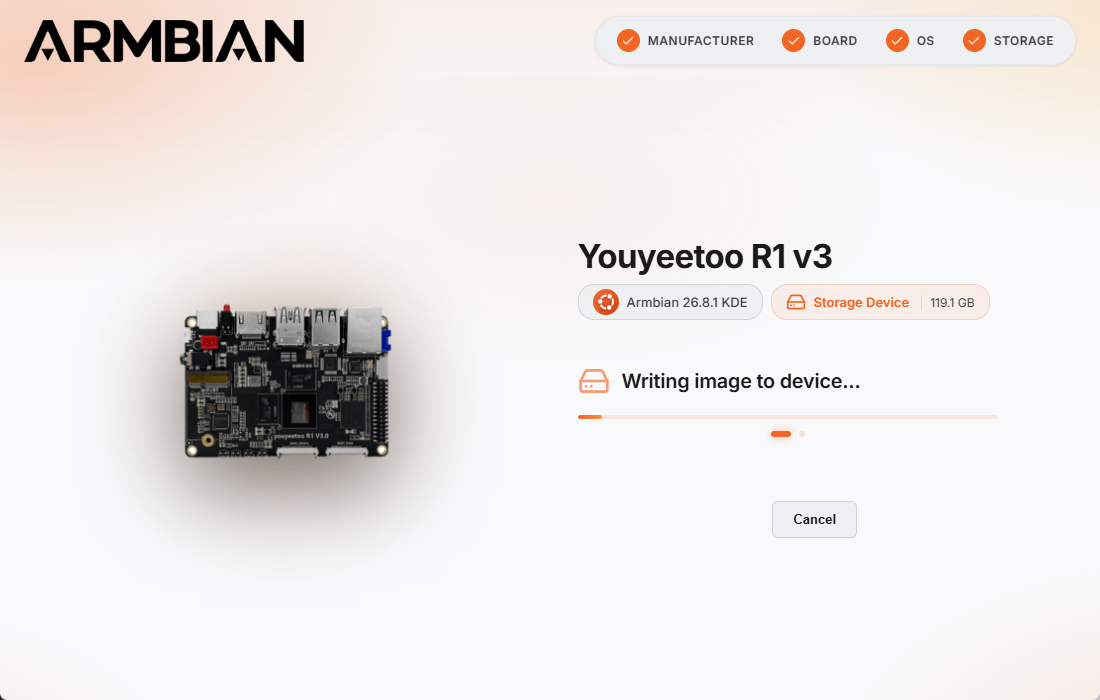
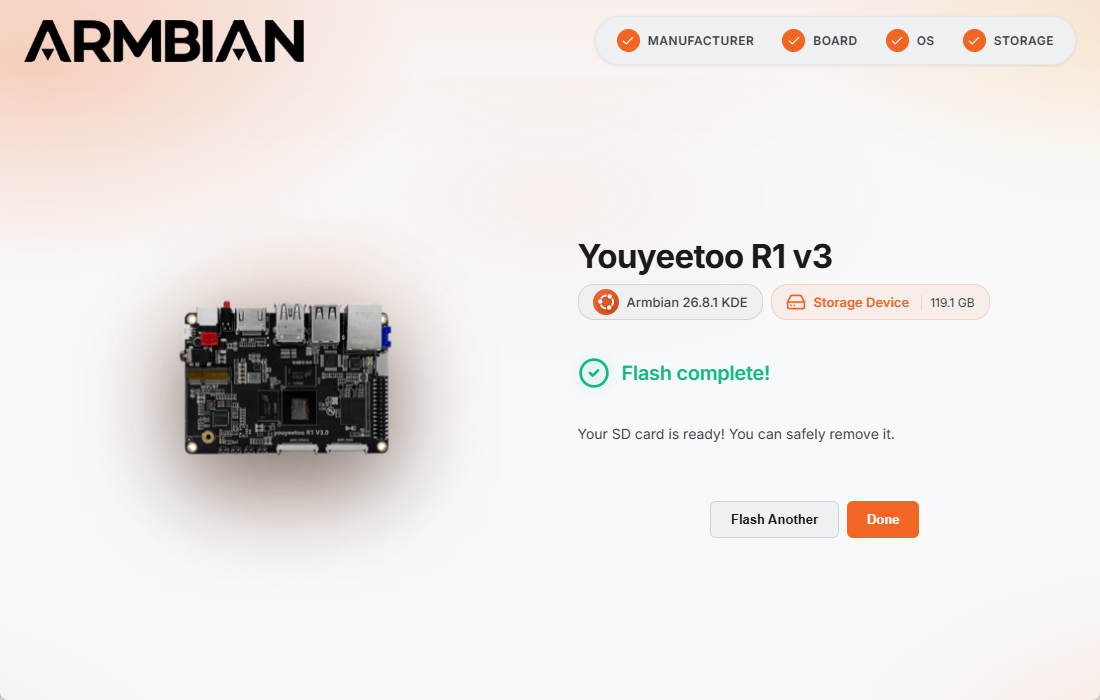
After the build is complete, remove the card reader.
¶ 5. Erase Original System
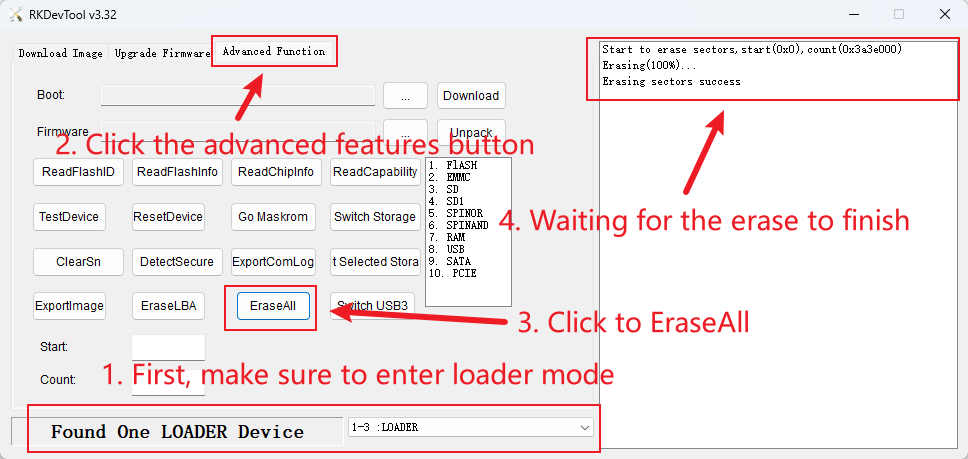
Connect the board to the computer, power on to enter loader mode (specific operations see references), and open the Rockchip development tool (RKDevTool). When the device is recognized as having entered loader mode, click Advanced Functions and then click Erase All. Wait for the progress to complete, then power off.
¶ 6. Start Booting
Insert the TF card into the board, connect the screen, and power it on to start the Armbian system. After that, it will first enter the configuration page. This process will configure the root user's password, create a regular user, and set up the network, time zone, and language, etc. Once the configuration is complete, you can use the Armbian system. If it is a board without eMMC, NVMe, or other storage media, the configuration is complete at this point.
¶ 7. Flash to Other Storage Media
Use the lsblk command to view the storage devices on the board. Generally, the onboard eMMC corresponds to /dev/mmcblk0, and /dev/mmcblk1 is the TF card we inserted. Next, upload the image to the board. You can choose the upload method based on your situation, such as USB drive, network, or any other method you find convenient. Then use the dd command to write the image to the corresponding storage media. Below is an example of flashing to eMMC, where xxx.img is the image file to be written, /dev/mmcblk0 is the target location, bs=1M specifies a block size of 1MB, and status=progress is used to display the write progress.
dd if=xxx.img of=/dev/mmcblk0 bs=1M status=progress
Wait for the command to finish, then power off, remove the TF card, and power on again to boot the Armbian system.